
If you ever wonder what the humidity in your house is then this project is for you!
During this project you will learn how to make a humidity meter using a DHT11 sensor and a 16X2 LCD screen. A DHT11 is a sensor that measures temperature and humidity. With the display you have the choice whether or not you want to add it, if not go to step 2. If you do want to add a display, you can choose whether you want to connect it with or without I2C. If you want to connect it without I2C go to step 4 and if you want to connect it with I2C go to step 6.
- Level - Beginner 30%
- Duration - 15/20 Min 30%
- Costs - € 42,75 euros complete 40%
Step 1: Requirements
Arduino UNO – 1X
Breadboard – 1X
M / M jumper wires -19X
DHT11 - 1X
16X2 LCD - 1X
10K potentiometer - 1X
Step 2: Building and Wiring
Now that you have all the parts you can start wiring.
You need five cables for wiring.
There is a cable from the 5V on the Arduino to the plus of the breadboard and from the ground on the Arduino to the minus of the breadboard.
Once you've done that put the DHT11 in the breadboard with the blue side facing you. In this way we also define the pins.
Now you go with a cable from the I/O pin 8 to the leftmost pin of the DHT11, then a cable goes from the middle pin of the DHT 11 to the plus of the breadboard and a cable from the rightmost pin to the minus of the breadboard.
It is important that you connect the cables in the correct order, otherwise your values will not be correct.

Step 3: Programming
Now that you have wired it you can start programming it.
It is a simple code that ensures that the measurements can be read and shown on the serial monitor.
// here we import the DHT library
#include
// now we give the DHT11 a name
dht DHT;
// and define its pin
#define DHT11_PIN 8
void setup ()
{
// here we start the serial connection
Serial.begin (9600);
}
void loop ()
{
// here we read the sensor values
int chk = DHT.read11 (DHT11_PIN);
// and see them on serial com
Serial.print ("Humidity:");
Serial.print (DHT.humidity);
Serial.print (”%, Temp:“);
Serial.print (DHT.temperature - 5);
Serial.println (”Celsius”);
delay (2000);
}
Step 4: Add LCD
If you have made the choice to add a display without I2C, follow these steps. When you add a display it becomes a standalone device, this ensures that it does not have to be connected to a computer.
The connections for the LCD are: K goes to the minus, A goes to the plus, D7 goes to I / O pin 2, D6 goes to I / O pin 3, D5 goes to I / O pin 4, D4 goes to I / O pin 5, E goes to I / O pin 6, RW goes to the minus, RS goes to I / O pin 7, VO goes to the signal pin of the potentiometer, VDD goes to the plus and VSS goes to the min.
When connecting the potentiometer, the rightmost pin goes to the plus, the leftmost pin to the minus and the middle pin to the VO of the LCD screen.
The reason that there is a lot in this project is because otherwise nothing or only white blocks are visible on the screen. By turning the potentiometer, the text will automatically appear beforehand. Keep doing this until the text is clearly visible, because the potentiometer is a twist resistance. This ensures that if you turn it that a different amount of voltage is applied to the screen. This in turn ensures that the small lights in the display become brighter or less bright.

Step 5: Programming the LCD
Now that you have connected the monitor, you can start programming it.
You must use the LiquidCrystal library that is standard in the Arduino IDE. Once you have imported it, you can start copying the code below.
// here we import the DHT library
// and the LiquidCrystal library
#include
#include
// here we define the LCD pins
LiquidCrystal lcd (7, 6, 5, 4, 3, 2);
// here we give the DHT11 a name
dht DHT;
// and define its pin
#define DHT11_PIN 8
void setup () {
// now we select the LCD lights
lcd.begin (16, 2);
}
void loop ()
{
// now we read the values of the DHT11
int chk = DHT.read11 (DHT11_PIN);
// and here we make sure they
// appear on the screen
lcd.setCursor (2,0);
lcd.print ("Temp:");
lcd.print (DHT.temperature - 5);
lcd.print (“C”);
lcd.setCursor (2,1);
lcd.print (“Humi:%”);
lcd.print (DHT.humidity);
delay (2000);
}
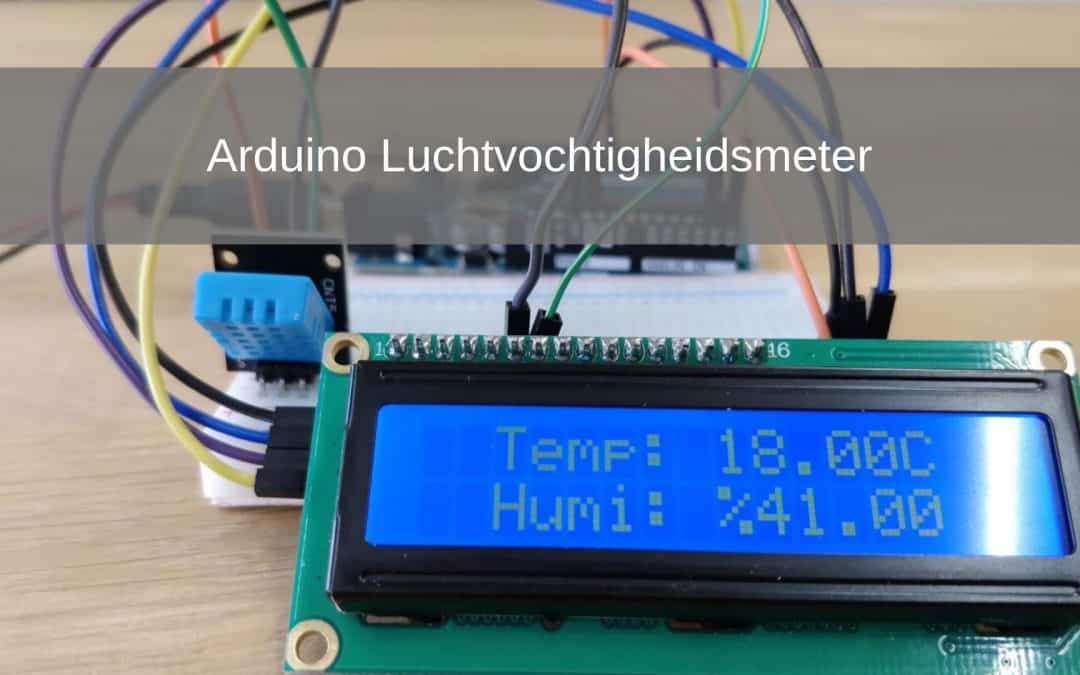
Once everything is correct you have your own standalone humidity meter and thermometer, congratulations.
Step 6: LCD with I2C
In this step I will show you how to connect an I2C LCD. The advantage of this is that the display only needs a total of four jumper wires and is standalone.
It is important that you import the LiquidCrystal_I2C library and the Wire library for this, otherwise you cannot control the screen.
The LiquidCrystal_I2C library can be found if you go to sketch in the Arduino IDE, then use the library and then click on manage library. Then you should see a pop-up tab there you will see a search bar at the top right. Type LiquidCrystal_I2C in there and select one and then click install. Do the same with the Wire library.

Now you are going to start wiring.
First, a jumper wire goes from the 5V on the Arduino to the plus on the breadboard and a jumper wire from the GND on the Arduino to the minus of the breadboard.
Then connect the GND of the I2C LCD to the minus, the VCC to the plus, SDA to A4 and SCL to A5.
The connection for the DHT 11 is the leftmost pin to I / O pin 8, the middle pin to the plus and the rightmost pin to the minus.
Step 7: I2C LCD Programming
Now you will adjust the program of the LCD so that you can control the I2C LCD with it.
Make sure you have imported the wire and the LiquidCrystal_I2C library. Once you have that you can make a few small adjustments and then your program will also work on an I2C LCD screen.
// here we import the correct libraries
#include
#include
#include
// here we let the program know the I2C address
// and that it is a 16 by 2 screen
LiquidCrystal_I2C lcd (0x3F, 20,4);
dht DHT;
#define DHT11_PIN 8
void setup () {
lcd.begin (16, 2);
// here we initialize the lights of
// the screen it is important that you 2 times
//lcd.init () because otherwise your program will not work
lcd.init ();
lcd.init ();
lcd.backlight ();
}
void loop ()
{
int chk = DHT.read11 (DHT11_PIN);
lcd.setCursor (2,0);
lcd.print ("Temp:");
lcd.print (DHT.temperature - 8);
lcd.print (“C”);
lcd.setCursor (2,1);
lcd.print (“Humi:%”);
lcd.print (DHT.humidity);
delay (2000);
}