4.7 avg.
5151+ reviews5151+ reviews
Order by 16:00 for same day shipping
14 days return
EN
Individual
Business
Arduino project: Machine learning Color detection
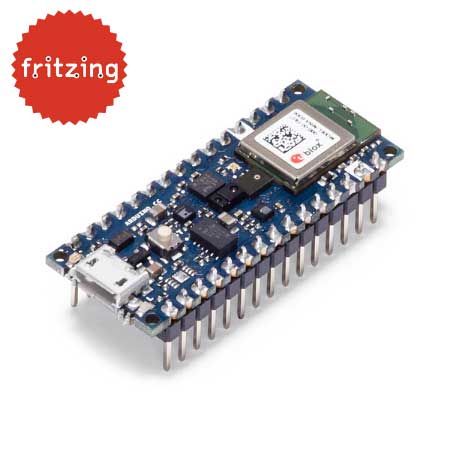
In this project we will use the color and proximity sensor on the Arduino Nano 33 BLE Sense. We will also need the new Arduino_KNN library. This library uses Tiny Machine Learning. In this project we will distinguish objects based on color.
This project is based on Arduino's project.
Simple machine learning with Arduino KNN
At the beginning of the program you specify how many objects you want to recognize and what they are called. 30 "sample readings" are taken from each object. When this process is finished and your Arduino starts to recognize objects, these values are added to the database of that object. We have written the project in such a way that all settings are configured in the serial monitor.
programming Arduino BLE Sense
How does the code work:
In this project we will go a bit deeper into how it all works exactly. In principle you can just use the code, but because we are using a more advanced code and a new (beta) library we will explain this in more detail.
First of all we import the necessary libraries. The library for the proximity/light sensor of the Arduino Nano 33 BLE Sense (Arduino_APDS9960.h) and the new machine learning library (Arduino_KNN. h).
Next we create a number of variables. One to indicate how many variables a color consists of. In this case we are using RGB colors so we have three. One is about the amount of objects. This is adjusted in the void setup to a value of your choice. Then there is a variable that indicates how many color readings should be in the database before we start. In our project this is 30. There is also a String() array that keeps track of the object names and variables for how the color is stored and how bright the color should be at a minimum.
After defining the variables we put them in a database. Now it's time for the setup.
In the void setup we start the serial port and send a start message. Then we ask how many objects you want to distinguish from each other. Now you can type a number and send it to the Arduino. It reads it out, adjusts the variable that is about the amount of objects. Then we go to define the objects. We do this by holding example colors above the sensor. The maximum is 3000 objects. Keep in mind that the distinction is based on color.
For each object you will be asked for a name for this object. You type the name into the serial monitor and send it to the Arduino. The label of your object will now be changed to the name you entered. Now place your object above the sensor of the Arduino 33 BLE Sense and move the object for the best effect. 30 measurements will be quickly performed and stored. Repeat this process for each object.
Now that you have defined all your objects you can start recognizing. You will be asked if you want to hold an object above the sensor and then one measurement will be performed. No new measurement will be performed until the object is removed from the sensor. This prevents a spam of measurements. Every measurement you make in the "loop" is added to the database you created in the "void setup" so that the Arduino knows better and better which object is which color.
At the moment we do notice that there are some problems with distinguishing red, orange and yellow. This can of course depend on your lighting.
The program
/*
  In deze schets gaan we met de Arduino BLE Sense op basis van kleur objecten detecteren.
  In deze schets kan je zelf de hoeveelheid objecten aanpassen
  en zelf de hoeveelheid voorbeelden de arduino moet zien voordat je objecten kan detecteren.
*/

//Bibliotheken:
#include <Arduino_KNN.h>
#include <Arduino_APDS9960.h>

//Variabelen:
const int INPUTS = 3;           //Hier definiëren we hoeveel kleur inputs we willen. In dit geval 3, RGB (Red, Green, Blue).
int OBJECTEN = 0;               //Aantal objecten wat we gaan definiëren.
const int VOORBEELDEN = 30;     //Hoeveelheid voorbeelden er worden geregistreerd per object voor referentiemateriaal.
const int K = 5;
String label[3000];             //Hier worden de objectlabels gedefinieert
float color[INPUTS];            //In deze array worden de kleuren opgeslagen.
const int DREMPEL = 5;          //Drempel voor de kleur helderheid.

//Creëer een KNN classifier.
KNNClassifier myKNN(INPUTS);

void setup() {
  pinMode(LED_BUILTIN,OUTPUT);
  digitalWrite(LED_BUILTIN,HIGH);

  //Initieer seriële monitor
  Serial.begin(9600);
  while (!Serial);

  //initieer APDS (Lichtsensor)
  if (!APDS.begin()) {
    Serial.println("Failled to initialized APDS!");
    while (1);
  }

  //Begin Seriele commando's
  Serial.println("Welkom bij de object detectie schets!");
  Serial.println();

  //Definieer de hoeveelheid objecten
  Serial.println("Hoeveel objecten wil jij detecteren?");
  Serial.println();
  while(!Serial.available()){}
  delay(100);
  String readstring = Serial.readString();
  OBJECTEN = readstring.toInt();
  Serial.flush();
  Serial.print("Jij hebt ");
  Serial.print(OBJECTEN);
  Serial.println(" objecten!");

  digitalWrite(LED_BUILTIN,LOW);

  //Definiëer de objecten
  for(int HuidigObject = 0; HuidigObject < OBJECTEN; HuidigObject++){
    Serial.print("Benoem object ");
    Serial.print(HuidigObject);
    Serial.println(":");

    while(!Serial.available()){}
    delay(100);
    label[HuidigObject] = Serial.readString();
    Serial.flush();
    Serial.print("Object ");
    Serial.print(HuidigObject);
    Serial.print(" = ");
    Serial.println(label[HuidigObject]);

    //Vraag voor voorbeelden van het object
    for (int HuidigVoorbeeld = 0; HuidigVoorbeeld < VOORBEELDEN; HuidigVoorbeeld++) {

      Serial.print("Laat een voorbeeld zien van: ");
      Serial.println(label[HuidigObject]);

      //Wacht voor een object en lees de RGB
      readColor(color);

      //Voeg kleur toe aan het k-NN model
      myKNN.addExample(color, HuidigObject);
    }

    Serial.println();
    Serial.print("Object ");
    Serial.print(HuidigObject);
    Serial.print(": ");
    Serial.print(label[HuidigObject]);
    Serial.println(" klaar!");
    Serial.println();

    //Wacht totdat het object weer weg is.
    while (!APDS.proximityAvailable() || APDS.readProximity() == 0) {}
  }
  Serial.println("Initieer process klaar!");
  Serial.println();
}

void loop() {
  //Variabelen:
  int classificatie;

  //Wacht totdat het object weer weg is voordat een volgende lezing word uitgevoerd.
  while (!APDS.proximityAvailable() || APDS.readProximity() == 0) {}

  Serial.println();
  Serial.println("Laat mij je object raden!");
  Serial.println();

  //Wacht voor een object en lees de kleur.
  readColor(color);

  //Classificeer het object
  classificatie = myKNN.classify(color, K);

  // Print the classification
  Serial.println();
  Serial.print("Jij hebt me een ");
  Serial.print(label[classificatie]);
  Serial.println(" laten zien!");
  Serial.println();
}

void readColor(float color[]) {
  int red, green, blue, proximity, colorTotal = 0;

 //Wacht totdat het object dichtbij komt.
 while (!APDS.proximityAvailable() || APDS.readProximity() > 0){}

  //Wacht totdat de kleur helder genoeg is.
  while (colorTotal < DREMPEL) {

    //Lees als object dichtbij is en helderheid hoog genoeg is.
    if (APDS.colorAvailable()) {

      //Lees kleur en afstand
      APDS.readColor(red, green, blue);
      colorTotal = (red + green + blue);
    }
  }

  //Definieer de kleur in de color array
  color[0] = (float)red / colorTotal;
  color[1] = (float)green / colorTotal;
  color[2] = (float)blue / colorTotal;

  //Print de color array
  Serial.print(color[0]);
  Serial.print(",");
  Serial.print(color[1]);
  Serial.print(",");
  Serial.println(color[2]);
}