4.7 avg.
5183+ reviews5183+ reviews
Order by 16:00 for same day shipping
14 days return
EN
Individual
Business
Program your first Python project on a Raspberry Pi
How to program your first Python project on the Raspberry Pi ? The world of microcomputers and embedded systems offers countless possibilities for both novice and experienced programmers. With the Raspberry Pi you have a compact, cheap and powerful computer at your disposal. In this article we take you step by step through the process of setting up, configuring and expanding a Python project. We do this on the Raspberry Pi mini computer. You will not only learn the basics of Python programming. You will also learn how to make hardware and software work together seamlessly.
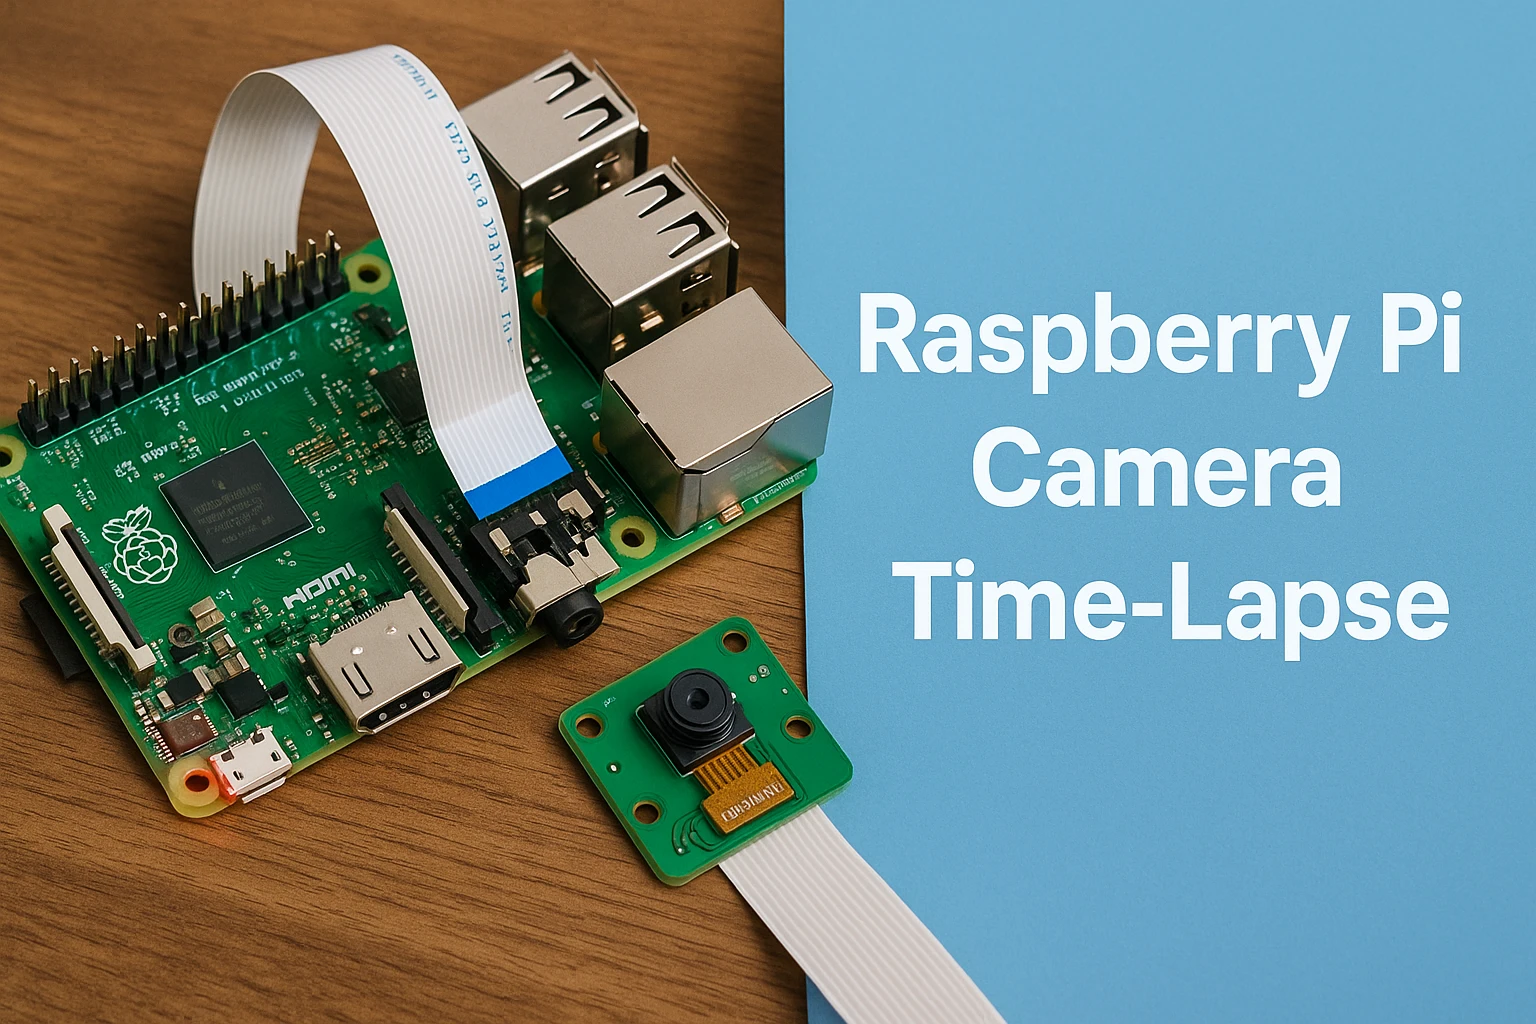
Python on a Raspberry Pi
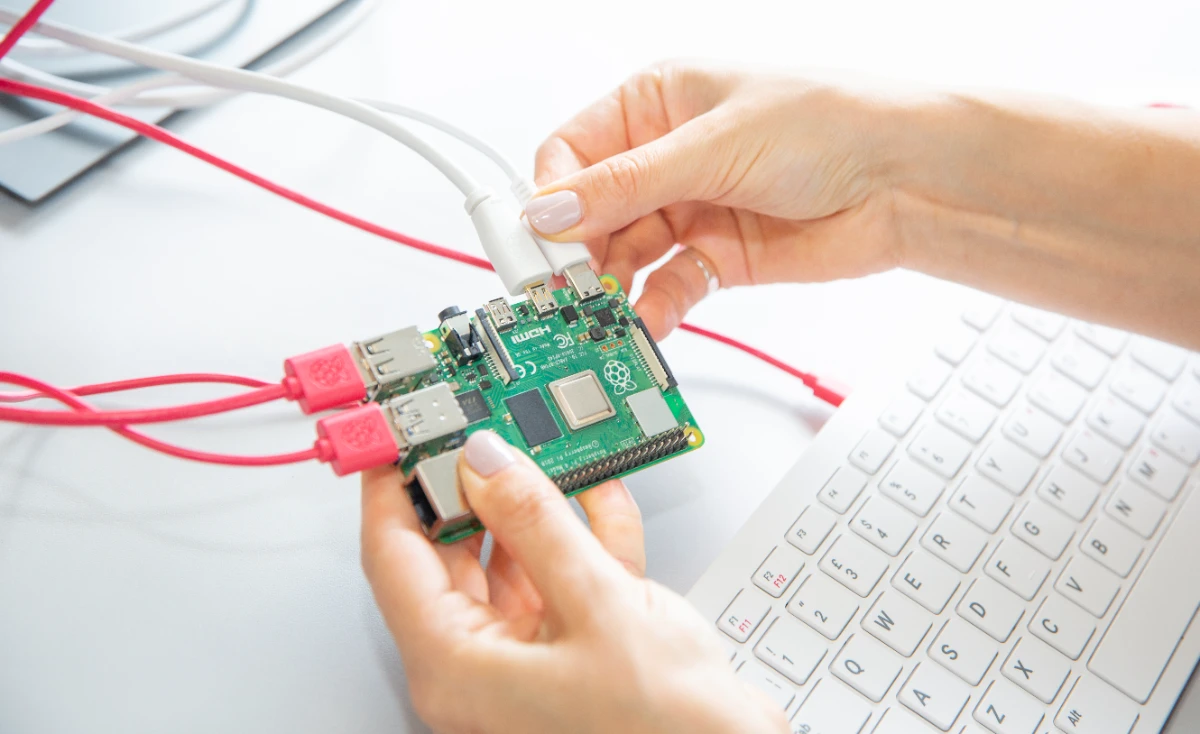
What is a Raspberry Pi ?
The Raspberry Pi is a small computer that fits in almost any workspace. Despite its compact size, the Raspberry Pi offers impressive computing power. This computer was originally developed to make computer education more accessible. In the meantime, the Raspberry Pi has become a favorite tool for hobbyists, students and professionals. The possibilities are almost endless. You can set up all kinds of projects with the Raspberry Pi . From simple automation systems to complex embedded systems. The mini computer is equipped with various connections such as USB ports, HDMI outputs and GPIO pins. Thanks to these connection options, you can easily connect and control external devices.
Why Python?
Python is a programming language known for its simplicity and readability. The language is widely praised for its clear syntax. This makes Python extremely suitable for beginners. In addition, Python is one of the most popular programming languages in the world. There is a huge community of developers that offers support. Through tutorials, forums and extensive documentation. The language has a large number of libraries. These libraries make it possible to perform all kinds of tasks quickly and efficiently. With Python you can build a working prototype within minutes. The combination of Python with the Raspberry Pi ensures that you set up a functional project in a short time.
Purpose and Benefits of this Project
In this article you will learn how to develop your first Python project on a Raspberry Pi step by step. The project is carefully constructed. Each phase of the process is explained in detail. This way you will not only learn the technical aspects. You will also learn about the importance of thorough preparation and documentation. Some advantages of this project are:
- Learning by doing: By doing it yourself, you develop practical skills. You learn in an intuitive way how hardware and software work together.
- Creativity and innovation: The combination of Python and Raspberry Pi gives you the freedom to design unique and creative projects. You can experiment with different sensors and devices.
- Access to a vibrant community: There is a large and active community around both Raspberry Pi and Python. This community always offers support and inspiration.
In the following chapters, we'll dive deeper into the different steps needed to make your project a success.
Supplies and Preparation
Before you start programming, it is important to know what hardware and software you need. Good preparation is the basis for every successful project. Below we provide an overview of the essential supplies and some practical tips to optimally set up your workplace.
Hardware Requirements
To set up your first project with the Raspberry Pi you will need a few basic components. These components will ensure that your project runs stably and reliably.
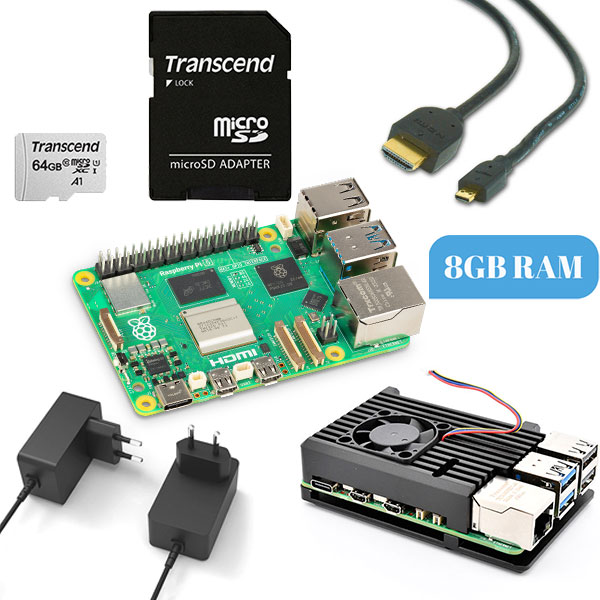
- Raspberry Pi : Choose a model that suits your needs. For many projects, the Raspberry Pi 5 is ideal because of its processing power. If you want to do a simpler project, the Raspberry Pi Zero 2W is also an excellent choice.
- MicroSD card: The Raspberry Pi runs from a MicroSD card. Make sure you get a card that is at least 16GB. A card with a high read/write speed is highly recommended.
- Power: It is important to use a reliable power supply. Most models require a 5V power supply with sufficient amperage. Always check this for your specific model.
- Case: Protect your Raspberry Pi with a sturdy case. This prevents damage and ensures a tidy setup at your workplace.
- Connection cables: Think of a Micro HDMI cable for video output and a USB cable for your keyboard and mouse. Depending on your project, you may need additional cables.
- Monitor and Peripherals: For the initial setup you will need a monitor, keyboard and mouse. This will allow you to control and configure your Raspberry Pi .
Software Requirements
In addition to the hardware, you also need to install the right software. This ensures that your Raspberry Pi functions optimally and that you can easily get started with Python.
- Raspberry Pi OS: This is the operating system developed specifically for the Raspberry Pi . It is based on Debian Linux. Download and install the latest version using the Raspberry Pi Imager.
- Python Interpreter: Raspberry Pi OS comes with Python by default. However, it is a good idea to check that you are using the latest version. This will prevent any compatibility issues.
- Development Environment (IDE): Choose a code editor in which to write your Python code. Some popular choices include Thonny and Visual Studio Code (VSCode). These environments offer useful features such as debugging tools and syntax highlighting.
- Additional Packages and Libraries: Depending on your project, you may need additional Python libraries. For example, the RPi.GPIO library for controlling the GPIO pins. You can also easily install additional modules using pip.
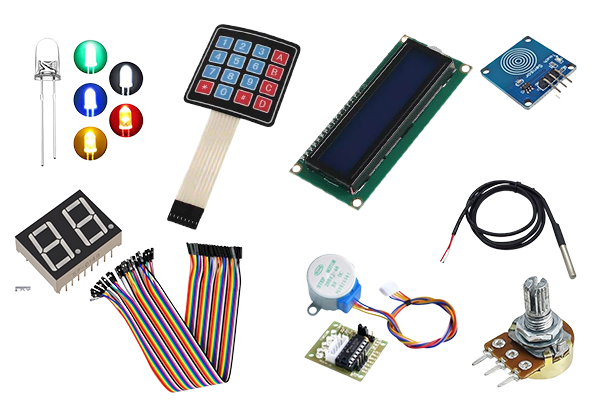
Recommended Accessories and Extras
In addition to the basic supplies, there are a few extra accessories that can enhance your work experience. These accessories are especially useful when you want to set up more advanced projects.
- Breadboard and Jumper Wires: A breadboard allows you to set up circuits without soldering. Use jumper wires to connect the different components.
- LEDs and Resistors: With a few LEDs and resistors you can do simple projects like a blinking LED light. This is ideal for beginners.
- Sensors and Actuators: You can experiment with all kinds of sensors. Think of temperature sensors, motion sensors or servo motors. These extensions give your project more functionality.
- Additional Storage or Backup: Consider using an external hard drive or cloud storage. This is useful for safely storing your projects and code.
Preparation: Checklist and Tips
Good preparation prevents problems later in the project. Here is a checklist of important points to check before you start:
- Inventory your Hardware:
- Make sure you have all the essential parts.
- Before you begin, test the power supply and MicroSD card.
- Install the Software:
- Download the Raspberry Pi Imager and install Raspberry Pi OS to the MicroSD card.
- Update the system and install the required Python packages.
- Provide a Workplace:
- Set up a stable workspace with sufficient space.
- Ensure good ventilation and a sturdy mounting of your Raspberry Pi .
- Document your Progress:
- Keep a log of every step you go through. This will help you troubleshoot any issues and make sharing knowledge easier.
With this preparation, you are ready to get started with confidence. The foundation has been laid and you have gathered all the necessary information. In the following chapters, we will continue with the installation of the operating system and the setup of the development environment.
Installing the Operating System
Now that you have all the hardware and software, it’s time to install the operating system on your Pi. This chapter will walk you through the process step by step, so you can effortlessly put Raspberry Pi OS on your MicroSD card.
Downloading and Preparing Raspberry Pi OS
Before you start, you need to download the right software. Raspberry Pi OS is specifically designed for the Raspberry Pi and is based on Debian Linux. The installation is simple and intuitive. Follow these steps:
- Download Raspberry Pi Imager: Visit the official Raspberry Pi website . Download the Raspberry Pi Imager that is suitable for your operating system. This tool makes the installation process simple and straightforward.
- Choose the Right Operating System: In the Imager, choose the recommended version of Raspberry Pi OS. You can choose between the 'Lite' version without a graphical interface or the full version with a desktop environment. Choose what suits your project best. Not sure which one you need? Then choose the full version.
- Preparing the MicroSD Card: Make sure you have a MicroSD card with at least 16GB of storage space. If your card already contains data, back it up and format it. This will ensure a clean installation.
Raspberry Pi Imager Installation Process
The installation process with the Raspberry Pi Imager is very user-friendly. Follow the instructions below:
- Launch Raspberry Pi Imager: Open the tool on your computer. Click on 'Choose OS' and select the version of Raspberry Pi OS you want to install.
- Select the MicroSD card: Next, click on 'Choose Storage' and select the MicroSD card you want to use. Make sure you choose the correct card. The installer will erase all data on this card.
- Click Write: Press the 'Write' button and confirm your choice. The Imager will write the software to the card. This may take a few minutes, depending on the speed of your MicroSD card and your internet connection.
- Safely Remove: When the Imager indicates that the installation is complete, safely remove the MicroSD card from your computer. This will prevent data from being corrupted.
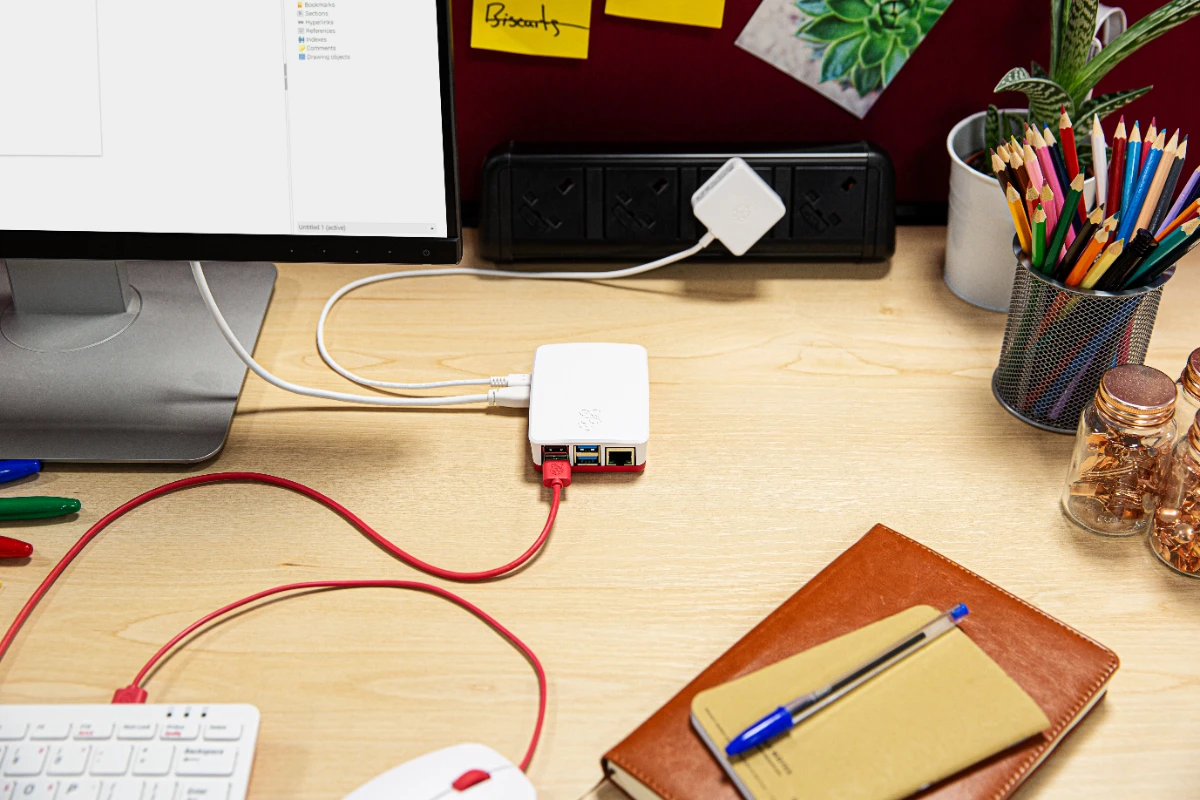
First Startup and Basic Configuration
Once the installation on the MicroSD card is complete, you can insert the card into the Raspberry Pi and perform the first boot. Follow these steps:
- Insert the MicroSD card: Insert the MicroSD card into the designated slot on your Raspberry Pi .
- Connect the Peripherals: Connect a monitor, keyboard, and mouse to the Raspberry Pi . This will allow for initial configuration.
- Connect Power: Connect the power supply to your Raspberry Pi . The computer will boot automatically.
- Configuration Wizard: When you first start up, you will be guided by a configuration wizard. Here you can set the language, time zone and keyboard layout, among other things. This is important so that the Raspberry Pi works properly according to your preferences.
- User Account and Password: Create a user account. Set a secure password. This is essential for the security of your system.
- Network Configuration: Connect your Raspberry Pi to the internet via Wi-Fi or a wired connection. This will allow you to download software updates and additional packages later.
Updates and Upgrades
It is recommended that you update your system immediately after the first boot. This will ensure that you have the latest security patches and software updates. To do this:
Open a Terminal: Launch a terminal window on your Raspberry Pi .
Run the Update commands: Type the following commands:
sudo apt update
sudo apt full-upgrade
These commands will ensure that all available updates are downloaded and installed.
Reboot: After the updates, it is a good idea to reboot your Raspberry Pi . This will ensure that all changes are implemented correctly.
Common Problems and Tips
During installation, you may encounter a few obstacles. Here are some tips to avoid common problems:
- Slow Writing Speed: If writing to the MicroSD card takes too long, consider a card with a higher speed and better quality.
- Boot problems: If the Raspberry Pi does not boot, check that the MicroSD card is inserted correctly. Also check the power supply. A weak power supply can cause problems.
- Network issues: Make sure you have a stable internet connection. If the Wi-Fi connection is unstable, use a wired connection.
With these steps and tips you are ready for the next phase. The Raspberry Pi is now ready to use and you can continue setting up a development environment.
Setting up the Development Environment
Now that the operating system is installed and updated, it is time to set up a development environment. A good development environment ensures that you can program efficiently and without errors. In this chapter we will discuss how to install Python. You will also learn which additional packages you need and how to choose a suitable code editor.
Installing Python and Required Packages
Although Raspberry Pi OS comes with Python out of the box, it is important to check that you have the correct version. Additionally, you can install additional packages for specific projects. Follow these steps:
Check the Python version: Open a terminal and type:
python3 --version- Make sure you are using at least Python 3.7 or higher. This will prevent compatibility issues with certain libraries.
Install Additional Packages: For hardware-driven projects, the RPi.GPIO library is essential. Install it by typing the following in the terminal:
sudo apt update
sudo apt install python3-rpi.gpio
If you want to work with other modules, you can install the necessary packages via pip:
pip3 install <module-naam>- Replace
with the name of the desired module. This can be useful for working with sensors, databases or web frameworks, for example.
Configuring a Code Editor or IDE
A good code editor makes writing and debugging your code much easier. There are several options available:
- Thonny IDE: This IDE is often included with Raspberry Pi OS. Thonny offers a clean interface and is ideal for beginners. The built-in debugging tools help you quickly find errors in your code.
- Visual Studio Code (VSCode): VSCode is a more powerful and advanced environment. To install VSCode, type in the terminal:
sudo apt install code
You can then add additional Python support via the extension market. - Alternative Editors: Other popular editors such as Geany, Atom, and Sublime Text are also good choices. Choose the editor that best suits your personal preferences and workflow.
Customizing the Development Environment
Once you have chosen an editor, it is useful to customize it further. This will allow you to work longer and more comfortably. Some tips for this are:
- Settings and Themes: Adjust fonts and colors in your editor settings. This will reduce eye strain and create a pleasant working environment.
- Plugins and Extensions: Install useful plugins such as linting tools, code formatters, and debugging extensions. These tools will greatly enhance your programming experience.
- Project structure: Create a logical structure for your project. Organize your scripts, modules, and other files into neat folders. This makes it easier to make changes or add extensions later.
Testing the Development Environment
Once your development environment is set up, it’s important to test it. Create a simple Python script to check that everything is working correctly. Follow these steps:
- Create a Test File: Open your editor and create a new file, for example named test.py .
- Add the Following Code: Place the following line of code in the file:
python
print("Welcome to your Python development environment on the Raspberry Pi !") - Run the Script: Save the file and open a terminal. Navigate to the folder where you test.py file. Then run the script by typing:
nginx
python3 test.py - Check the Output: If you see the message correctly on the screen, your development environment has been successfully set up.
Tips for an Efficient Workflow
An efficient workflow helps you work faster and more clearly. Here are some recommendations:
- Automating Tasks: Use tools like virtualenv. This allows you to create an isolated Python environment per project. This prevents conflicts between different packages.
- Version control with Git: Install Git to keep track of your code and changes. This is useful for collaboration or to back up your project. Install Git with:
nginx
sudo apt install git - Documentation and Notes: Keep a logbook where you record important changes and findings. This way, if problems arise, you can more quickly find what has been changed.
With these steps and tips, your development environment is ready to go. You can now confidently start writing Python code and controlling hardware on your Raspberry Pi .
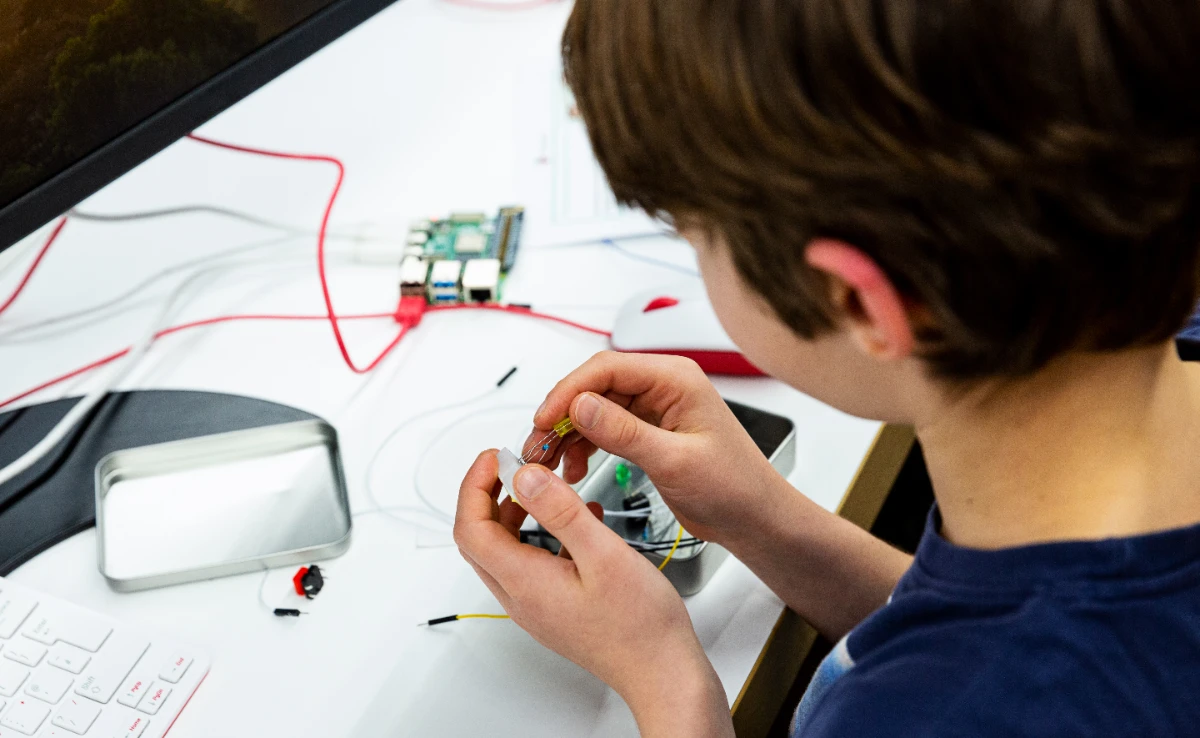
Your First Python Project
After the extensive preparation and installation, it is time to actually realize a project. In this chapter we will work on a simple but instructive project: a blinking LED. This project lays the foundation for understanding hardware control and using Python in combination with the GPIO pins of the Raspberry Pi .
Project overview
The goal of this project is to turn an LED on and off. This will teach you the basics of Python programming and hardware control. The project includes the following learning objectives:
- You will learn how to use Python to control hardware.
- You will learn how to read and write to the GPIO pins.
- You will learn about basic concepts such as timing and loop structures in Python.
For this project you will need the following parts:
- A working Raspberry Pi with Raspberry Pi OS installed.
- An LED.
- A resistor of approximately 220 ohms.
- A breadboard and jumper wires to make the connections.
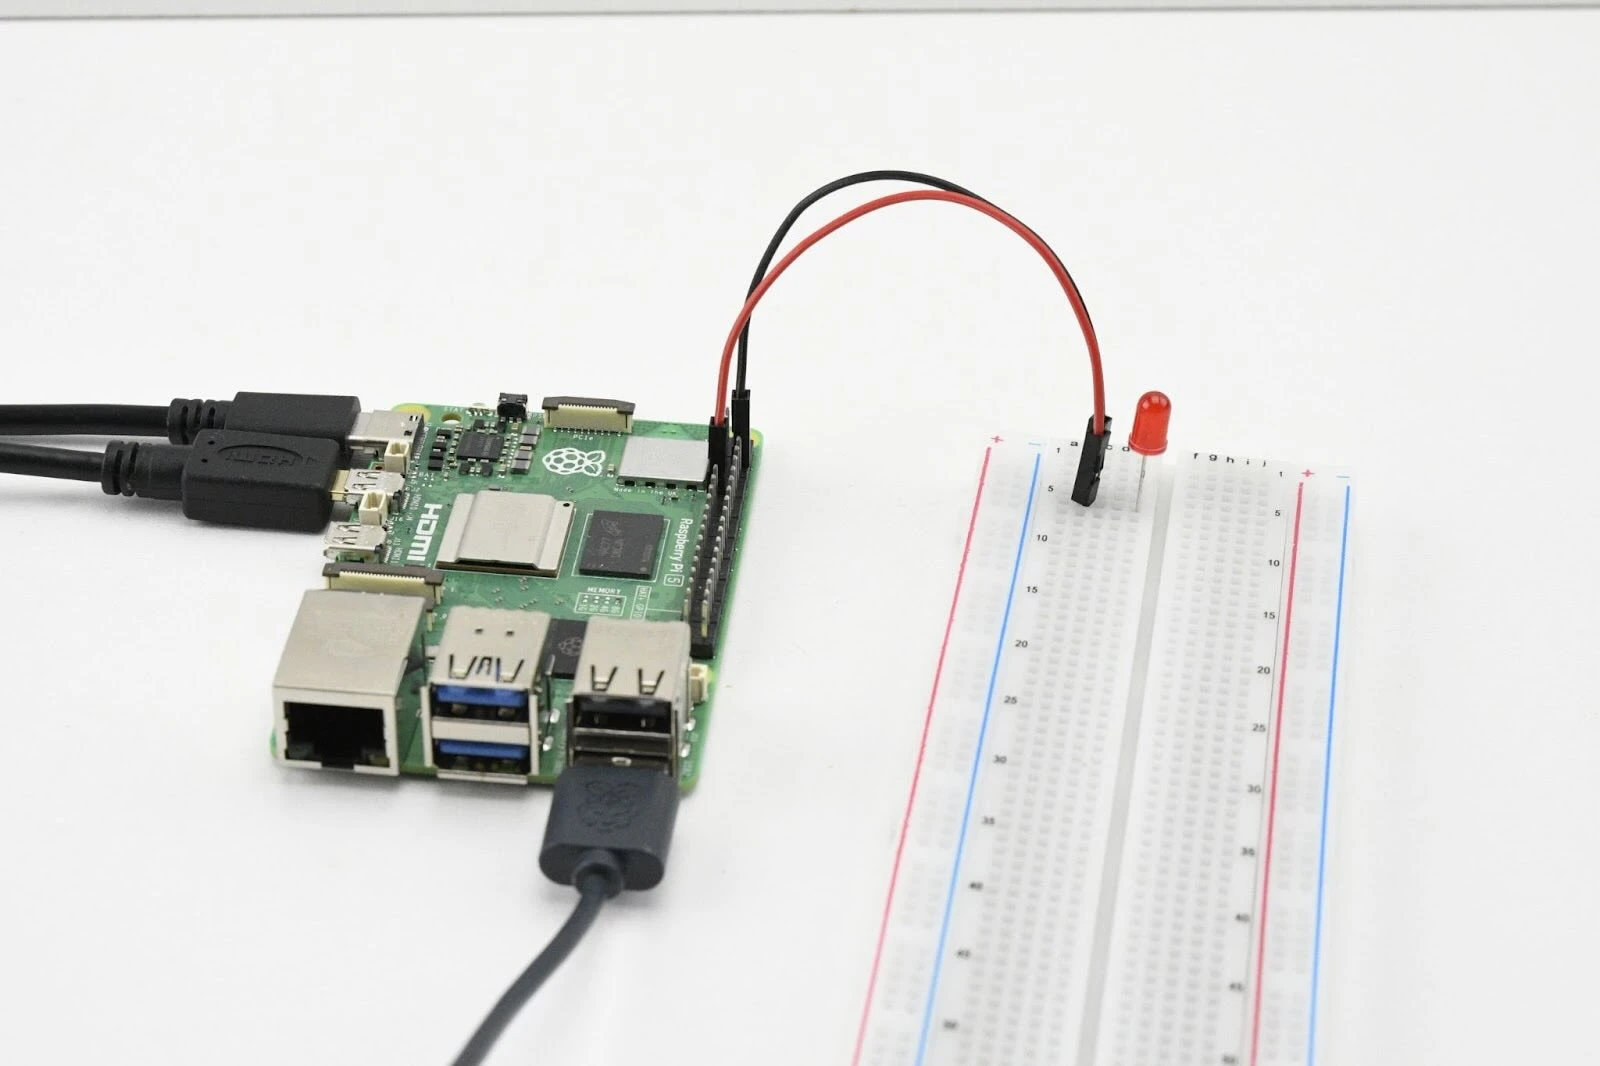
Connecting the LED
Connecting the LED correctly is an important step. Follow these instructions carefully:
- Connect the Cathode: The shorter leg of the LED is the cathode. Connect this to a GPIO pin on the Raspberry Pi via a resistor. An example is GPIO 18.
- Connect the Anode: The longer leg, the anode, should be connected to the 3.3V pin of the Raspberry Pi . This will ensure the correct voltage when the LED is on.
- Check Polarity: Always check that the LED is connected correctly. Incorrect connection can cause damage to the components.
The Python code
The next step is to write the Python code that controls the LED. Create a new file called blink.py and paste the code below:
import RPi.GPIO as GPIO
import time

# Gebruik de BCM-benaming voor de pinnen
GPIO.setmode(GPIO.BCM)

# Definieer de GPIO-pin voor de LED
led_pin = 18

# Stel de pin in als output
GPIO.setup(led_pin, GPIO.OUT)

try:
    while True:
        # Zet de LED aan
        GPIO.output(led_pin, GPIO.HIGH)
        print("LED aan")
        time.sleep(1)  # wacht 1 seconde

        # Zet de LED uit
        GPIO.output(led_pin, GPIO.LOW)
        print("LED uit")
        time.sleep(1)  # wacht 1 seconde

except KeyboardInterrupt:
    # Reinig de GPIO-instellingen bij stoppen
    GPIO.cleanup()
    print("Programma gestopt en GPIO opgeruimd.")
Explanation of the code:
- Importing modules: The RPi.GPIO module is used to control the GPIO pins. The time module provides delays in the program.
- Setting the GPIO mode: Use GPIO.setmode(GPIO.BCM) to specify that you want to use the Broadcom SOC designations.
- Pin configuration: The variable led_pin is set to GPIO 18. Use GPIO.setup(led_pin, GPIO.OUT) to make this pin suitable as output.
- Main Loop: The while True loop keeps the program running indefinitely. Within this loop you turn the LED on and off with a 1 second pause.
- Exception Handling: The try-except block ensures that the program stops gracefully when you give an interrupt (for example Ctrl+C). The GPIO settings are then neatly cleaned up.
Executing the Script
After you have written the code, it is time to run your script. Follow the steps below:
Open a Terminal: In the terminal, navigate to the folder where you blink.py you saved.
Run the Script: Type the command:
python3 blink.pyObserve the LED: If everything is connected properly and the code is correct, the LED will blink on and off. This confirms that your first Python project is running successfully.
Additional Extensions
Once you have mastered the basic project, you can consider expanding the project further. Some ideas for expansion include:
- Adjusting the blinking frequency: Adjust the wait time in the time.sleep() functions. This will change the speed of the blinking.
- Control multiple LEDs: Connect additional LEDs to other GPIO pins. Extend the code to control multiple LEDs simultaneously.
- Sensor integration: Add a sensor, for example a temperature sensor or a light sensor. Let the LED react to the measured values.
This project is an excellent foundation. You have now learned the basics. With this knowledge you can continue to experiment and develop more advanced projects.
Debugging and Troubleshooting
No project is free from problems. Debugging is therefore an essential part of any programming experience. In this chapter, we will discuss how to find and fix errors, both in software and hardware.
Introduction to Debugging
Debugging helps you gain insight into how your program works. By finding errors, you learn more about the operation of the hardware and the logic of your code. It is important to proceed calmly and systematically. There are various techniques available, from print statements to the use of advanced debugging tools.
Common Errors and Causes
When working with Raspberry Pi and Python, you may encounter several types of errors. Some common errors include:
- Syntax and Typos: Small errors in code, such as incorrect indentation or a typo, can prevent your code from executing. Check your code carefully.
- GPIO Configuration Issues: If the wrong pins are used or the GPIO mode is not set correctly, the hardware will not work as expected. Make sure you use the correct naming (BCM vs. BOARD).
- Hardware Connections: Loose connections or incorrect wiring can result in a non-functioning project. Check the polarity of your LED and make sure all connections are tight.
- Insufficient Power: A weak power supply can cause your Raspberry Pi to be unstable or reboot unexpectedly. Always use a power supply that meets the specifications.
Debugging Techniques and Tools
There are several techniques you can use to solve problems:
- Using Print Statements: Add print statements to your code. This will allow you to see which parts of your code are executed and which are not. This will help isolate the error.
- Logging: For more complex projects it is useful to keep log files. The Python logging module can be very useful for this.
- Interacting with the GPIO: Use commands like gpio readall to check the status of the GPIO pins. This will give you an overview of the configuration and help verify the connections.
- Using a Debugger: Modern IDEs like Thonny and VSCode offer built-in debugging tools. These tools allow you to set breakpoints and step through your code.
Practical Troubleshooting
Below are some concrete problems and possible solutions:
- Problem: The LED is not flashing.
- Check the connections of the LED and the resistor.
- Verify that the correct GPIO pin is set in your code.
- Use a multimeter to check if there is voltage across the pin.
- Problem: Error messages or crashing code.
- Read the error messages carefully.
- Check for syntax errors and ensure correct indentation.
- Use print statements or a debugger to find the exact location of the error.
- Problem: Unstable operation of Raspberry Pi .
- Ensure a stable and sufficient diet.
- Update your system and install the latest patches.
- Make sure the Raspberry Pi is not overheating. Provide good ventilation or an additional cooling system.
Tips for an Efficient Debugging Workflow
Here are some tips that can help you resolve errors faster and more efficiently:
- Work Step by Step: Make changes one by one and test after each change. This way you can find out exactly which change caused the error.
- Document Your Findings: Keep a log of the problems and solutions. This helps with future projects and makes it easier to ask for help.
- Ask the Community for Help: Both Raspberry Pi and Python have large and helpful communities. Forums and online groups can often get you up and running quickly.
- Keep Calm and Analyze: Debugging can be frustrating at times. Take your time and approach each problem with a fresh perspective. A short break can often lead to new insights.
With these techniques and tips, you will be well prepared to solve any problems during your project. Debugging is a learning process and contributes to your development as a programmer.
Getting Started with More Advanced Projects
Now that you have the basics down, it is time to expand your knowledge. In this chapter, we will discuss how to expand simple projects into more complex applications. You will learn how to integrate multiple components and how to fully utilize the capabilities of the Raspberry Pi .
Overview and Expansion Options
The first steps with a blinking LED form a solid foundation. But much more is possible. You can use the knowledge you have acquired to develop projects that combine multiple hardware components. The possibilities are diverse. Think for example of building a smart alarm system, a weather station or a home automation system. Each project challenges you to learn new techniques and improve your skills.
Integrating Multiple Components
A more advanced project requires the integration of several hardware components. Here are some examples:
- Multiple LEDs and Buttons: Build a system that controls multiple LEDs. Add buttons to activate different functions. This can result in an interactive lighting system where each button controls a specific LED or group of LEDs.
- Sensors and Data Logging: Add sensors, such as temperature sensors, light or motion detectors. Process the data in Python and log the data to a file or database. This gives you insight into the environment and forms a basis for real-time monitoring.
- Smart Lighting or Alarm System: Combine LEDs, motion sensors, and audio signals to create a simple alarm system. When a motion sensor detects activity, you can set the LEDs to flash and play an alarm sound.
Examples of Advanced Projects
There are many projects that you can realize with the knowledge of the basic principles. Some examples are:
- Weather station: Use various sensors to measure temperature, humidity and air pressure. Process the data with Python and show it on a display or via a web interface.
- Home Automation: Connect your Raspberry Pi to the internet. Build a system where you can control devices via a web dashboard or voice commands.
- Machine Learning: Experiment with simple machine learning models. For example, let your project recognize patterns in sensor data and predict trends based on collected data.
Communication with External Devices
For more advanced applications, it is often necessary to have your Raspberry Pi communicate with other devices. There are several methods available:
- Serial Communication: Use protocols such as UART, I2C or SPI. These communication protocols allow data to be exchanged between the Raspberry Pi and other microcontrollers or sensors.
- Network communication: Connect to the internet via Wi-Fi or Ethernet. Python libraries such as socket or requests allow you to send and receive data. Additionally, you can use frameworks such as Flask to set up a simple web server. This allows you to remotely monitor and control your project.
Software Extensions
In addition to the hardware, you can also expand the software side. Some ideas are:
- Database integration: Store the collected data in a database, such as SQLite or MySQL. This is useful for projects that need to record data over time, such as a weather station.
- GUI and Web Interfaces: Build a graphical user interface with libraries such as Tkinter. A web interface provides an extra layer of interaction and allows you to control your project remotely.
- Version Control and Automation: Use Git to keep track of your code. This helps with bug tracking and collaboration. You can also use automation tools for continuous integration and testing.
Documentation and Community Support
Documenting your project is very important. Good documentation not only helps you. It is also useful for others who want to copy or improve your project. Some tips:
- Project Logs: Keep a detailed log. Record all steps, challenges, and solutions. This log is valuable in solving future problems.
- Online Communities and Forums: Share your experiences on platforms such as GitHub, Reddit or specialized forums. The feedback from the community can help you refine your project and find new ideas.
Conclusion of the More Advanced Part
Expanding your first project to more advanced applications is a natural next step. By experimenting with multiple components, network communication and data integration, you will develop a deep understanding of both hardware and software. Get inspired by existing projects and don't be afraid to try new ideas. The possibilities are virtually endless. Keep learning and improving, and enjoy every step of this challenging process.
Conclusion and Further Resources
Summary of the Project
In this article, we have presented a comprehensive roadmap. You have been guided step by step through the process of setting up a Python project on a Raspberry Pi . We started with the basics. Then we focused on installing the operating system and setting up an efficient development environment. Then we created a simple project, namely blinking an LED. Finally, we discussed techniques for debugging and expanding your project to more advanced applications. Each phase has been crucial in increasing your understanding of both hardware and software.
Reflection on the Learning Experience
Completing this project has given you new knowledge in several areas. You have learned how to:
- Configuring and booting a Raspberry Pi .
- Creates a stable workplace with the necessary hardware and software.
- Python used to control hardware via the GPIO pins.
- Sets up and expands simple yet effective projects.
- Resolves issues using debugging techniques and community support.
Each step has contributed to a stronger understanding of the technology. This knowledge forms a solid foundation for future projects in the field of embedded programming and Internet of Things (IoT).
Recommended Resources and Learning Platforms
For those who want to learn more, there are many resources available. Here are some recommendations:
- Official Raspberry Pi Website: Here you will find manuals, tutorials and the latest updates on the Raspberry Pi hardware and software.
- Python Documentation: The official Python documentation provides extensive explanations of the language and all available modules.
- Online Courses and Tutorials: Platforms like Coursera, Udemy, and YouTube offer courses specifically focused on Raspberry Pi and Python programming.
- Communities and Forums: Share your experiences and ask questions on platforms like Stack Overflow, Raspberry Pi Forums, and specialized subreddits. The knowledge of the community is invaluable.
Next Steps and Challenges
Now that you have the basics down, you can move on. Here are some suggestions for next steps:
- More Complex Projects: Move on to set up projects that integrate multiple sensors and actuators. For example, think about building a smart alarm system, a weather station or a home automation system.
- Dig Deeper into Software Development: Delve into topics such as version control with Git, using databases, and building web interfaces.
- Experimenting with IoT: Connect your projects to the internet. Learn data analytics and machine learning to predict trends and take automation to the next level.