4.7 avg.
5183+ reviews5183+ reviews
Order by 16:00 for same day shipping
14 days return
EN
Individual
Business
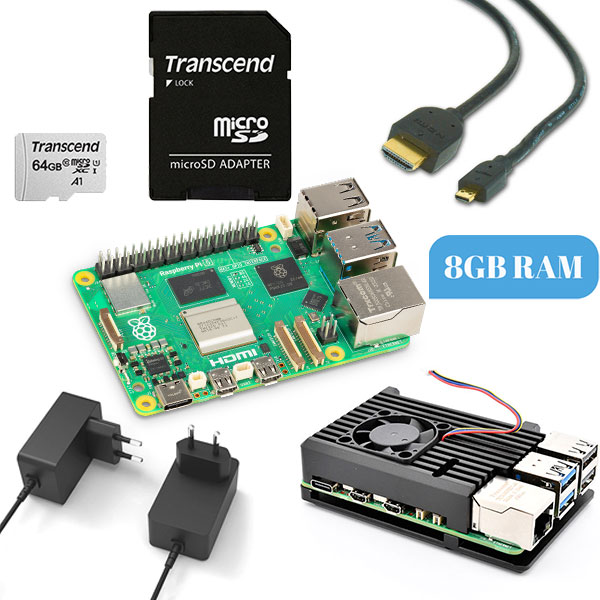
Raspberry Pi project: Pi-hole ad blocker
We start by installing Raspbian Lite. Raspbian Lite is the lightest version of Raspbian, the OS for the Raspberry Pi . Insert your micro SD card into your computer via an adapter and boot the Raspberry Pi imager. Allow the Raspberry Pi imager to make changes to your system.
What you will now see is the following:
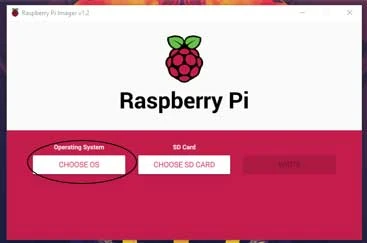
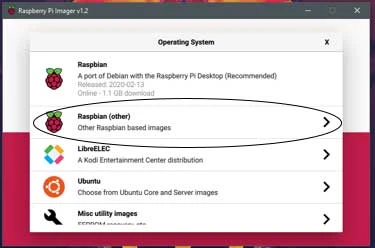
First we are going to select an Operating System (OS). In this case Raspbian Lite.
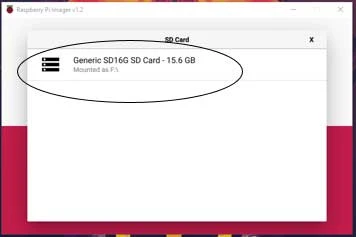
Now that you have selected your OS it is time to select the correct SD card.
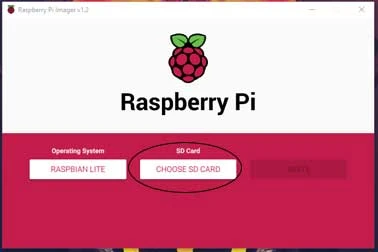
We use a 16GB micro SD card. What you see here may differ based on your micro SD card.
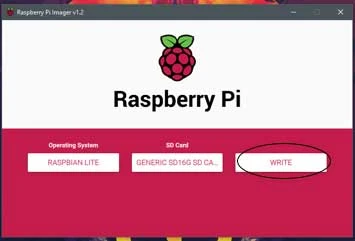
Once you have selected your micro SD card you will arrive at the following screen.
Setting up the Raspberry Pi
Now that you have installed Raspbian Lite on your micro SD card it is time to make some adjustments to the settings. First, put the micro SD card back into the computer. This process consists of one step that you only need to perform if you do not have an Ethernet connection. The second step is necessary for both an Ethernet connection and a wireless connection.
Configure WiFi (not necessary if you have an Ethernet connection)
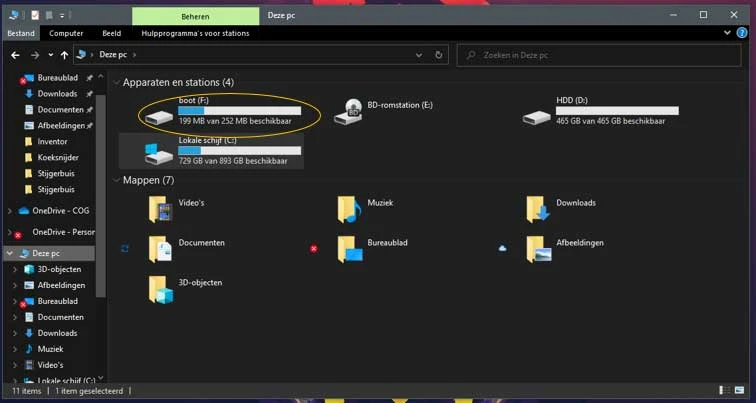
First go to windows explorer and then to this computer. You will now find a screen similar to the picture next to it. Now click on the “boot” disk.
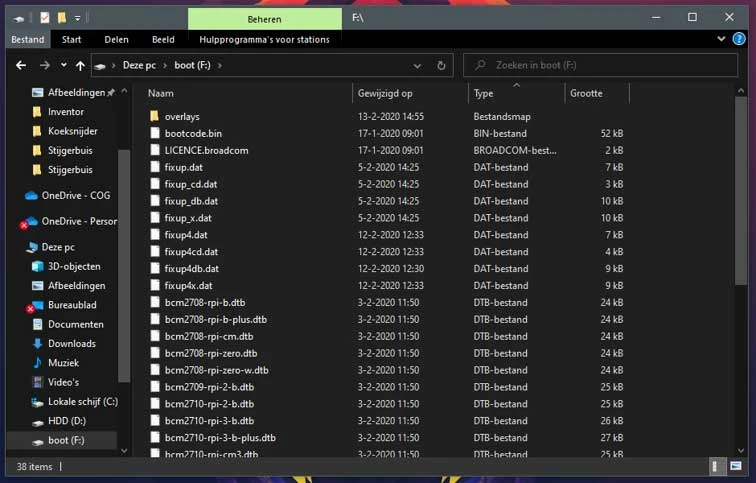
We are going to work in the “boot” disk. Here you will find something similar to the following picture.
What we are going to do now is modify the ”wpa_supplicant.conf”' and add it to the ”boot” drive. If all goes well, you have downloaded this file under requirements. If not, look below this text. Open the document with notepad. If all goes well, you should see the following text. If not, copy the following text.
ctrl_interface=DIR=/var/run/wpa_supplicant GROUP=netdev
update_config=1
country=NL

network={
 ssid=”Jouw_Netwerk_Naam”
 psk=”Jouw_Netwerk_Wachtwoord”
 key_mgmt=WPA-PSK
}
Now customize “Your_Network_Name” and “Your_Network_Password” with your WiFi's name and password.
In our case: Name: Electronics For You Password: Electronics@123
Below you can see an example of the end result.
ctrl_interface=DIR=/var/run/wpa_supplicant GROUP=netdev
update_config=1
country=NL

network={
 ssid=”Elektronica Voor Jou”
 psk=”Elektronica@1234″
 key_mgmt=WPA-PSK
}
Once you have edited this document and saved it to the “boot” drive you can proceed to the next step.
Configure remote access
Go to windows explorer and then to this computer. Now click on the hard drive called: ”boot”. And paste the following file in here: ssh
You are now ready to install Pi-hole. Remove the micro SD card from your PC and insert the micro SD card into your Raspberry Pi . Now connect the Raspberry Pi to your power supply and optionally with an ethernet cable.
Install Pi-hole
We are now going to connect to our Raspberry pi. This process consists of two steps. Finding the IP address of the Raspberry and connecting and installing Pi-hole.
Finding the IP address
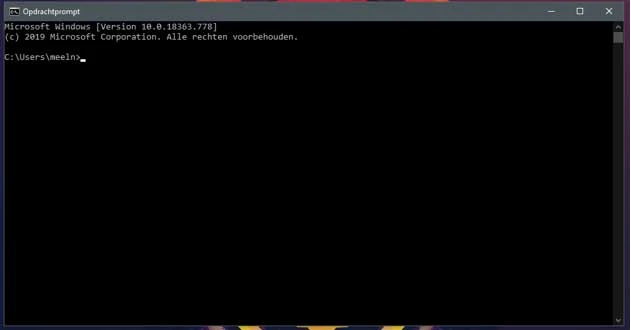
In the search bar, search for “cmd”. Then press enter.
The program you see here should now be open. Type the command 'ipconfig' and press enter.
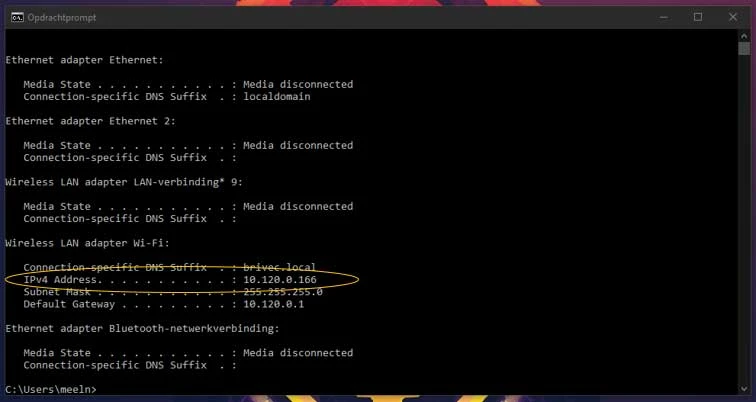
Next, you will see something similar to the photo next to it.
Search for IPv4 Address. Here you will find your IP address. This is important for finding the IP address of your Raspberry Pi .
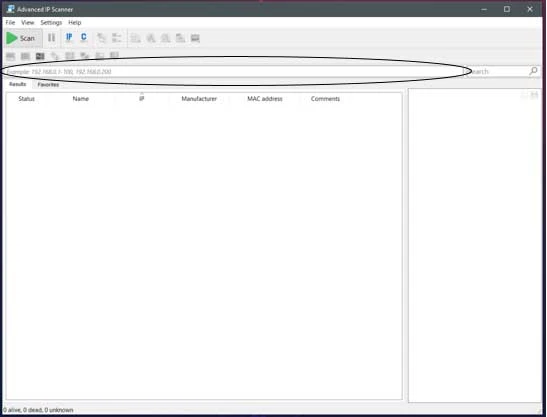
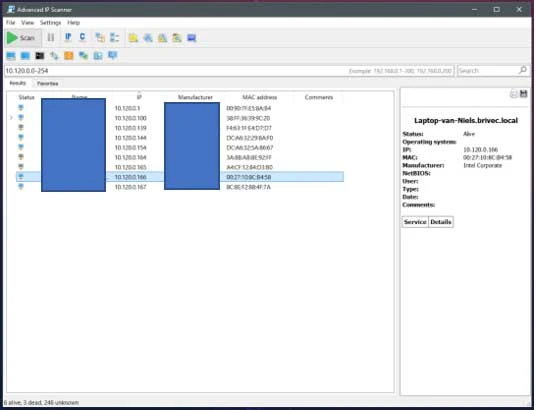
Your IP address will consist of xxxx , in our case 10.120.0.166 . Now open advanced IP scanner, a program for preparation.
You will now see this. In the circled line type xxx0-254 , so in our case 10.120.0.0-254 .
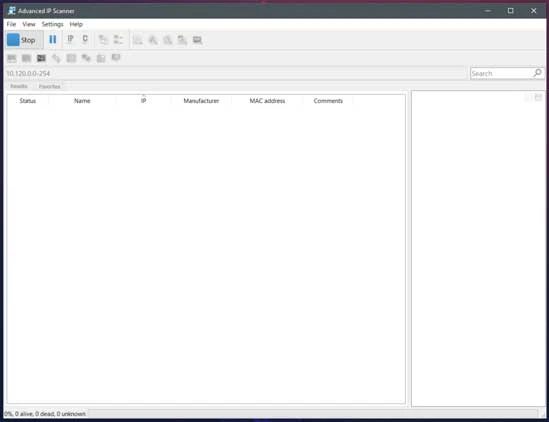
Then click Scan.
Please wait until you have finished scanning.
You will now see a list of Device Names, IP Addresses, Manufacturers and MAC Addresses. Unfortunately, we cannot see a manufacturer or name for the Raspberry Pi . So we are going to search for a MAC address. A MAC address consists of XX:XX:XX:XX:XX:XX. For a Raspberry Pi , this always starts with DC:A6:32: or B8:27:EB: . Now search for such a MAC address and see which IP address is listed. In our case '10.120.0.154'.
Connecting to your Raspberry Pi
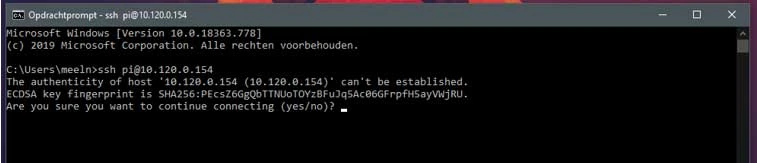
Go back to the windows search bar and type 'cmd'. Hit enter.
You will now see the following screen.
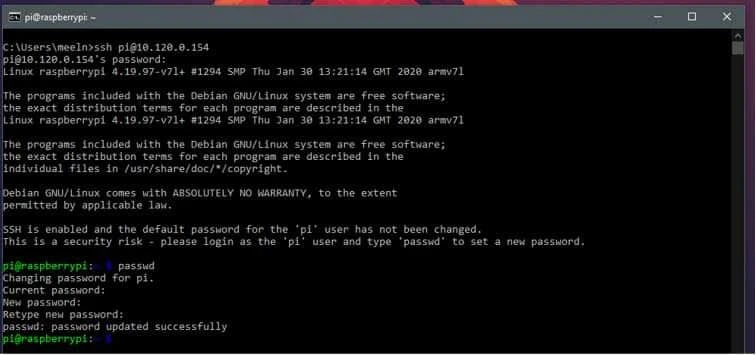
Now type 'ssh pi@xxxx', where xxxx is the IP address of your Raspberry Pi . In our case it will be 'ssh pi@10.120.0.154'. After filling it in, click enter.
You will now see the following. Type 'yes'. Hit enter.
You will be asked for a password. The default password is ' raspberry '. Type this password. When typing passwords, no characters will appear. This is normal. Press enter after filling in your password.
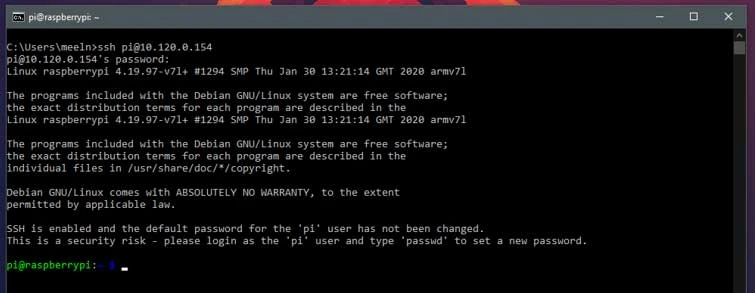
You are now logged into your Raspberry Pi . The first thing we are going to do is create a new password, so that not everyone can get to your Raspberry Pi . Type 'passwd' and hit enter. Type your current password and then the new password twice. Hit enter after each password.
You now have a secure, only accessible Raspberry Pi . We need to perform a few more steps until the Pi-hole is ready to use. Type the command 'sudo apt-get update' and hit enter. Wait for the process to finish. This command will update your Raspberry Pi .

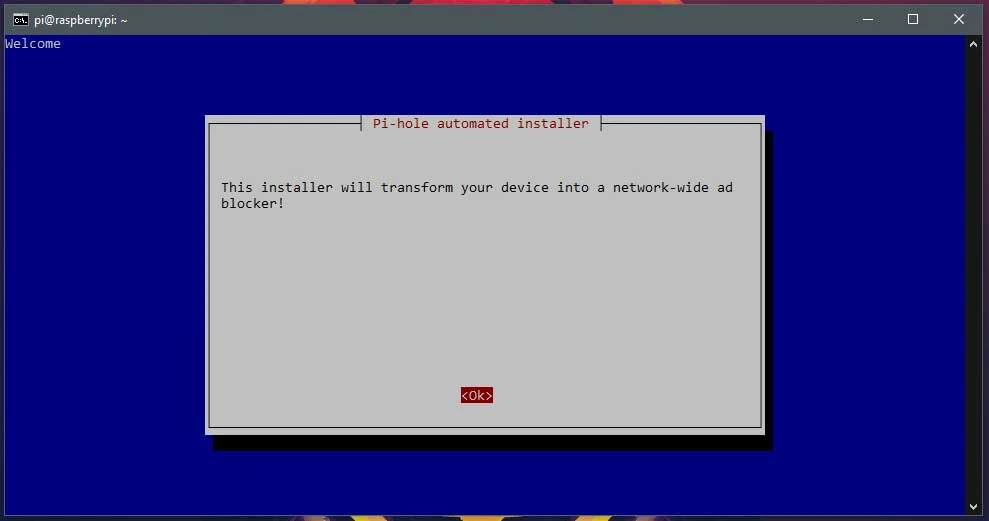
Now that we have everything prepared, the time has finally come. We are going to install Pi-hole. Type the command 'sudo su'. Then type 'curl -sSL https://install.pi-hole.net | bash'. Hit enter.

It will take a while, but eventually you will get to the following screen. When you see this screen, press enter.
You will now see the following screen. Click enter again.
On the next screen, click enter again.
In this screen you need to indicate how your Raspberry Pi is connected to the internet. For an ethernet cable, press enter. For wireless, press the down arrow and press the space bar. Check if the asterisk is now at 'wlan0'. If so, press enter.
Now select a DNS provider. We recommend Cloudflare. Use the arrows to go down until you have selected Cloudflare, then click enter.
This screen allows you to block or allow lists of known ad servers. You can navigate using the arrow keys on your keyboard and select or deselect using the space bar. We recommend keeping all enabled. When you are done making your selection, press enter.
If all goes well, you should now arrive at this screen. Press enter.
At the next screen, click enter again.
Click enter again on this screen.
Here you can select whether you want to be able to adjust settings later via the internet. If you still plan to do this, click enter. If you do not plan to do this, select 'off' again with the arrows and space bar and click enter.
If you left the web interface on, press enter. If not, use the arrows and spacebar to select 'off' and press enter.
Click enter again here.
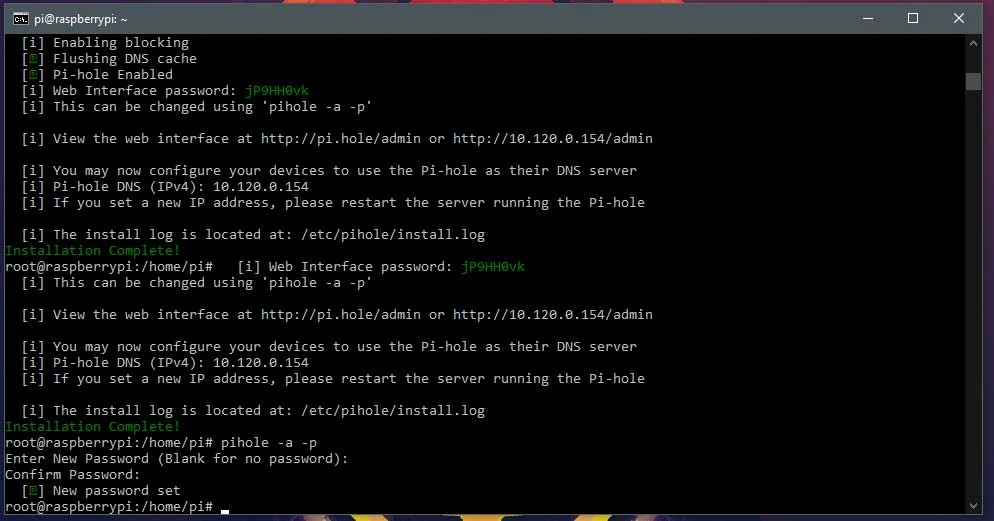
Click enter here too. You are almost done. Pi-hole will install itself with the settings you have given.
We are almost there. Remember the website link circled next to it. Yours is a different address.
Now click enter.
Type the command ”pihole -a -p”. Hit enter. This will allow you to enter your own password for the web interface. It is a password, so you will not see any characters appear.

You are now done installing. Click away the terminal.
Connect your computer to the Pi-hole
In this step you will connect your computer to the Pi-hole. This will block most ads.
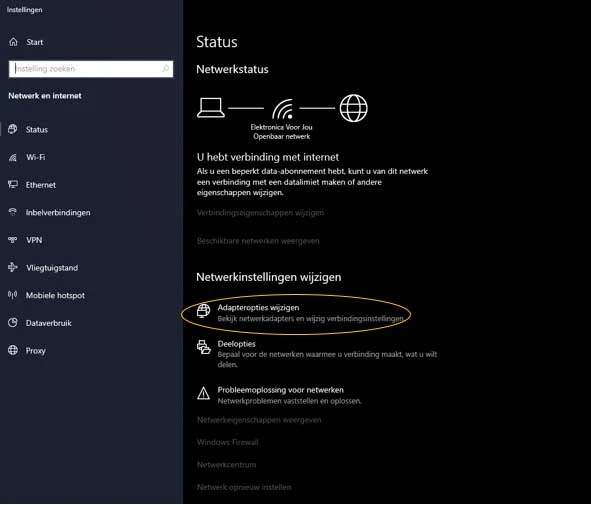
Go to the windows search bar, type 'Network Status' and click on the first result. You will see a screen like this.
Click on Change adapter options.
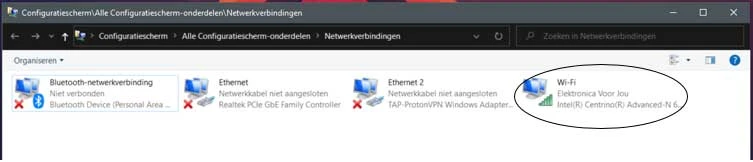
You will now see the following screen. Select your internet connection. This is the option that does not have a cross next to it.
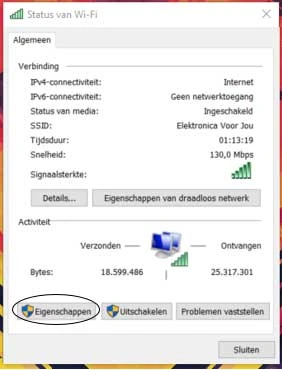
You will now see the following screen, select 'properties'.
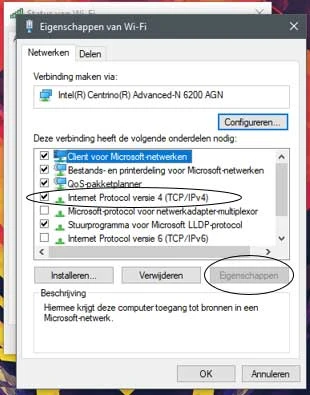
Now you will see the following screen, click on 'Internet Protocol Version 4 (TCP/IPv4)'. Then click on 'properties'.
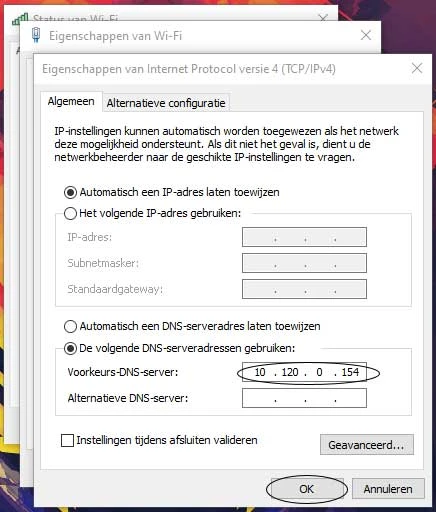
Now the following screen will appear. Click on 'Use the following DNS server addresses:'.
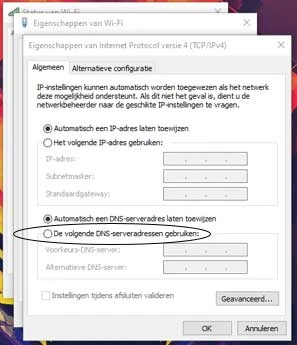
Now fill in 'Preferred DNS server:' The IP address of your Raspberry Pi . xxxx, with us 10.120.0.154. Leave the 'Alternative DNS server:' empty.
After that click OK. Then close all other settings.
You now have less chance of ads while using the internet. Not all ads can be blocked because new ads are added daily. However, Pi-hole is updated often so that you get as few ads as possible on your computer. Whether you are on the internet or playing a game.