4.7 avg.
5169+ reviews5169+ reviews
Order by 16:00 for same day shipping
14 days return
EN
Individual
Business
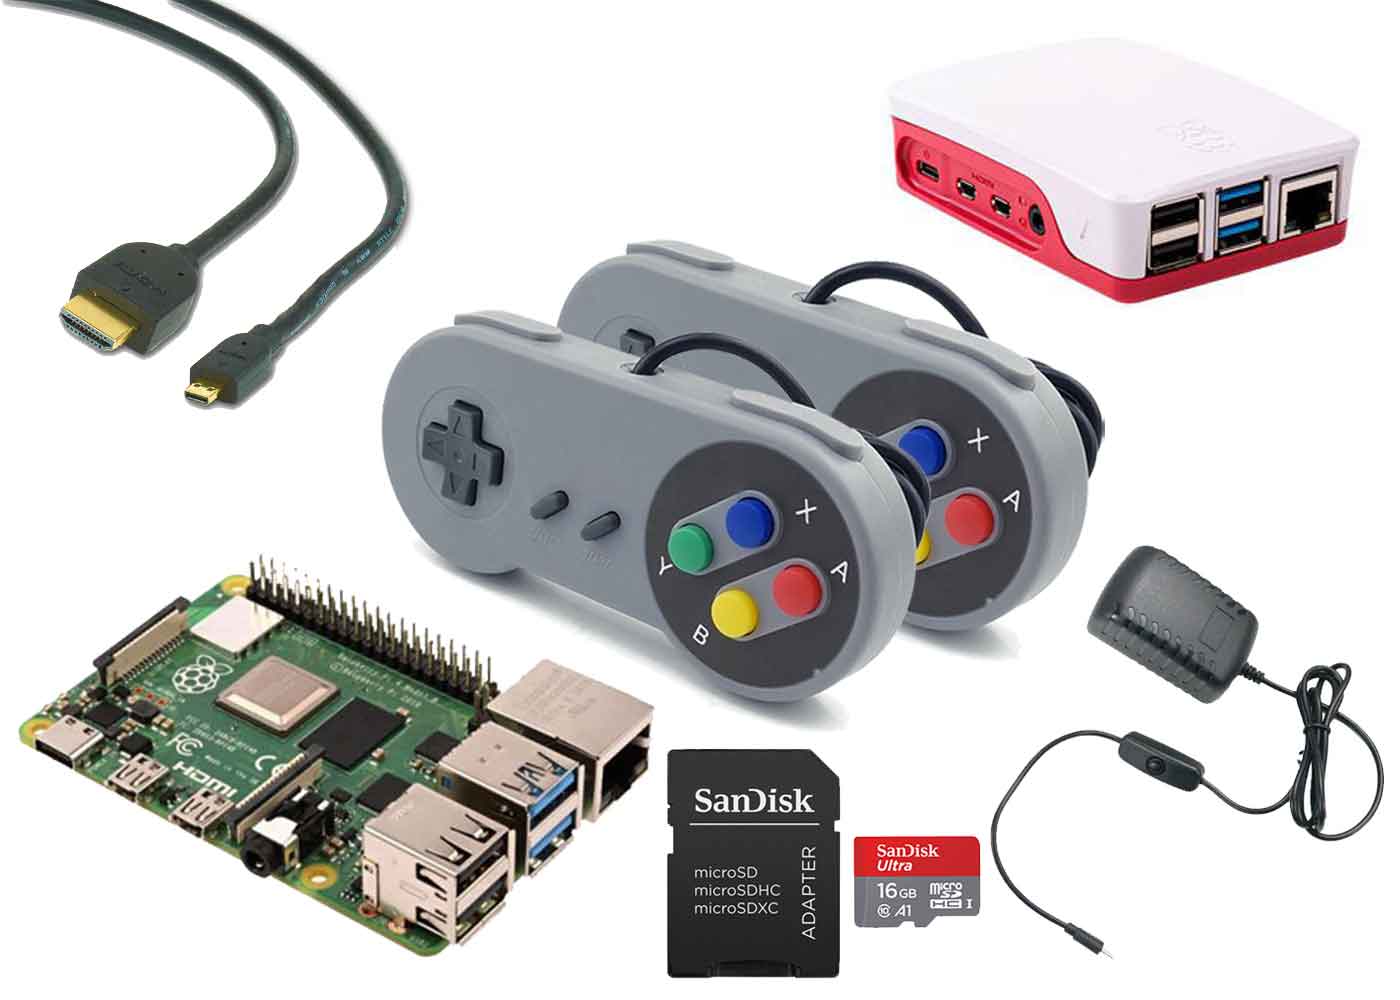
Raspberry Pi Project: RetroPie
Install IMG
Once you have downloaded the RetroPie file you need to extract the .gz file. The extracted file is the .img To install the RetroPie SD image to your MicroSD card you need to insert the MicroSD card into your computer. And install the .img using one of the following programs:
- Windows: Win32Diskimager
- Apple: Pi Baker
- Linux you can use the dd command or Etcher to use
Please make sure your Micro SD card is formatted before you start.
Connect
Insert the MicroSD card with the RetroPie Image into the SD slot on the bottom of the Raspberry Pi . Then connect the Raspberry Pi to a TV / Monitor with an HDMI cable. Connect the SNES controller(s) to the USB port(s) and you are ready to power it up.

The first time you boot your RetroPie you will need to configure the SNES controller. Once you get to the Welcome page you will need to hold down any button to start the process. After this you will be taken to a page where you can configure the buttons. You do this by pressing the button that is shown on the screen.
Is it D-pad Up? Then press the up arrow. You do this for all the buttons on the controller. There are more buttons to configure than are actually on the SNES controller. You can skip these by holding down two buttons. You have now configured your SNES controller.
If all goes well you will now end up on the ”EmulationStation”. There are no games on the RetroPie yet. Due to Copyright & Property Rights the games are not on the RetroPie by default.
Installing ROMs
You have to download the games yourself and put them on the RetroPie. To get the games you can search on google for ROMS for SNES RetroPie. Once you have found a game you can download it. There are a few ways to get the games on the RetroPie. The easiest way is via a USB.
- Take a formatted USB stick.
- Create a folder and call it retropie.
- Plug the USB stick into the Pi and wait until the Pi stops flashing.
- Remove the USB stick from the Pi and plug it into the computer.
- Place the previously downloaded ROMs in the retropie/roms folder
- Plug the USB stick back into the Pi and wait for the Pi to stop flashing.
- Reboot the RetroPie
Play!
You have now loaded the games onto the RetroPie and can start playing!
Hotkeys
Hotkey | Action |
| Select + Start | Exit |
| Select + Right Shoulder | Save |
| Select + Left Shoulder | Load |
| Select + B | Reset |
| Select + X | RGUI Menu |
| Select + Right | Input State Slot Increase |
| Select + Left | Input State Slot Decrease |