4.7 avg.
5183+ reviews5183+ reviews
Order by 16:00 for same day shipping
14 days return
EN
Individual
Business
Setting up a Raspberry Pi Proxy Server
In this project we will learn how to create a cheap but powerful proxy server using Squid (proxy software). This tutorial provides a complete step-by-step guide to installing and configuring Squid, including optional steps such as opening it up for external access and setting up mandatory authentication.
What is a proxy server?
A **proxy server** acts as an intermediary between your device and the internet. When you visit a website through a proxy, the proxy forwards your request and retrieves the data on your behalf. This can help hide your IP address and access blocked websites. A **proxy is not a VPN**, as a proxy only works for specific apps or browsers and does not **encrypt** your internet traffic. This means that your data may still be visible to your ISP or others on the same network. **However**, if a website uses **HTTPS** (as most do these days), your connection to that site will remain encrypted even if you use a proxy. So while you're not giving up all of your security, a VPN does provide an extra layer of privacy and protection. This project can be run on all Raspberry Pi models from the Raspberry Pi 3B onwards, including the Raspberry Pi Zero 's. Alternatively, you can install this on a server or computer running a Linux distribution such as Ubuntu.
Prepare system
Before we begin, it is important to update the system. Open the terminal, which can be found in the upper left corner of Raspb
erry Pi OS , next to the file explorer icon. Run the following commands to update the system:
sudo apt-get update -y
sudo apt-get upgrade -y
sudo apt autoremove -y
Installing Squid
After the system is updated, we install the proxy software (Squid). In addition, we install an additional package that will be used later for setting up authentication. If you do not want to use authentication, you can skip the second command.
sudo apt install squid -y
sudo apt install apache2-utils -y
Next, check that Squid is installed correctly and make sure the service is started automatically when the Raspberry Pi boots:
sudo systemctl status squid.service
sudo systemctl enable squid.service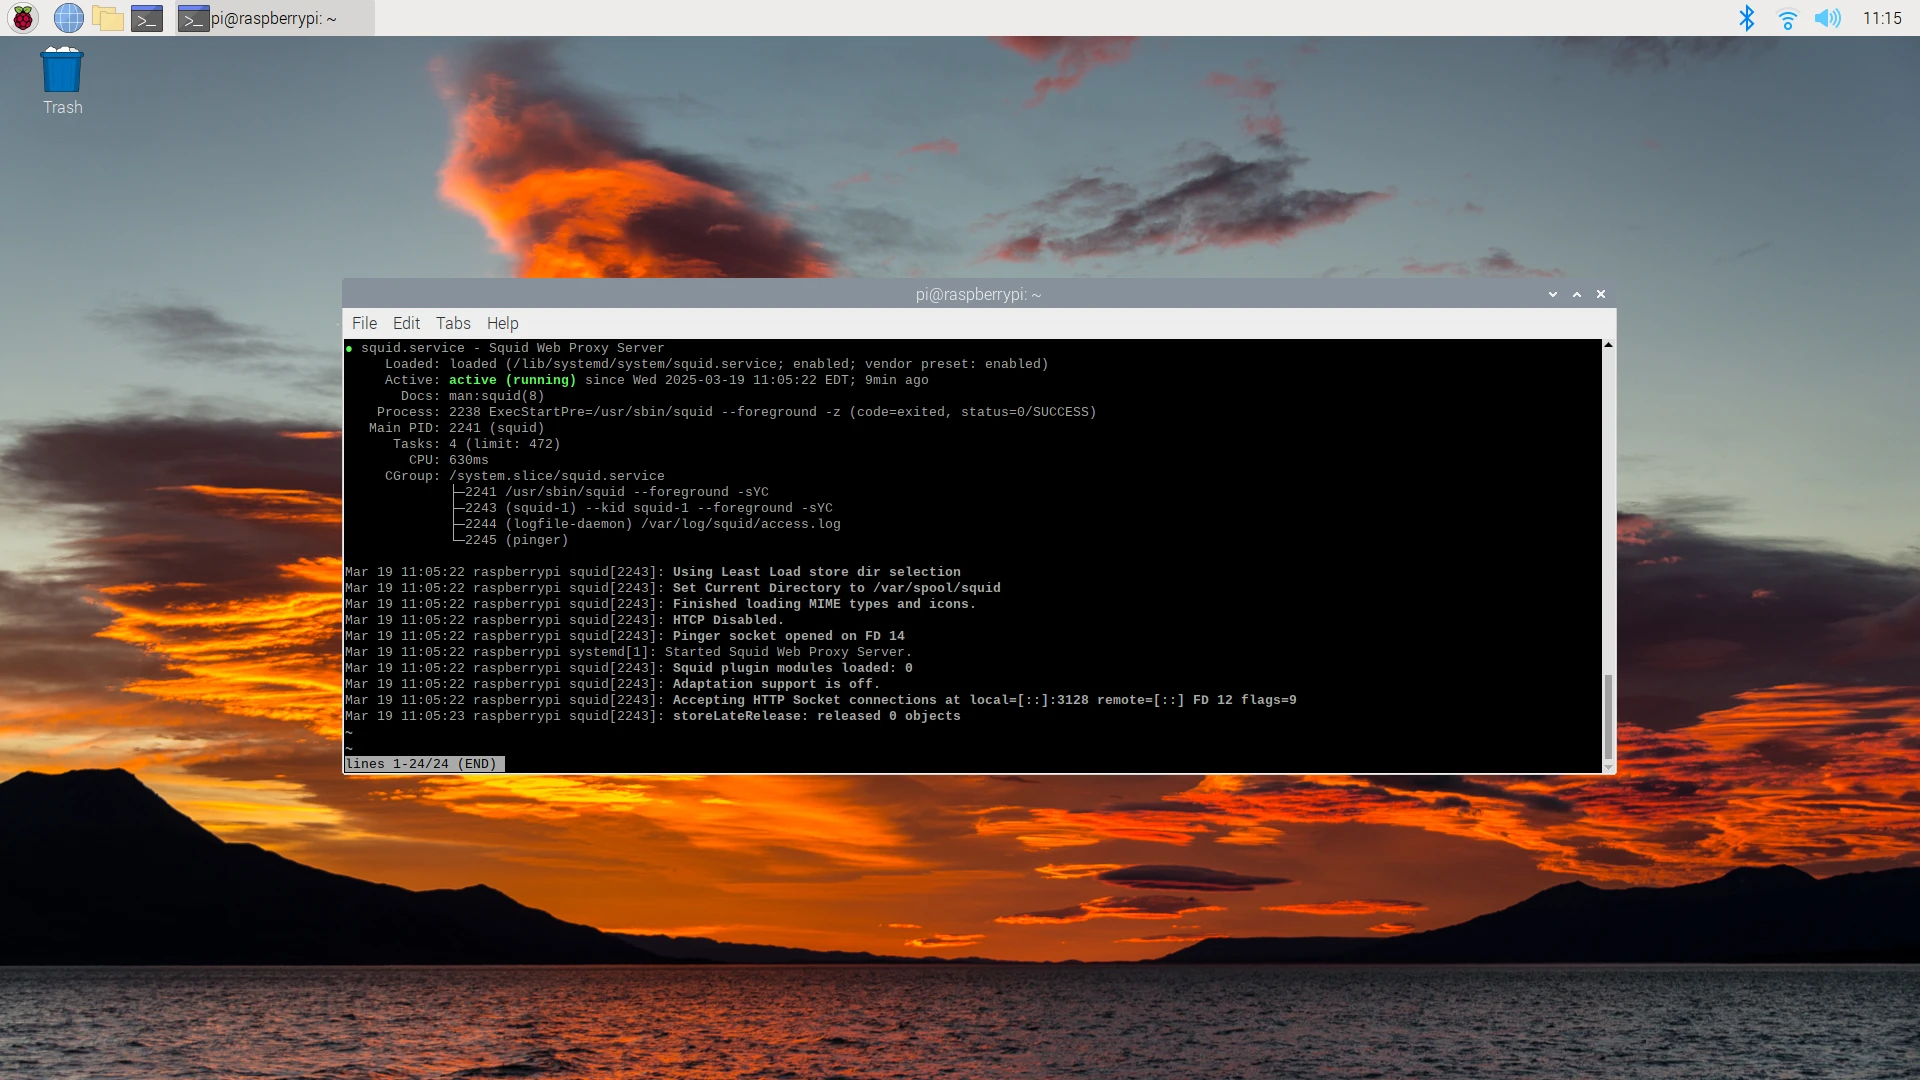
If the status shows "Active: inactive (dead)" or "Unit squid.service could not be found.", you can run the following commands:
sudo systemctl start squid.serviceIf Squid is not installed correctly, repeat the installation procedure and check that all steps were performed correctly. ### Configuring Squid To configure Squid, we open its configuration file with the following command:
sudo nano /etc/squid/squid.confAt the top of the file add the following lines:
via off
forwarded_for off
request_header_access Via deny all
request_header_access X-Forwarded-For deny all
half_closed_clients off
connect_timeout 30 seconds
read_timeout 60 seconds
request_timeout 30 seconds
persistent_request_timeout 30 seconds
Save the changes with `CTRL+S` and close the editor with `CTRL+X`. Then restart Squid with:
sudo systemctl restart squidThe proxy server is now operational within the local network via port 3128. To find the local IP address of the Raspberry Pi , use the command:
ifconfigOn a Windows computer this can be done with:
ipconfigSet up remote access to the proxy
To make the proxy reachable externally, port 3128 needs to be opened on the router. This process varies from router to router, but usually involves the following: 1. Find the router's IP address by running the `ifconfig` command on the Raspberry Pi or `ipconfig` on Windows. Typically, the router address is the local IP with the last digits replaced by `1` (for example `192.168.2.1`). 2. Open a web browser and enter this address. 3. Log into the router and find the "port forwarding" settings. 4. Open port 3128 for both incoming and outgoing traffic. 5. Save the changes. To allow Squid to accept external connections, add the following lines to the top of the config file:
acl all src 0.0.0.0/0
http_access allow all
Note: This will make the proxy publicly accessible. If you want to keep the proxy secure, follow these steps to enable authentication. To find your public IP address, visit a website like: - [https://ipchicken.com](https://ipchicken.com) - [https://whatismyip.com](https://whatismyip.com)
Set up authentication
To add a password and username, use the following commands:
You only use this the first time to create the password file. Replace "username" with your own username:
sudo htpasswd -c /etc/squid/passwords usernameFor additional users:
sudo htpasswd /etc/squid/passwords anotheruserNext, modify the Squid configuration by adding the following lines:
auth_param basic program /usr/lib/squid/basic_ncsa_auth /etc/squid/passwords
auth_param basic realm proxy
acl authenticated proxy_auth REQUIRED
# Vervang "http_access allow all" met:
http_access allow authenticated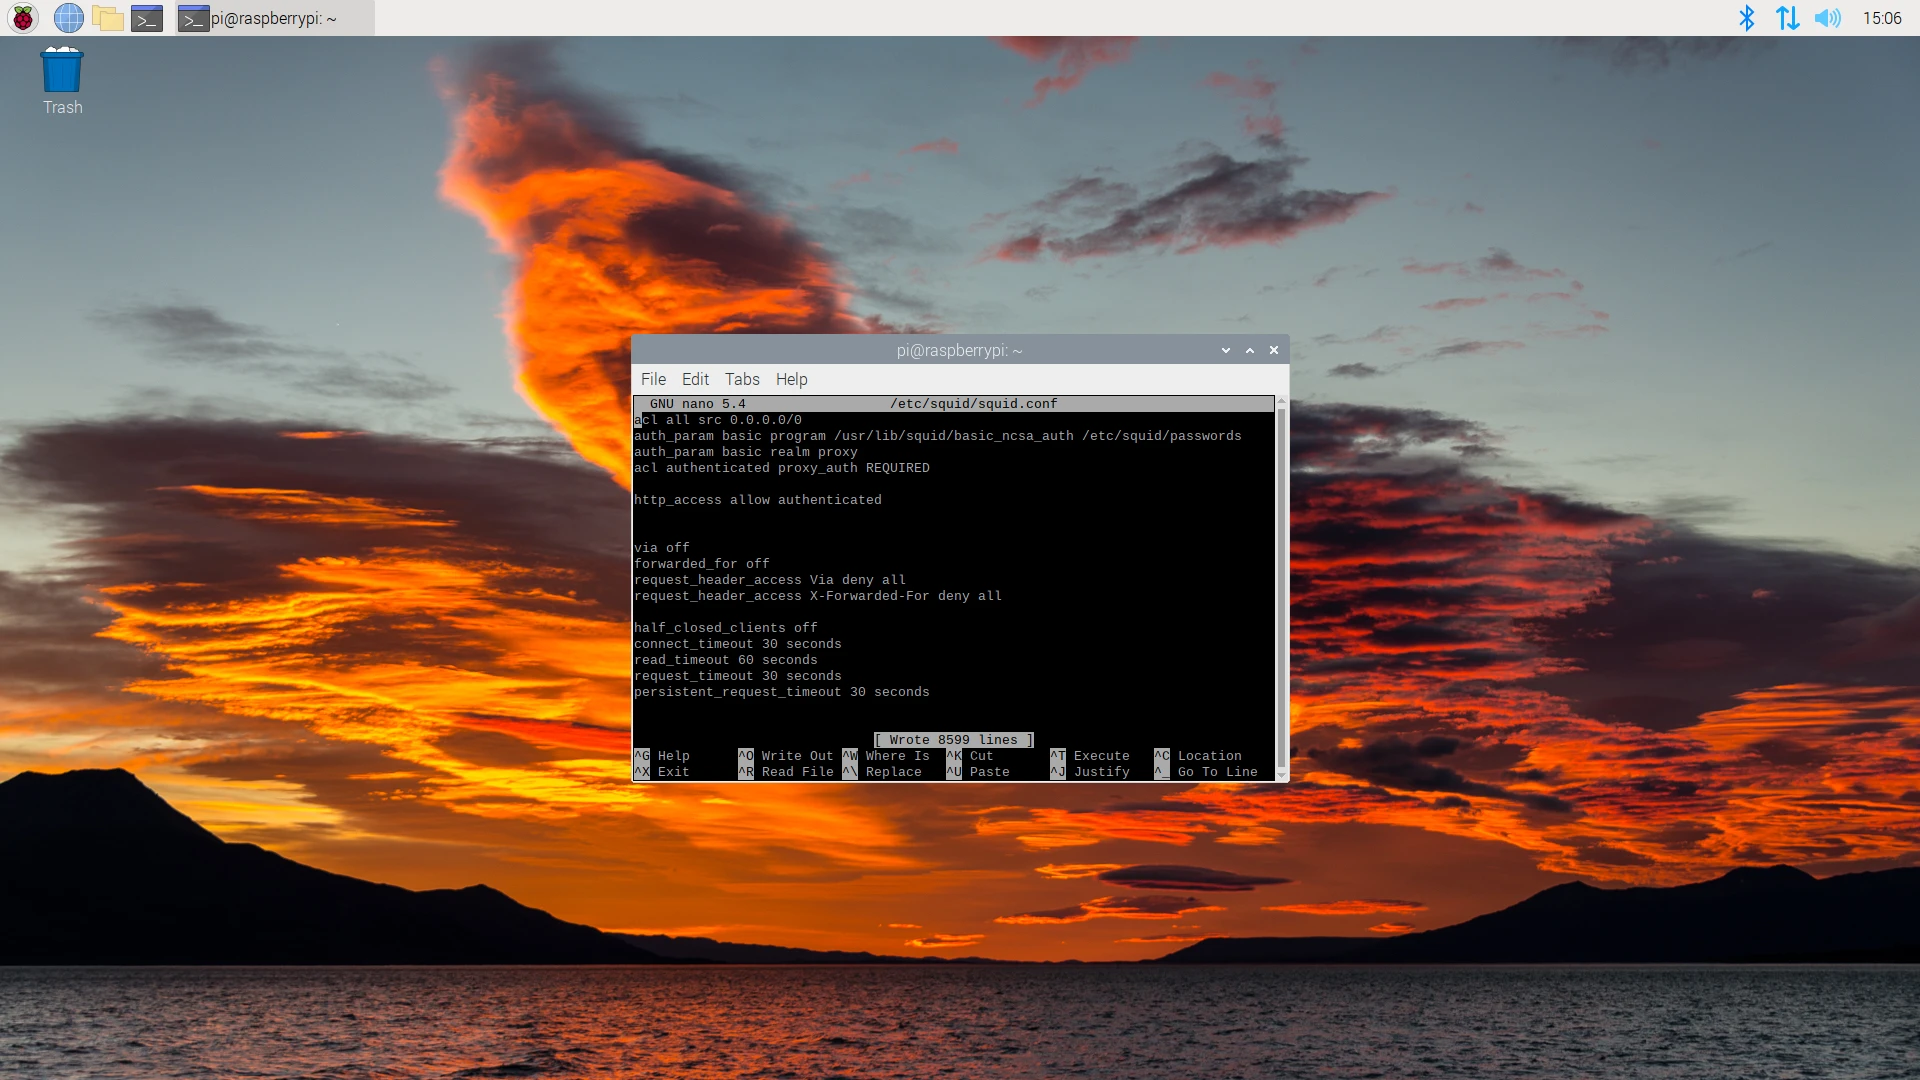
Restart the Squid service:
sudo systemctl restart squidTest proxy with authentication
To verify that the proxy is working properly, use the following command on a Windows PC:
curl -v -x http://gebruikersnaam:wachtwoord@lokaal_of_publiek_ip:3128 www.google.com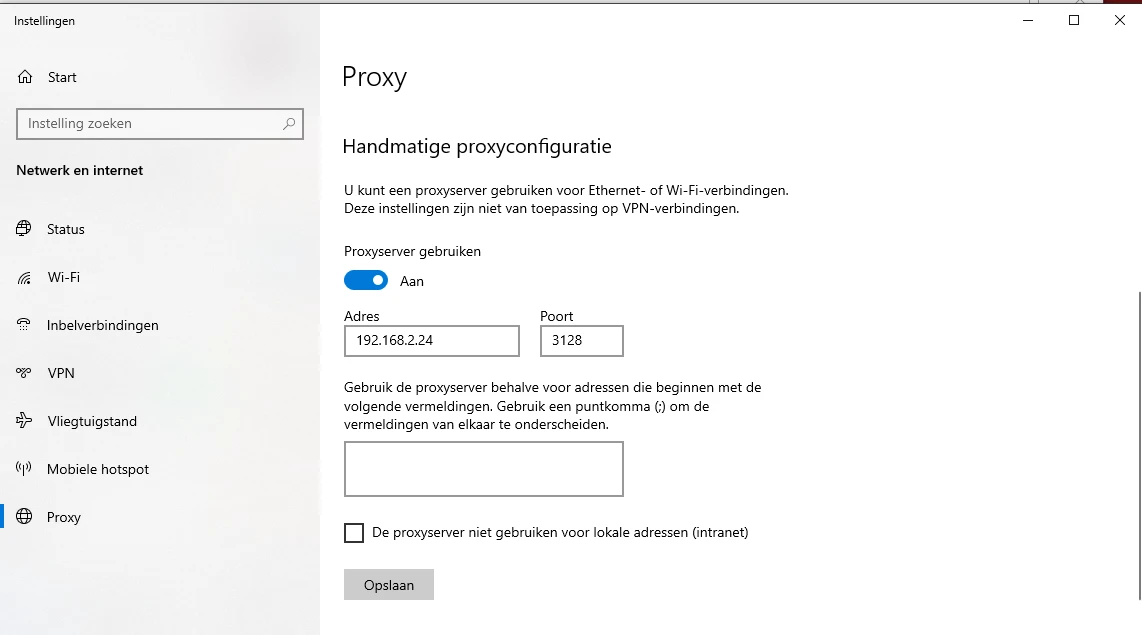
Your proxy server should now be working properly, both locally and remotely, with optional user authentication.