4.7 avg.
5183+ reviews5183+ reviews
Order by 16:00 for same day shipping
14 days return
EN
Individual
Business
Raspberry Pi project: Programming a calculator in Python
Connect & Startup
Insert the micro SD card (with Raspbian) into the micro SD card slot on the bottom of the Raspberry Pi . On the side of the Raspberry Pi 4B there are two Micro HDMI ports. Insert the Micro HDMI cable into the left port, and the HDMI end into a monitor. Connect a keyboard & mouse to the USB ports and finally insert the power cable into the USB-C port.
Your setup is now ready to boot. When you boot the Raspberry Pi you will see a desktop. During the first boot you will need to set some settings such as language, time, internet, etc. This is explained step by step and you only need to do this once.
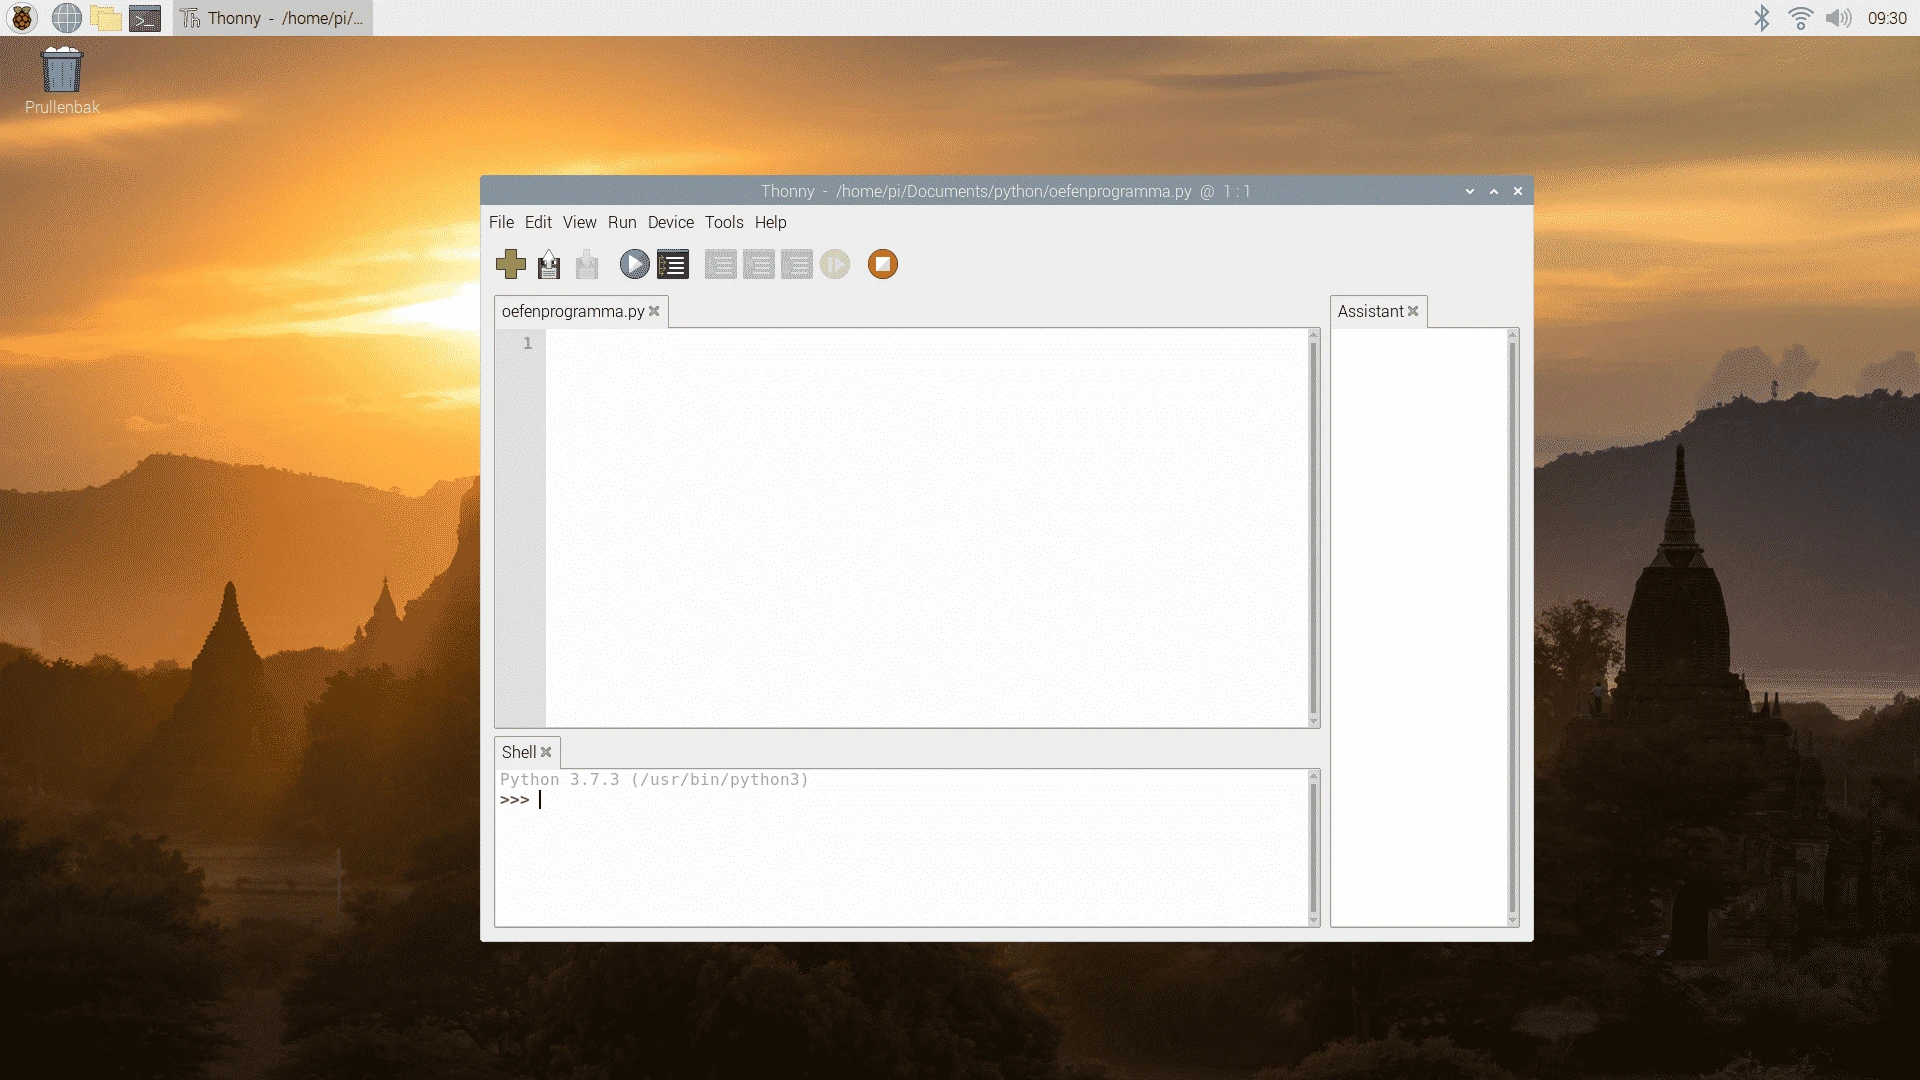
You start the Python IDE by selecting “Thonny Python IDE” from the main menu under “Programming”. You will then see this screen (figure 1):
Functions and statements
Python is the common programming language for writing software in Raspberry Pi . This example code is therefore written in Python. In the example code we use several functions and statements. Many of these functions may be unfamiliar, so we will discuss them one by one. Please note that Python is case-sensitive. This means that Python distinguishes between the input of words with and without capital letters. For example, some functions will not work if you type the word with a capital letter, because it should be with a lowercase letter, or the other way around.
Programming
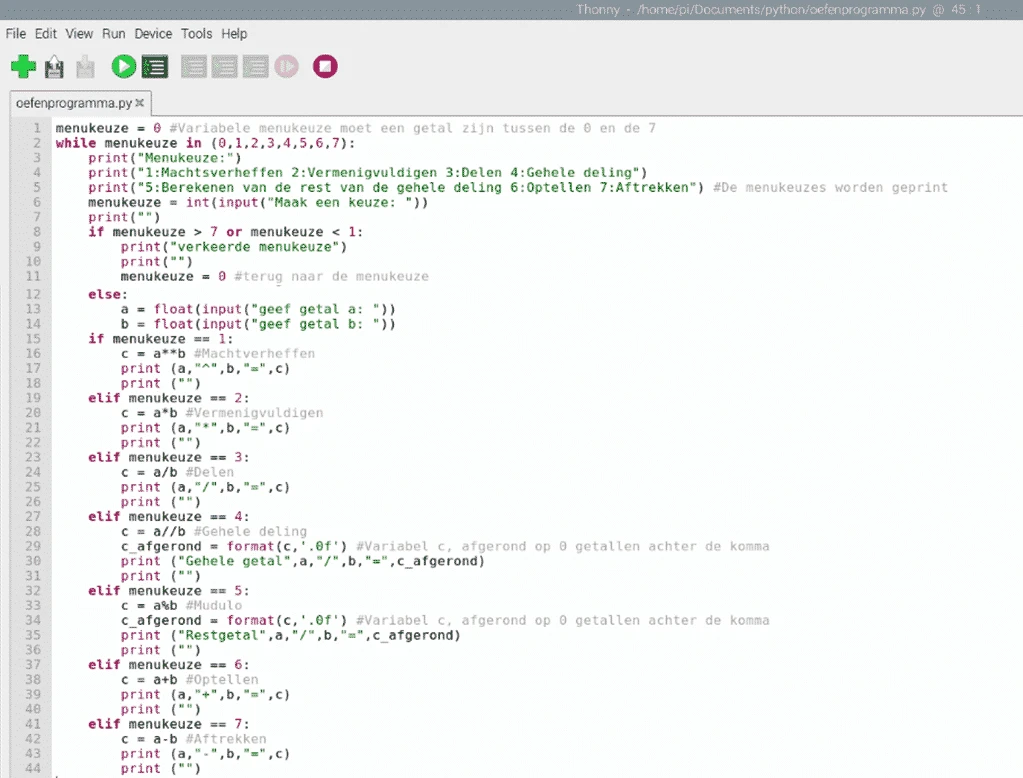
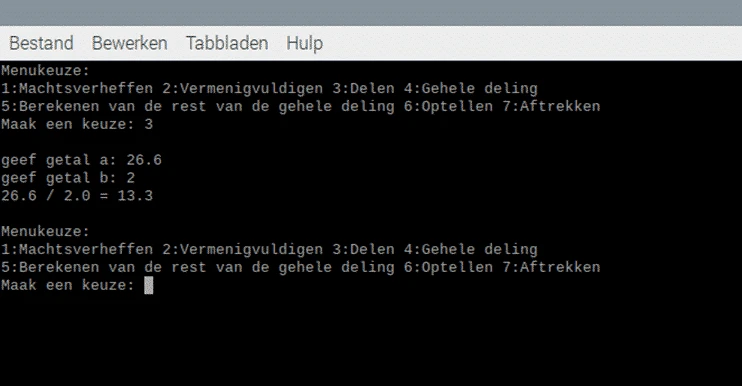
You can copy and paste the code below. We recommend that you copy the code yourself, as this will help you learn more. Don't forget to save the code in a logical place. Once you have entered and saved the example code (see figure 2), you can start the code. You can do this by pressing ctrl+t or by selecting "Run current script in terminal" under the heading "Run". When you start the code, you will first come to the menu option. Here you have to choose which function you want to use. Then enter the desired number and press enter. You will then be asked for two numbers that you want to use for the sum. The answer to the sum will be printed one line below (see figure 3). If the code gives an error message, you can look it up by using ctrl+F5 or by selecting "Debug current script (nicer)" under "Run".
menukeuze = 0 #Variabele menukeuze moet een getal zijn tussen de 0 en de 7
while menukeuze in (0,1,2,3,4,5,6,7):
    print(“Menukeuze:”)
    print(“1:Machtsverheffen 2:Vermenigvuldigen 3:Delen 4:Gehele deling”)
    print(“5:Berekenen van de rest van de gehele deling 6:Optellen 7:Aftrekken”) #De menukeuzes worden geprint
    menukeuze = int(input(“Maak een keuze: “))
    print(“”)
    if menukeuze > 7 or menukeuze < 1:
        print(“verkeerde menukeuze”)
        print(“”)
        menukeuze = 0 #terug naar de menukeuze
    else:
        a = float(input(“geef getal a: “))
        b = float(input(“geef getal b: “))
    if menukeuze == 1:
        c = a**b #Machtverheffen
        print (a,”^”,b,”=”,c)
        print (“”)
    elif menukeuze == 2:
        c = a*b #Vermenigvuldigen
        print (a,”*”,b,”=”,c)
        print (“”)
    elif menukeuze == 3:
        c = a/b #Delen
        print (a,”/”,b,”=”,c)
        print (“”)
    elif menukeuze == 4:
        c = a//b #Gehele deling
        c_afgerond = format(c,’.0f’) #Variabel c, afgerond op 0 getallen achter de komma
        print (“Gehele getal”,a,”/”,b,”=”,c_afgerond)
        print (“”)
    elif menukeuze == 5:
        c = a%b #Mudulo
        c_afgerond = format(c,’.0f’) #Variabel c, afgerond op 0 getallen achter de komma
        print (“Restgetal”,a,”/”,b,”=”,c_afgerond)
        print (“”)
    elif menukeuze == 6:
        c = a+b #Optellen
        print (a,”+”,b,”=”,c)
        print (“”)
    elif menukeuze == 7:
        c = a-b #Aftrekken
        print (a,”-“,b,”=”,c)
        print (“”)
If you have successfully completed this project, you will know how to use various functions in Python. For example, which calculations you can make, and which arithmetic operators you need for that. You can apply this later in many other projects.