Monday April 21st we are closed due to Easter Monday. Orders placed after Friday April 18th 16:00 will be shipped Tuesday April 22nd.
4.7 avg.
5137+ reviews5137+ reviews
Order by 16:00 for same day shipping
14 days return
EN
Individual
Business
Raspberry Pi project: Hungry bat
In this simple project you will learn how to make the game Hungry Bat in Scratch.
What is Hungry bat?
In this game your character is a bat. You can control it with the arrow keys. The goal of the game is to guide the bat to the taco without touching the yellow walls.
What is Scratch?
Scratch is a programming program on your Raspberry Pi . In this program you work with function blocks. This means that you do not write the programming text yourself. The blocks with the functions have already been made for you. You put these blocks in a diagram yourself. If you have downloaded the Raspbian software on your Raspberry Pi Scratch should be automatically on your Pi. If not, you must download it.
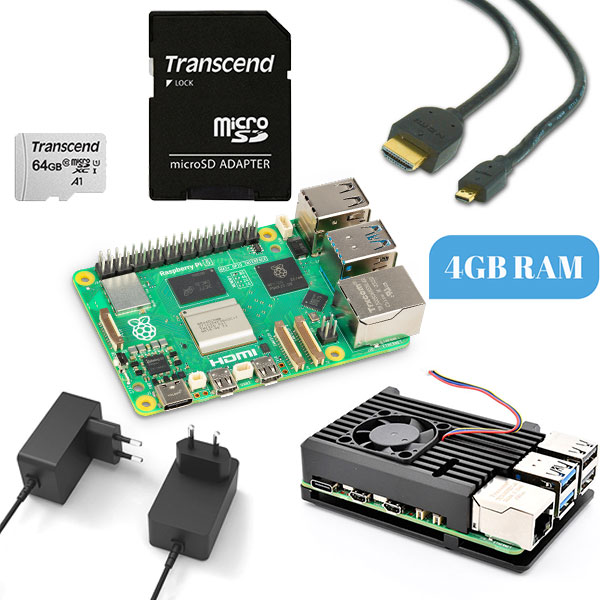
I program in Scratch on the Raspberry Pi 4 with 4GB. You can also program on the Raspberry Pi 3B+. You can also use the 1 GB or 2 GB with the Pi 4.
Are you programming in Scratch 2.0? Then you can still follow this tutorial. Keep in mind that certain functions may be in a different place. The images may also look different than on your screen. You can follow this tutorial because the code is the same.
Change language
Your program is probably in English. To follow the steps properly, it is wise to change the language in your program. You can change the language by clicking on the “globe” at the top left of your screen. This icon can be found next to the Scratch logo. Select Dutch.
Connect & Startup
On the side of the Raspberry Pi 4B are two Micro HDMI ports. Insert the Micro HDMI cable into the left port, and the HDMI end into a monitor or display.
Connect a keyboard & mouse to the USB ports and finally insert the power cable into the USB-C port.
Your setup is now ready to be booted.
When the Raspberry Pi starts up now you will see a desktop on your monitor. When you first start it up you still have to set it up, but that is explained step by step.
Programming
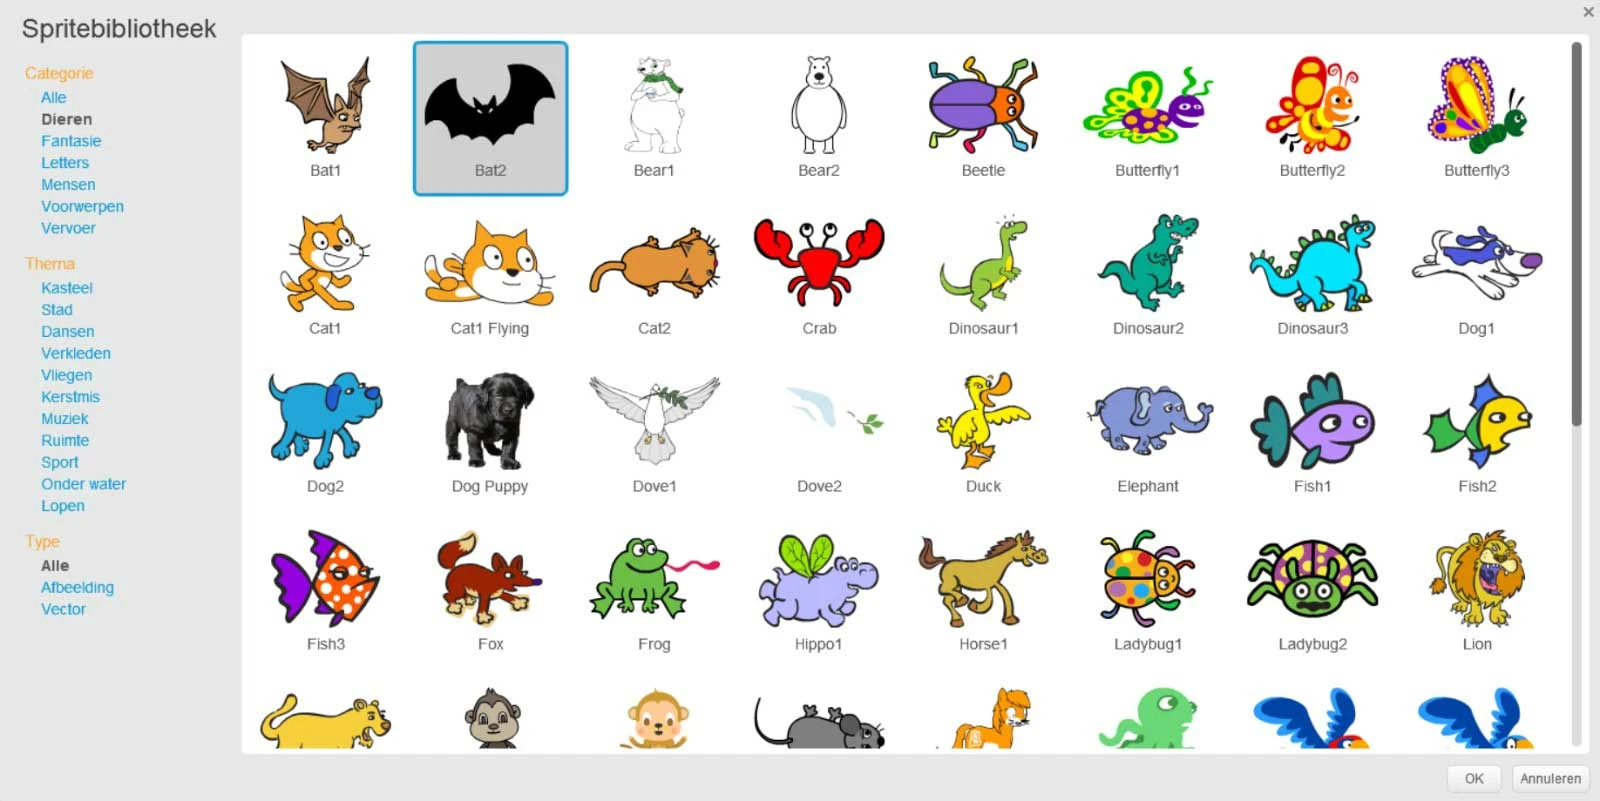
First we are going to choose a character. Next to the text: New Sprite: if you see a head, click on it. Now you see all the standard Sprites (characters). For this example I choose Bat2 (Figure 1). But of course you can also choose another character. If you have chosen a nice character, press OK. You can delete the standard character. Click on the icon with your right mouse button. Then click on delete
Now we're going to write the code so that your character can be controlled.
- Go to Events and grab the “when (flag) is clicked”.
- Go to Movement and grab the “go to X:– Y:–” place it under the start function.
- Determine for yourself where you want the ball to start, for convenience I do it at the top left of the screen. You can always adjust it later. When you know where you want to start, read the X and Y values and fill them in.
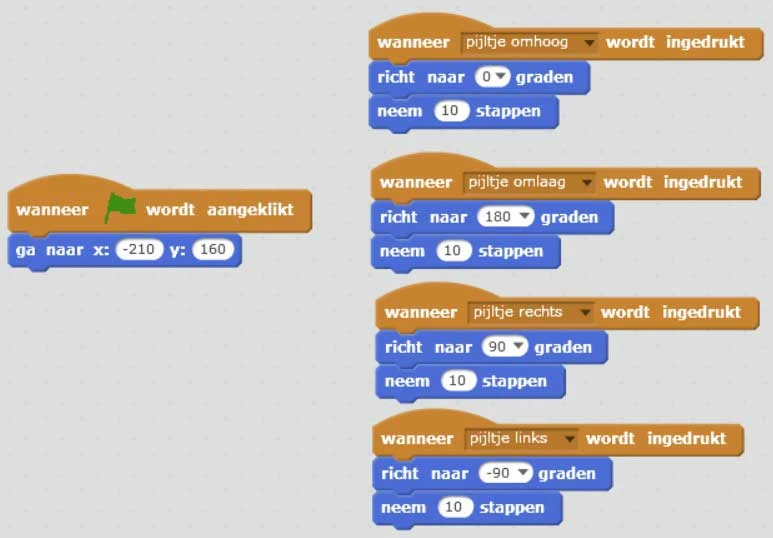
- Go to Events and grab the “when — is pressed” place it next to the code on your screen. Check the up arrow.
- Copy this block 3 more times. Also put these next to each other on your screen. Also label these blocks arrow down, right and left.
- Go to Motion and take the “point to – degrees” and the “take – steps”. Put this function under “when up arrow is pressed”. The order of these functions does not matter.
- Copy these 2 functions and put them under the rest of the “when – is pressed”
- For arrow up, enter: aim 0 degrees. Take 10 steps.
- For down arrow enter: aim 180 degrees. Take 10 steps.
- For arrow right, enter: aim 90 degrees. Take 10 steps.
- For arrow left, enter: aim -90 degrees. Take 10 steps.
- The grades determine the direction the character moves. The number of steps determines how fast he moves.
- Test for yourself whether your code works.
- Your code will look something like this (Figure 2).
Now we are going to make our maze. We do this in the background. Choosing a background is a bit the same as choosing your character. Because we are going to make our own background, we click on the brush. With the square you can draw walls around which you have to let the character move. Experiment a bit to see what you like. By drawing these walls you can make the game more difficult by placing them close together, or easier by making the distances greater (Figure 3).

Now we create the finish.
- Create a new Sprite (character). When your character reaches the finish line you have won the game. For the finish line I choose the taco, place it in the background. Remember that where you place it is your finish line.
- Go back to your bat code.
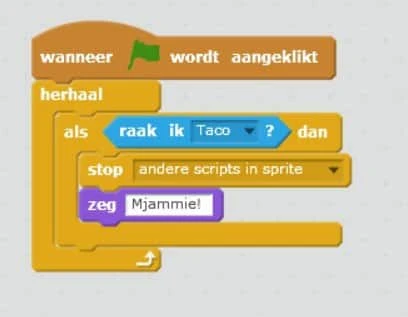
- Go to Events and grab the “when (flag) is clicked”.
- Then go to Controls and grab the repeat block. Put it under the start function.
- Next, take the “if then” block and place it in the repeat block.
- Go to Observe and grab the “do I touch –?” put this function between the “if then”. Press the arrow and select the taco.
- Then go to Appearances and grab the “say –“. After the say, write for example “Yummy!”.
- Go to control and grab the “stop” function. Press the arrow and look for “all scips in Sprite”. Place this above the say function.
- Test for yourself whether the code works.
- Your code should now look something like this (Figure 4).
- On your screen it will look something like this (Figure 5).
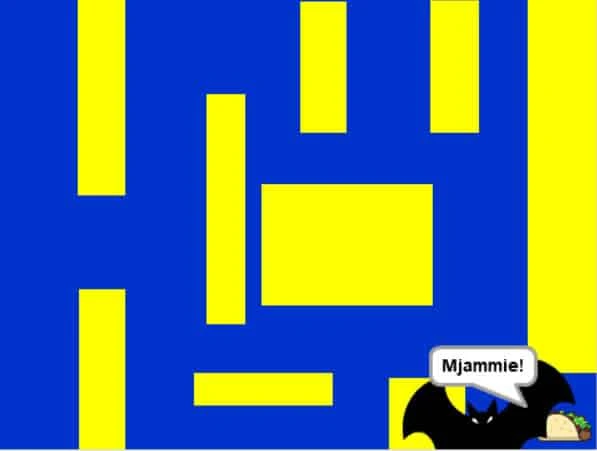
As you can see, my character is too big (Figure 5), it hits the yellow walls directly. We are going to adjust this.
- To change the size of the character we go to Appearances and choose the “make size with –%” function. Place it under the start function.
- Change the percentage to your liking, the lower the percentage the smaller your character will be.
- After you resize your character will probably be out of position. Adjust the X and Y values again for this starting position.
The bat has an extra appearance created by default. To check if your character has this too, go to Appearances. There you should see 2 or more versions of your character. You can also create an appearance yourself.
- To animate our character we go to Control. Grab a repeat block and place it at the bottom of your start function.
- Go to Looks and grab a “next look” and put it in the repeat block.
- Go to Controls and grab a “wait – seconds” function. Put this at the bottom of the repeat block. You can adjust the number of seconds to make the animation faster or slower.
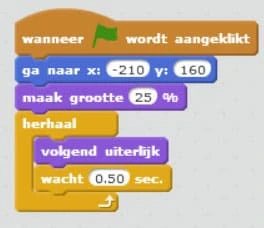
- Your code should now look something like this (Figure 6). (The X and Y values are different after I adjusted them to the size of the character.)
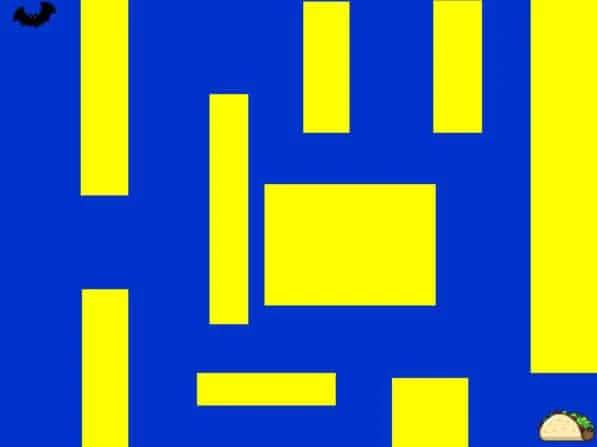
- On your screen it will still look something like this (Figure 7).
- Go to Controls and grab a “wait – seconds” function. Put this at the bottom of the repeat block. You can adjust the number of seconds to make the animation faster or slower.
- Your code should now look something like this (Figure 6). (The X and Y values are different after I adjusted them to the size of the character.)
- On your screen it will still look something like this (Figure 7).
Now we will create a loss function.
- Go to Events and grab the “when (flag) is clicked”.
- Then go to Controls and grab the repeat block. Put it under the start function.
- Take the “If—Then” block and put it in the repeat block.
- Grab the “stop –” and check the option “all scripts in sprite”. Put this function in the “If—then”
- Go to observe and grab “do i touch color –” and put it between “If—then”. Click on the colored box in the code and then click on one of your walls (yellow).
- Next, in Appearances, grab the “say” function. Place it in the “If—then” block. After say, write: Game over.
- Test for yourself if the code works, your character will say “Game over” when it touches a yellow wall. At that moment you can no longer control it.
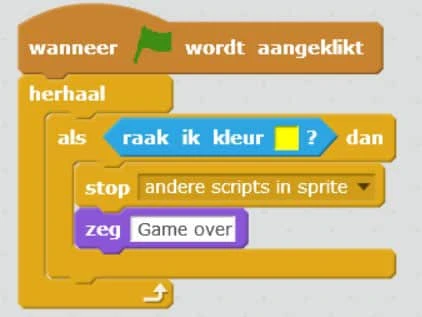
- Your code should now look something like this (Figure 8).
Now you are done with your hungry bat game! Did you enjoy making it? Experiment a bit with this program. You can try adding sound effects yourself. Or you can add other objects in the game that the character has to collect. Have fun!