In this project you will learn how to Raspberry Pi Domoticz installs. With Domoticz you can control the home automation in your home via your web browser.
There have been some problems with Raspberry 5 and domoticz, see at the bottom of the document what the problem could be and how to solve it.
This manual covers:
- Supplies
- De Raspberry Pi prepare
- De Raspberry Pi Set up
- Install Domoticz
- Access the web interface
- Level - Beginner 30%
- Duration - 20-30 min 35%
- Cost - € 75,75 to € 133,69 50%
You need:
- Raspberry Pi 3,4 of 5
Raspberry Pi 5
Raspberry Pi 4
Raspberry Pi 3 - Micro SD card, 16GB or more
- Raspberry Pi nutrition
Nutrition Raspberry Pi 5
Nutrition Raspberry Pi 4
Nutrition Raspberry Pi 3 - Raspberry Pi Case
Case Raspberry Pi 5
Case Raspberry Pi 4
Case Raspberry Pi 3 - Ethernet cable (optional, but recommended)
- Raspberry Pi imager
Instant download - Advanced IP scanner
- SSH file
- WiFi configuration document (only if you do not have a wired (Ethernet) connection)
- P1 Smart meter cable (Optional)
Step 1: You Raspberry Pi prepare
Now that you've got everything ready, let's start installing Raspbian Lite. Raspbian Lite is the lightest version of Raspbian, the OS for the Raspberry Pi. Insert your micro SD card into your computer via an adapter and start the Raspberry Pi imager on. stand the Raspberry Pi imager to make adjustments to your system.
What you will see now is the following:

We will first select an Operating System (OS). In this case, Raspbian Lite.
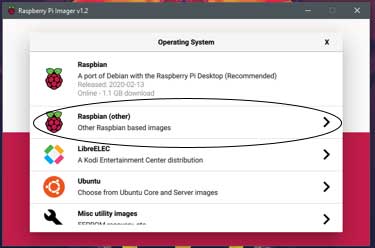
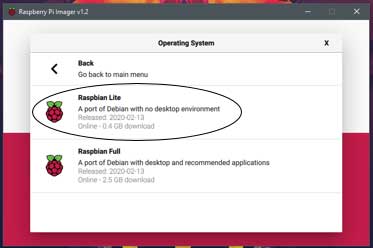
Now that you have selected your OS, it is time to select the correct SD card.

We use a 16GB micro SD card. What you see here may differ based on your micro SD card.

If you have selected your micro SD card you will arrive at the next screen.
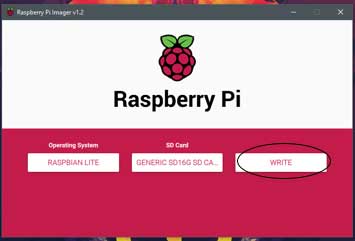
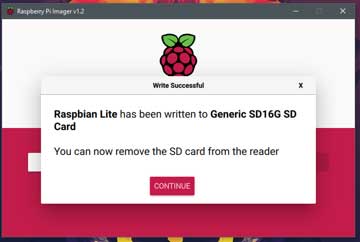
You will now go through the next three screens. When the writing process is finished, you can close the imager. Then remove the micro SD card.


Step 2: De Raspberry Pi Set up
Now that you have Raspbian Lite installed on your micro SD card, it is time to make some adjustments to the settings. Be the first to insert the micro SD card back into the computer. This process consists of a step that you only need to perform if you do not have an Ethernet connection. The second step is necessary for both an Ethernet connection and a wireless connection.
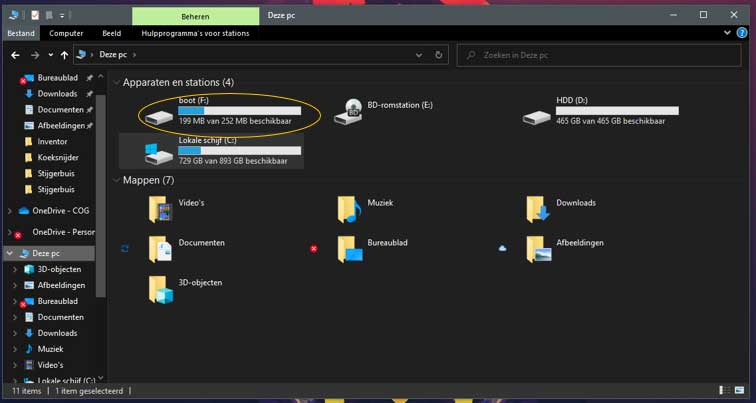
We are going to work in the “boot” disk. In this you will find something similar to the following photo.
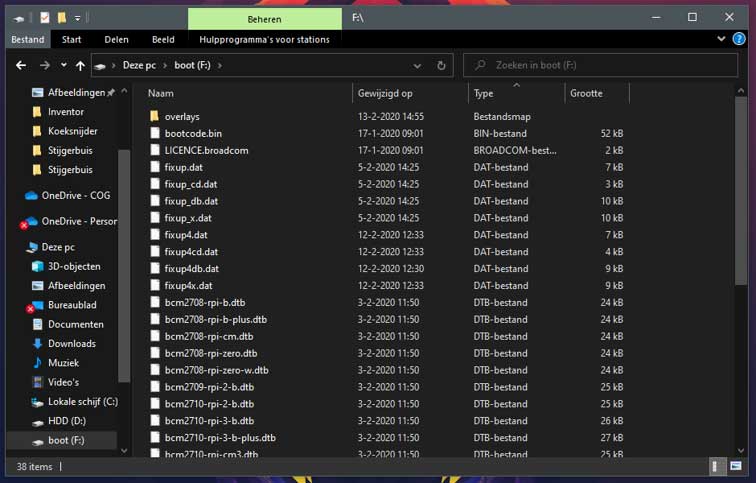
What we are going to do now is edit the ”wpa_supplicant.conf” 'and add it to the ”boot” disk. You should have downloaded this file from supplies. If not, look below this text. Open the document with notepad. You should now see the following text. If not, copy the following text.
ctrl_interface = DIR = / var / run / wpa_suppliant GROUP = netdev
update_config = 1
country = NL
network = {
ssid = "Your_Network_Name"
psk = "Your_Network_Password"
key_mgmt = WPA-PSK
}
Now change “Your_Network_Name” and “Your_Network_Password” with your WiFi's name and password.
In our case:
Name: Electronics For You
Password: Electronics @ 123
Here you see an example of the end result.
ctrl_interface = DIR = / var / run / wpa_suppliant GROUP = netdev
update_config = 1
country = NL
network = {
ssid = "Electronics For You"
psk = ”Electronics @ 1234 ″
key_mgmt = WPA-PSK
}
If you do not want your WiFi password to be readable in the configuration file, use the following to encrypt the key.
wpa_passphrase “Your_Network_Name”
Then enter your WiFi password and you will receive an encrypted key in response.
Change the above configuration:
FROM
psk = "Your_Network_Password"
to
psk=17235aaa79fff0-932781590872387954237548127
(note: WITHOUT quotes)
If you have edited this document and saved it to the "boot" disk you can go to the next step.
Step 2.2: Configure remote approach
Go to the windows explorer and then to this computer. Now click on the hard drive named: ”boot”. And paste the following file here: ssh
You are now ready to install domoticz. Remove the micro SD card from your PC and put the micro SD card in your Raspberry Pi. Now connect the Raspberry Pi with your power supply and possibly with an Ethernet cable.
Step 3: Install Domoticz
We are now going to connect to our Raspberry pi. This process consists of two steps. Finding the IP address of the Raspberry and connecting and installing domoticz.
If you have a keyboard and screen connected, you can also log into the terminal and run the following command.
ip ace
This allows you to see both the WiFi and wired IP numbers.
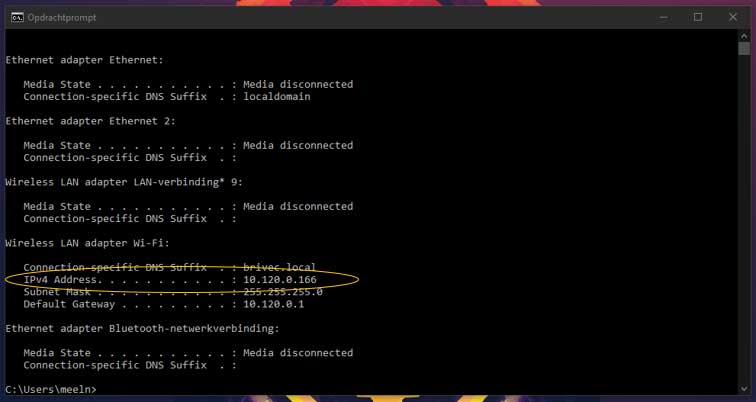
Then you will see something similar to the photo on the right.
Search for IPv4 Address. Here you will find your IP address. This is important for finding the IP address of your Raspberry Pi.
Your IP address will consist of xxxx, in our case 10.120.0.166.
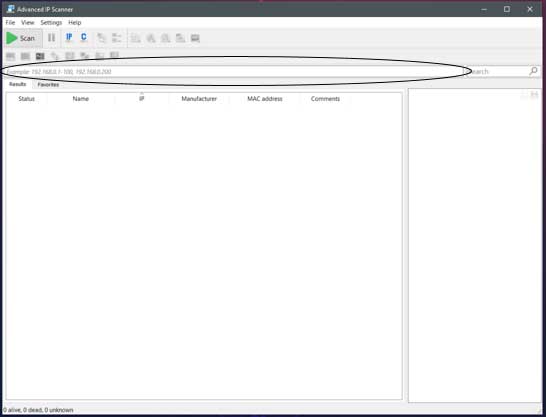
Open now advanced IP scanner, a preparation program.
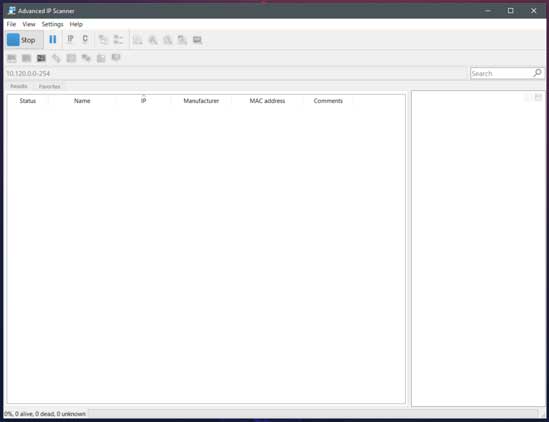
You will see this now. In the circled line type xxx0-254, so in our case 10.120.0.0-254.
Then click Scan.
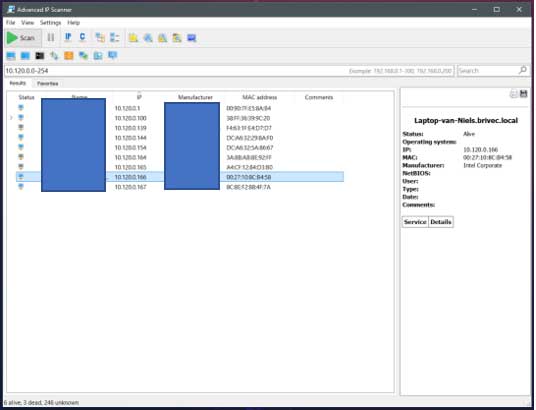
You will now see a list of Device names, IP addresses, Manufacturers and MAC addresses. At the Raspberry Pi unfortunately we can't see a manufacturer or name. So we're going to search by MAC address. A MAC address consists of XX:XX:XX:XX:XX:XX. At a Raspberry Pi it always starts with DC:A6:32: or B8:27:EB: . Now look for such a MAC address and see which IP address it contains. In our case '10.120.0.154'.
Step 3.2: Connecting with you Raspberry Pi
Go back to the windows search bar and type 'cmd'. Click on enter.
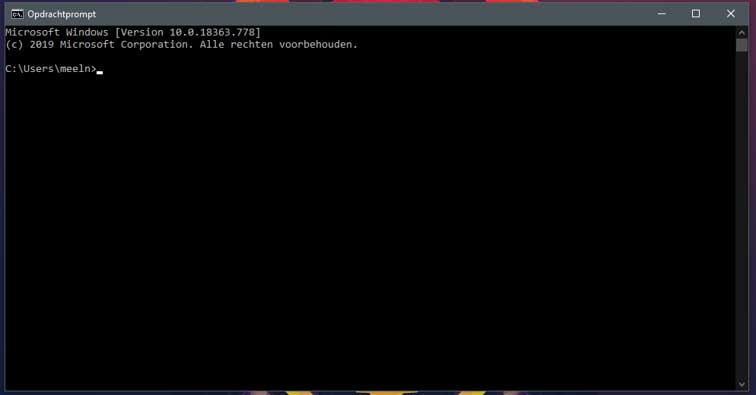
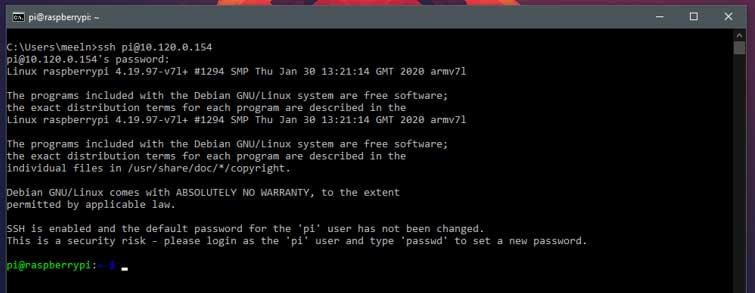
You will now see the following screen.
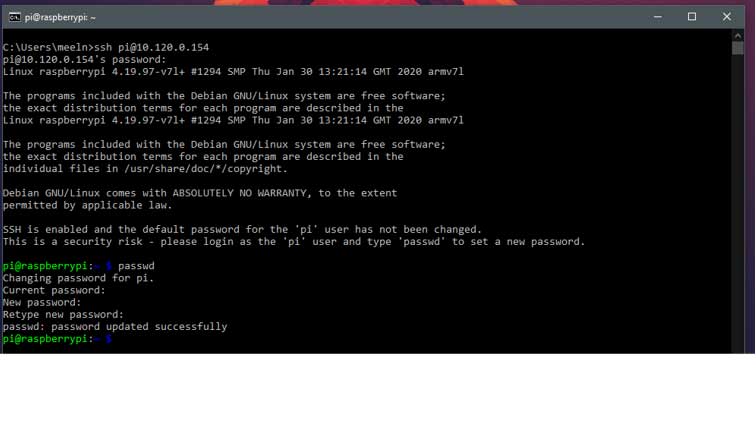
Now type 'ssh pi@xxxx', where xxxx is the IP address of your Raspberry Pi is. So in our case it becomes 'ssh pi@10.120.0.154'. After filling in, click on enter.
You will be asked for a password. The default password is 'raspberry'. Enter this password. While typing passwords, no characters will appear. This is normal. Click enter after entering your password.
You are now logged in to your Raspberry Pi. The first thing we are going to do is create a new password so that not everyone can access your Raspberry Pi can. Type 'passwd' and hit enter. Type your current password and twice the new password. Click enter after each password.
You now have a secure, accessible only to you Raspberry Pi. We still need to perform a few more steps until the domoticz is ready for use. Type the command 'sudo apt-get update' and hit enter. Wait for the process to finish. This command updates you Raspberry Pi.
Now that we have prepared everything, the time has finally come. We are going to install domoticz. Type the command 'sudo su'. Then type
'curl -sSL install.domoticz.com | sudo bash". Click on enter.
If you want to reconfigure the ports, you can run the above command again.
You will then be given the option to reconfigure.
You can also indicate here whether you only want http access via port 8080, or https over port 443
A number of configurable settings will then appear. We recommend the default settings, but if you have already installed OpenMediaVault change port 8080 to 8888. You can navigate through the steps with enter.
raspberry 5
The current version of the Raspberry OS Bookworm has not had support for the library libssl1.1 for a while.
A well-known workaround was to disable SSL in the config.
DAEMON_ARGS=”$DAEMON_ARGS -sslwww 0″
Since some people still experienced problems, we have a working installation manual for you below.
We put Raspberry OS (bookworm) on the SD card (full) with the imager and placed it in an RPi5.
After the automatic update of the OS, we executed the command below.
sudo bash -c “$(curl -sSfL https://install.domoticz.com)”
We turned on http on 8080 and https (ssl) on 443
After a reboot, domoticz was available over both http and https
(of course a warning because the certificate is not valid from the SSL, but this is normal behavior.)
In our case, the good SSL library was immediately installed properly on the OS
(This is a new package included in the OS last month?)
There was also no problem with automatic starting.
Below is some additional debugging information that may help you with an existing installation.
root@raspberrypi:~# lsb_release -a
No LSB Modules ARE Available.
Distributor ID: Debian
Description: Debian GNU/Linux 12 (bookworm)
Release: 12
Code name: bookworm
root@raspberrypi:~# ldd /home/pi/domoticz/domoticz | grep libssl
libssl.so.1.1 => /lib/aarch64-linux-gnu/libssl.so.1.1 (0x00007fff5d250000) <——— this was the problematic library that was not included by default with RPi OS.
root@raspberrypi:~# ss -tulips | grep domo
tcp LISTEN 0 128 *:6144 *:* users:((“domoticz”,pid=2025,fd=25)) ino:20841 sk:3 cgroup:/system.slice/domoticz.service v6only:0 <->
tcp LISTEN 0 128 *:8080 *:* users:((“domoticz”,pid=2025,fd=11)) ino:20825 sk:4 cgroup:/system.slice/domoticz.service v6only:0 <->
tcp LISTEN 0 128 *:443 *:* users:((“domoticz”,pid=2025,fd=18)) ino:20832 sk:5 cgroup:/system.slice/domoticz.service v6only:0 <->
if you don't have this library:
apt-get update
apt-get install libssl1.1
Manually downloadable here:
(https://archive.raspberrypi.com/debian/pool/main/o/openssl/libssl1.1_1.1.1w-0~deb11u1+rpt1_arm64.deb)
The error message if this library is missing looks like this:
sudo journalctl -u domoticz
Nov 12 21:38:49 RaspPi systemd[1]: Starting domoticz.service – LSB: Home Automation System…
Nov 12 21:38:49 RaspPi domoticz.sh[9933]: Time synchronized, starting Domoticz…
Nov 12 21:38:49 RaspPi domoticz.sh[9941]: /home/pi/domoticz/domoticz: error while loading shared libraries: libssl.so.1.1: cannot open shared object file: No such file or directory
Step 4: The web interface
To connect to the web interface, go to your ip address in your web browser Raspberry Pi, xxx.xxx.xxx.xxx, and then type “:” and the port you chose. If all goes well, 8080 or 8888. In our case we go to http://10.120.0.154:8080 or http://10.120.0.154:8888 (https://10.120.0.154)





I bought the domiticz kit from you. unfortunately I can't get into the raspberry with no way. I emailed you, but I have not had any response. the ssh pi @ command times out on port 22
what to do?
Hi Rob,
Curious that you have not received an answer to your email? We have to find out this. Could you send the email to simon@electronicsvoorjou.nl? Then I'll pick it up.
Yours faithfully,
Simon
Electronics For You
I follow everything super but can not log in with the ip address this site is not safe.
Hello Theo,
Here you can find more information about HTTPS & SSL.
https://www.domoticz.com/wiki/Native_HTTPS_/_SSL_support
Good luck with the project!