IIn this project you will learn how to Raspberry Pi based NAS with Open Media Vault. NAS stands for Network Attached Storage. This means that you can connect to this storage from any computer via the internet.
This Raspberry Pi NAS manual covers:
- Supplies
- De Raspberry Pi prepare
- De Raspberry Pi Set up
- Open Install Media Vault
- Configure Open Media Vault
- Connect to your NAS
After this manual you will know how to Raspberry Pi 4 you can make your own NAS.
- Level - Medium 50%
- Duration - 90-120 min 66%
- Costs - € 75,75 to € 133,69 exc. external storage 50%
Supplies Raspberry Pi NAS projects:
- Raspberry Pi 4
Raspberry Pi 4 - Micro SD card, 16GB or more
- Raspberry Pi nutrition
Nutrition Raspberry Pi 4 - Raspberry Pi Case
Case Raspberry Pi 4 - Ethernet cable (optional, but recommended)
- USB stick (s) and / or one or more hard disks with USB adapter
- Raspberry Pi imager
Instant download - Advanced IP scanner
- SSH file
- WiFi configuration document (only if you don't have an ethernet connection)
Step 1: You Raspberry Pi prepare
Now that you've got everything ready, let's start installing Raspbian Lite. Raspbian Lite is the lightest version of Raspbian, the OS for the Raspberry Pi. Insert your micro SD card into your computer via an adapter and start the Raspberry Pi imager on. stand the Raspberry Pi imager to make adjustments to your system.
You will now see the following:
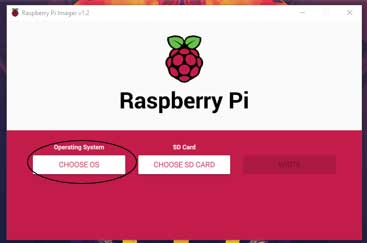
We will first select an Operating System (OS). In this case, Raspbian Lite.
In the new version of the Imager this is under Raspberry Pi OS (other). Here it is called Raspberry Pi OSLite.
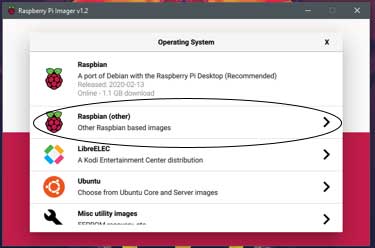
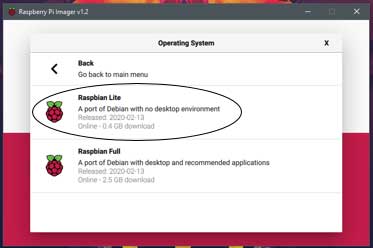
Now that you have selected your OS, it is time to select the correct SD card.
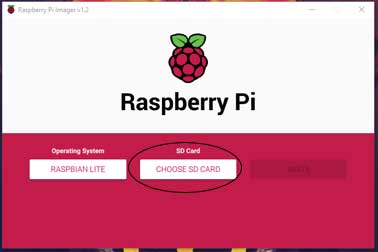
We use a 16GB micro SD card. What you see here may differ based on your micro SD card.
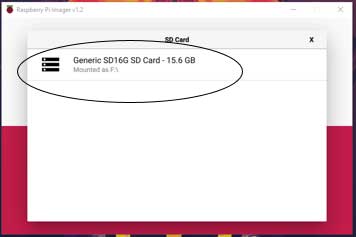
We use a 16GB micro SD card. The text may differ depending on your SD card.
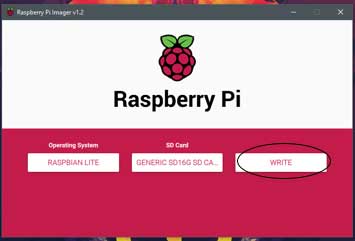
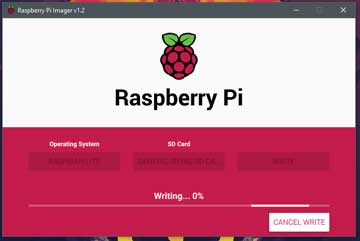
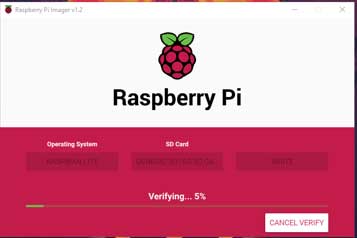
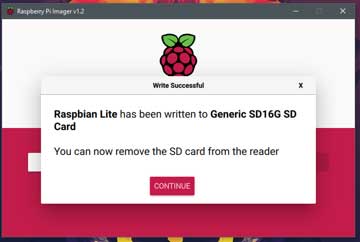
You will now go through the next three screens. When the writing process is finished, you can close the imager. Then remove the micro SD card.
Step 2: De Raspberry Pi Set up
Now that you have Raspbian Lite installed on your micro SD card, it is time to make some adjustments to the settings. Be the first to insert the micro SD card back into the computer. This process consists of a step that you only need to perform if you do not have an Ethernet connection. The second step is necessary for both an Ethernet connection and a wireless connection.
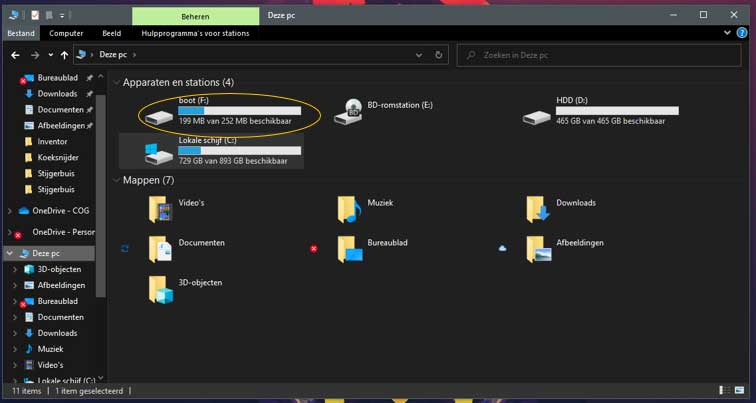
We are going to work in the “boot” disk. Again, the image on the right is similar to your screen.
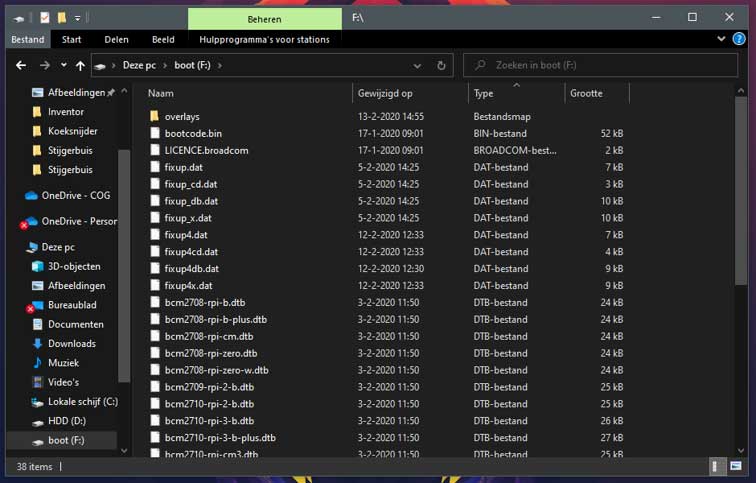
What we are going to do now is edit the ”wpa_supplicant.conf” 'and add it to the ”boot” disk. You should have downloaded this file from supplies. If not, look below this text. Open the document with notepad. You should now see the following text. If not, copy the following text.
ctrl_interface = DIR = / var / run / wpa_suppliant GROUP = netdev
update_config = 1
country = NL
network = {
ssid = "Your_Network_Name"
psk = "Your_Network_Password"
key_mgmt = WPA-PSK
}
Now change “Your_Network_Name” and “Your_Network_Password” with your WiFi's name and password.
In our case:
Name: Electronics For You
Password: Electronics @ 123
Here you see an example of the end result.
ctrl_interface = DIR = / var / run / wpa_suppliant GROUP = netdev
update_config = 1
country = NL
network = {
ssid = "Electronics For You"
psk = ”Electronics @ 1234 ″
key_mgmt = WPA-PSK
}
If you have edited this document and saved it to the "boot" disk you can go to the next step.
Step 2.2: Configure remote approach
Go to the windows explorer and then to this computer. Now click on the hard drive named: ”boot”. And paste the following file here: ssh
You are now ready to install Open Media Vault. Remove the micro SD card from your PC and put the micro SD card in your Raspberry Pi. Now connect the Raspberry Pi with your power supply and possibly with an Ethernet cable.
Order the Ebook Getting Started With Raspberry Pi!
FROM €24,99 for € 4,99
Order our Ebook now to get started with Raspberry Pi and read everything you need to know if you are starting with Raspberry Pi. In addition to all the information, there are 6 instructive example projects in the book!

Step 3: Install Open Media Vault
We are now going to connect to our Raspberry pi. This process consists of two steps. Finding the IP address of the Raspberry and connecting and installing Open Media Vault.
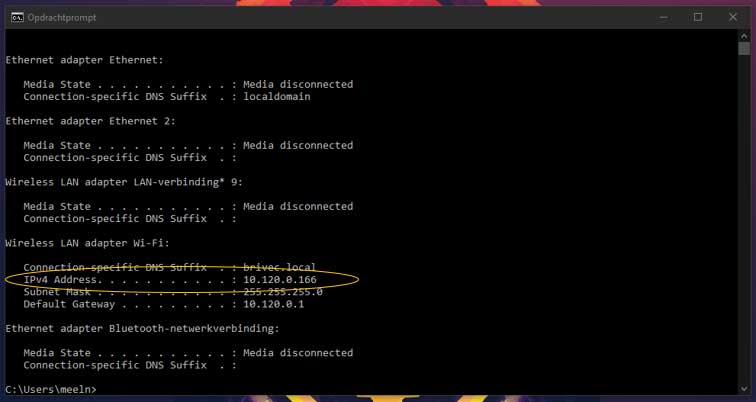
You will see the following screen.
Search for IPv4 Address. Here you will find your IP address. This is important for finding the IP address of your Raspberry Pi.
Your IP address will consist of xxxx, in our case 10.120.0.166.
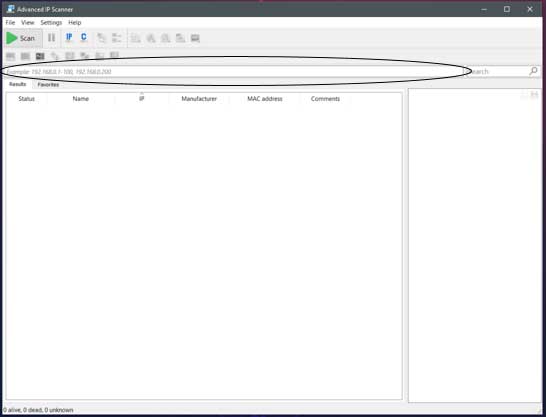
Open now advanced IP scanner, a preparation program.
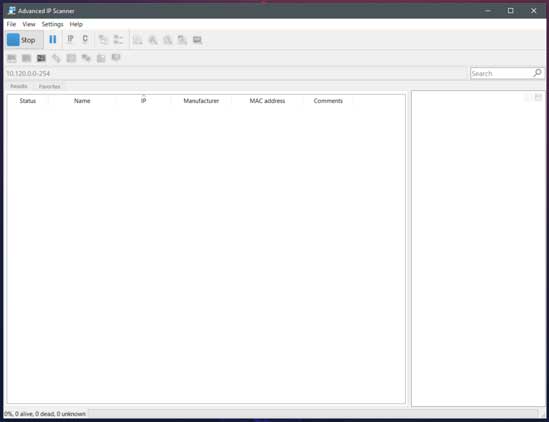
You will see this now. In the circled line type xxx0-254, so in our case 10.120.0.0-254.
Then click Scan.
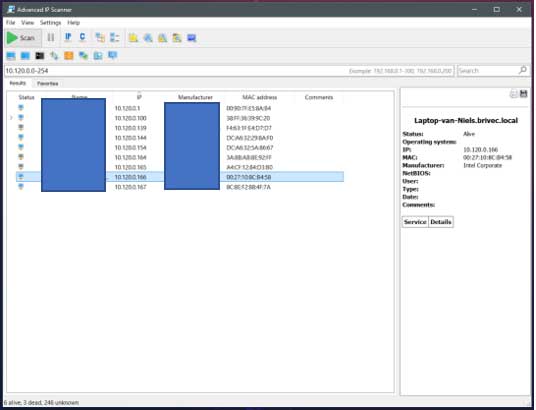
You will now see a list of device names, IP addresses, manufacturers and MAC addresses. At the Raspberry Pi unfortunately we can't see a manufacturer or name. So we're going to search by MAC address. A MAC address consists of XX:XX:XX:XX:XX:XX. At a Raspberry Pi always starts with DC:A6:32: or B8:27:EB: . Now look for such a MAC address and see which IP address it contains. In our case '10.120.0.154'.
Step 3.2: Connecting with you Raspberry Pi
Go back to the windows search bar and type 'cmd'. Click on enter.
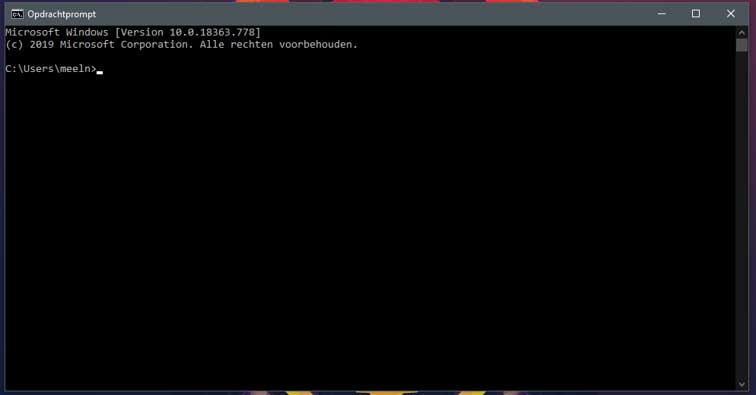
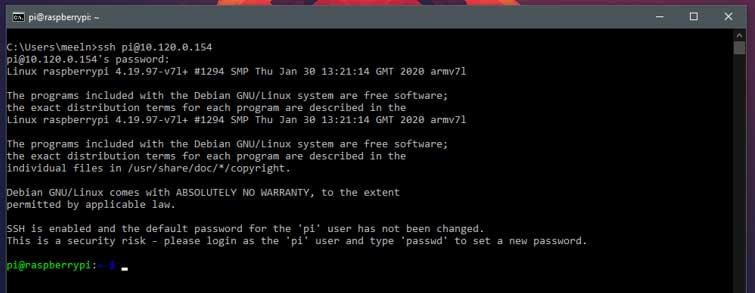
You will now see the following screen.
Now type 'ssh pi@xxxx', where xxxx is the IP address of your Raspberry Pi is. So in our case it becomes 'ssh pi@10.120.0.154'. After filling in, click on enter.
You will be asked for a password. The default password is 'raspberry'. Enter this password. While typing passwords, no characters will appear. This is normal. Click enter after entering your password.
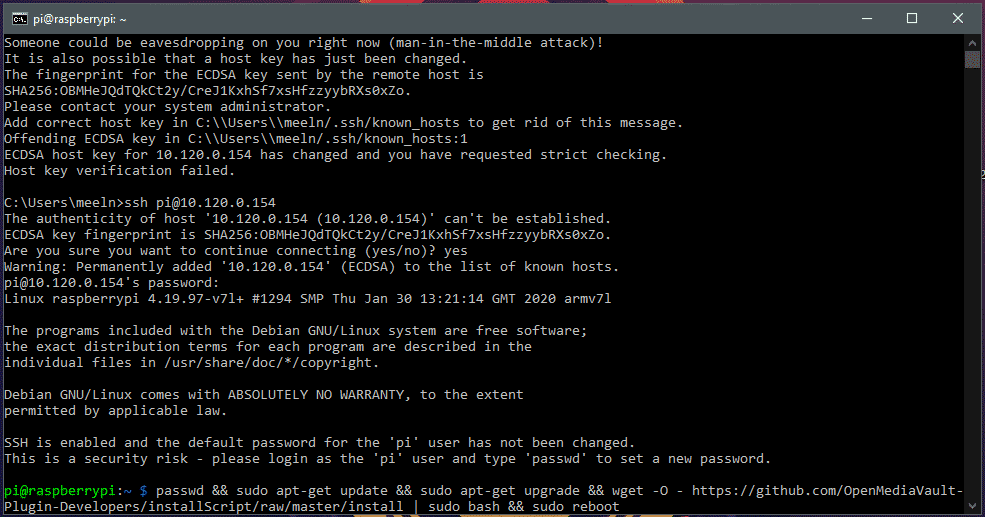
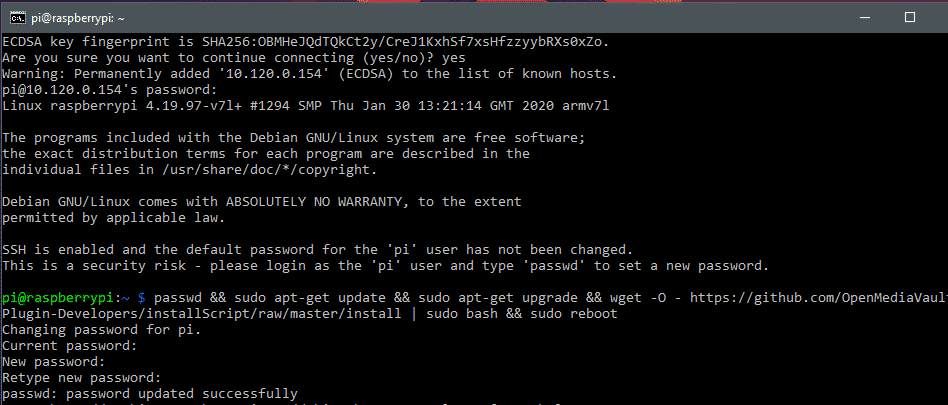
passwd && sudo apt-get update && sudo apt-get upgrade -y && wget -O - https://github.com/OpenMediaVault-Plugin-Developers/installScript/raw/master/install | sudo bash
This command will change your password. As a result, no one can just reach you via the command prompt Raspberry Pi. An update will then take place. There will come a time when the process will stop and you will be asked if you are sure. You answer this with y or n. Type 'y' and then click enter. The process will now continue on its own. When the process is finished, you can close the command prompt.
It may be that at some point the script stops moving forward. This means that the IP address of your Raspberry Pi is changed. This is no problem. The installation will continue as usual. Scan again for the IP address and reconnect via command prompt. When you are connected, you know that the connection is working via the new IP address and you can close the command prompt again.
Step 4: Configure Open Media Vault
Now that you have installed Open Media Vault, we need to configure your NAS. Plug your USB stick(s) and/or hard drives into the USB ports of the Raspberry Pi. Now open your web browser.
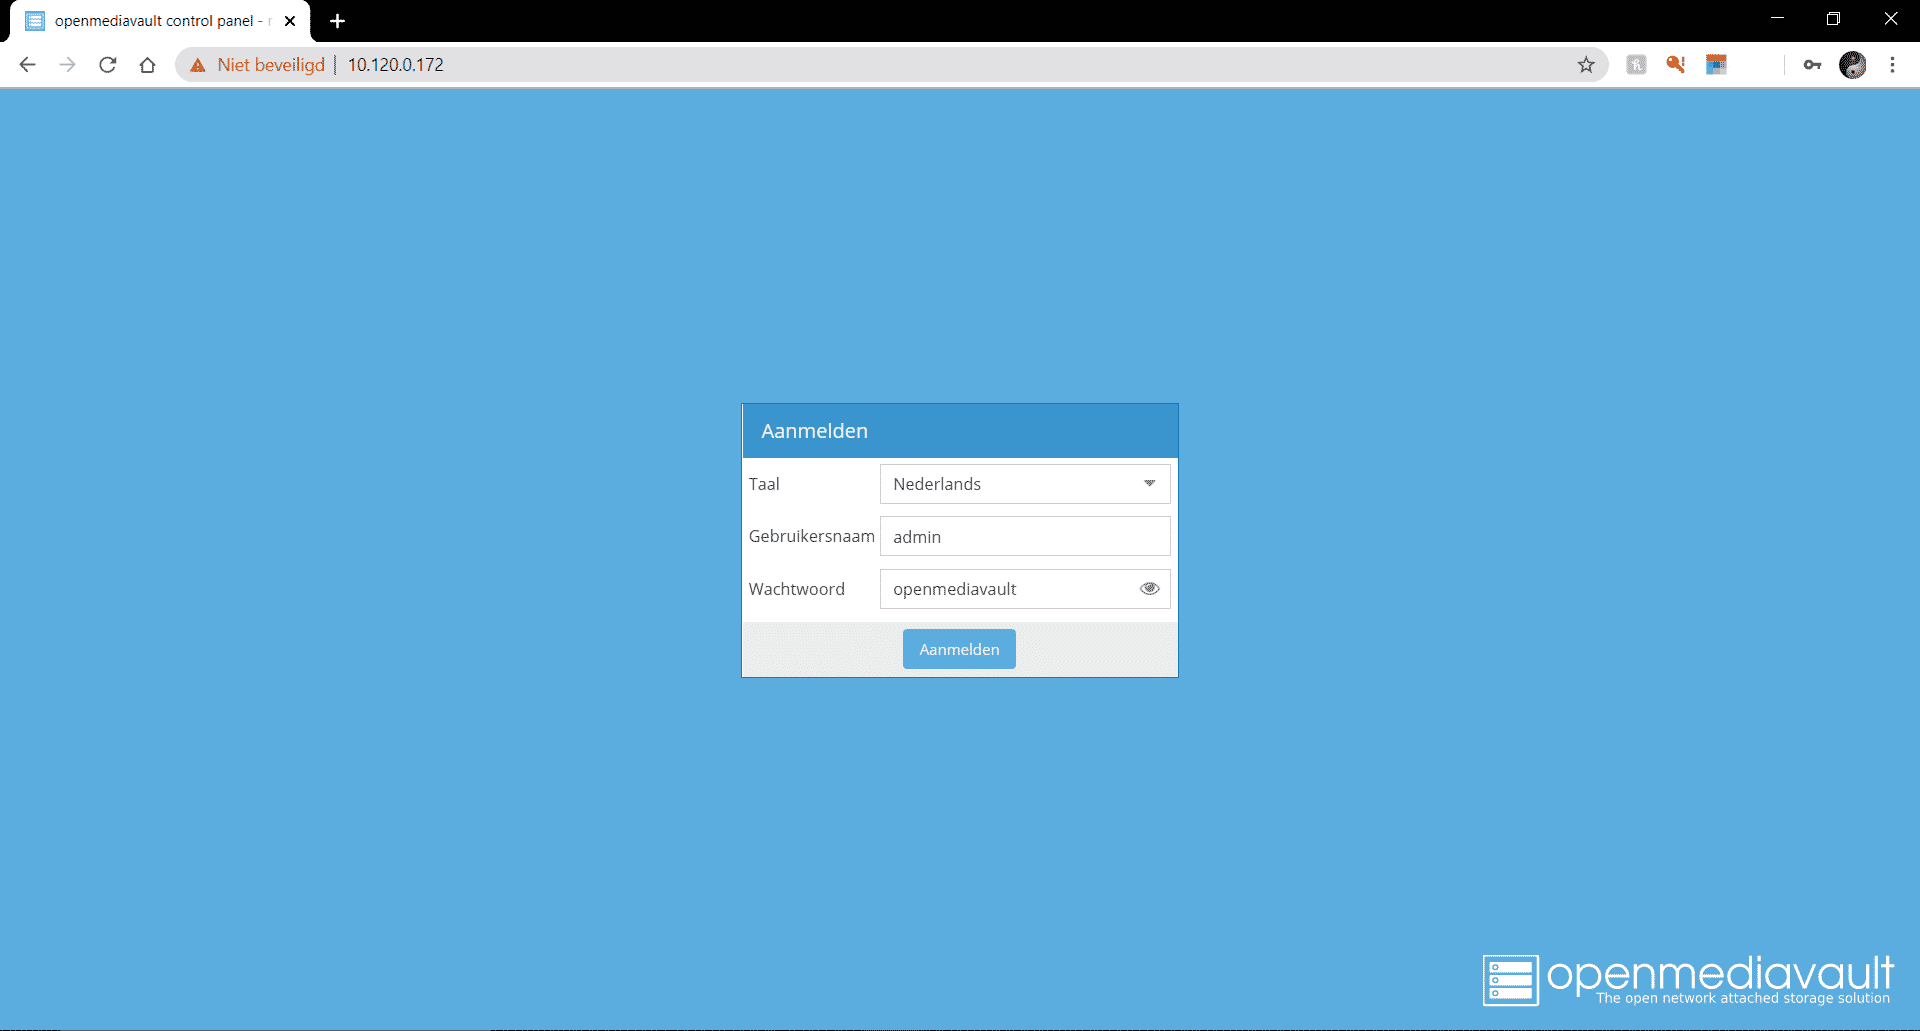
In a web browser, go to your .'s IP address Raspberry Pi. Then you come to this screen. Enter 'admin' under name and 'openmediavault' under password.
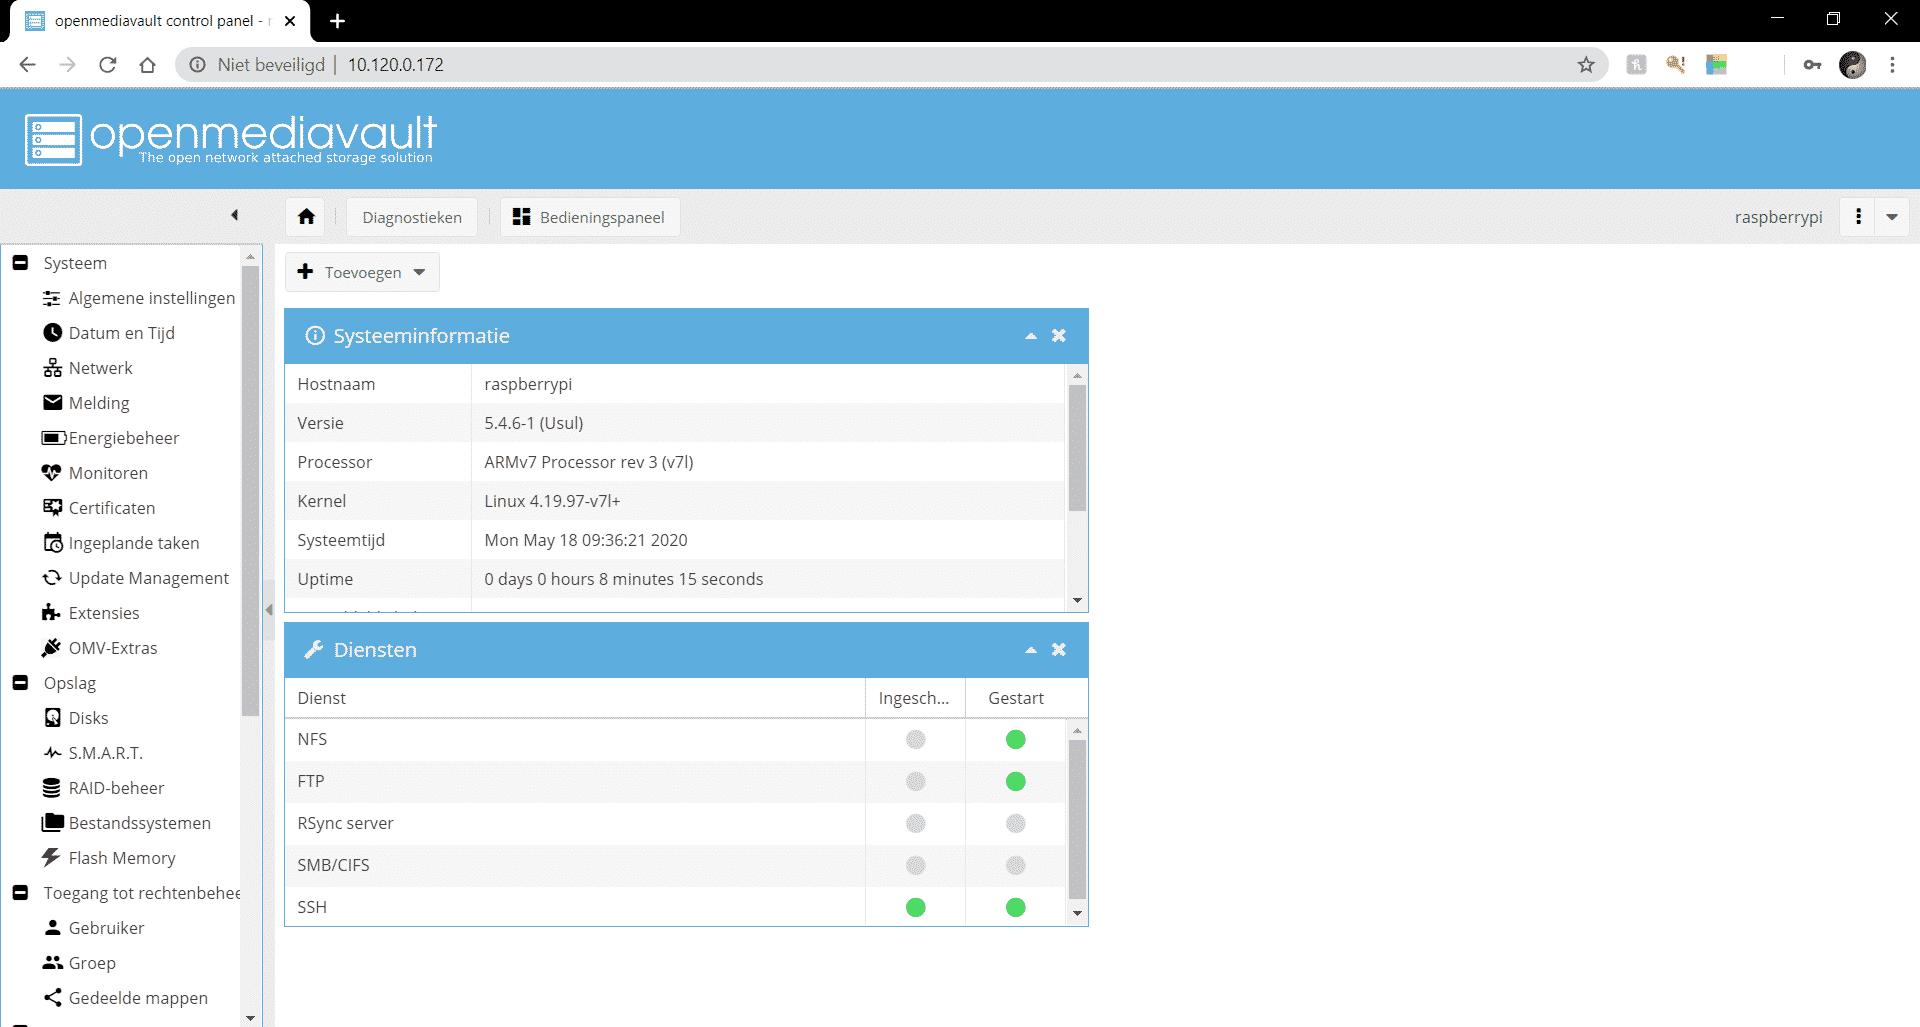
After logging in you will come to the dashboard† On the left you will see a row of settings. Under the heading 'System', go to 'Network'.
Now we are in the network settings. Here you can enter the name of your Raspberry Pi change. We have called it 'EVJ-NAS'.
Now go under the heading 'System' to 'General settings'. And then click on 'Password of the web administrator'.
Now go to 'Disks' under the heading 'Storage'. Here you should find both your USB stick (s) and SD card. If not. Click on search and they should be found. If you are using a hard drive, keep in mind that it is not supplied with power via the USB port, but from an external source.
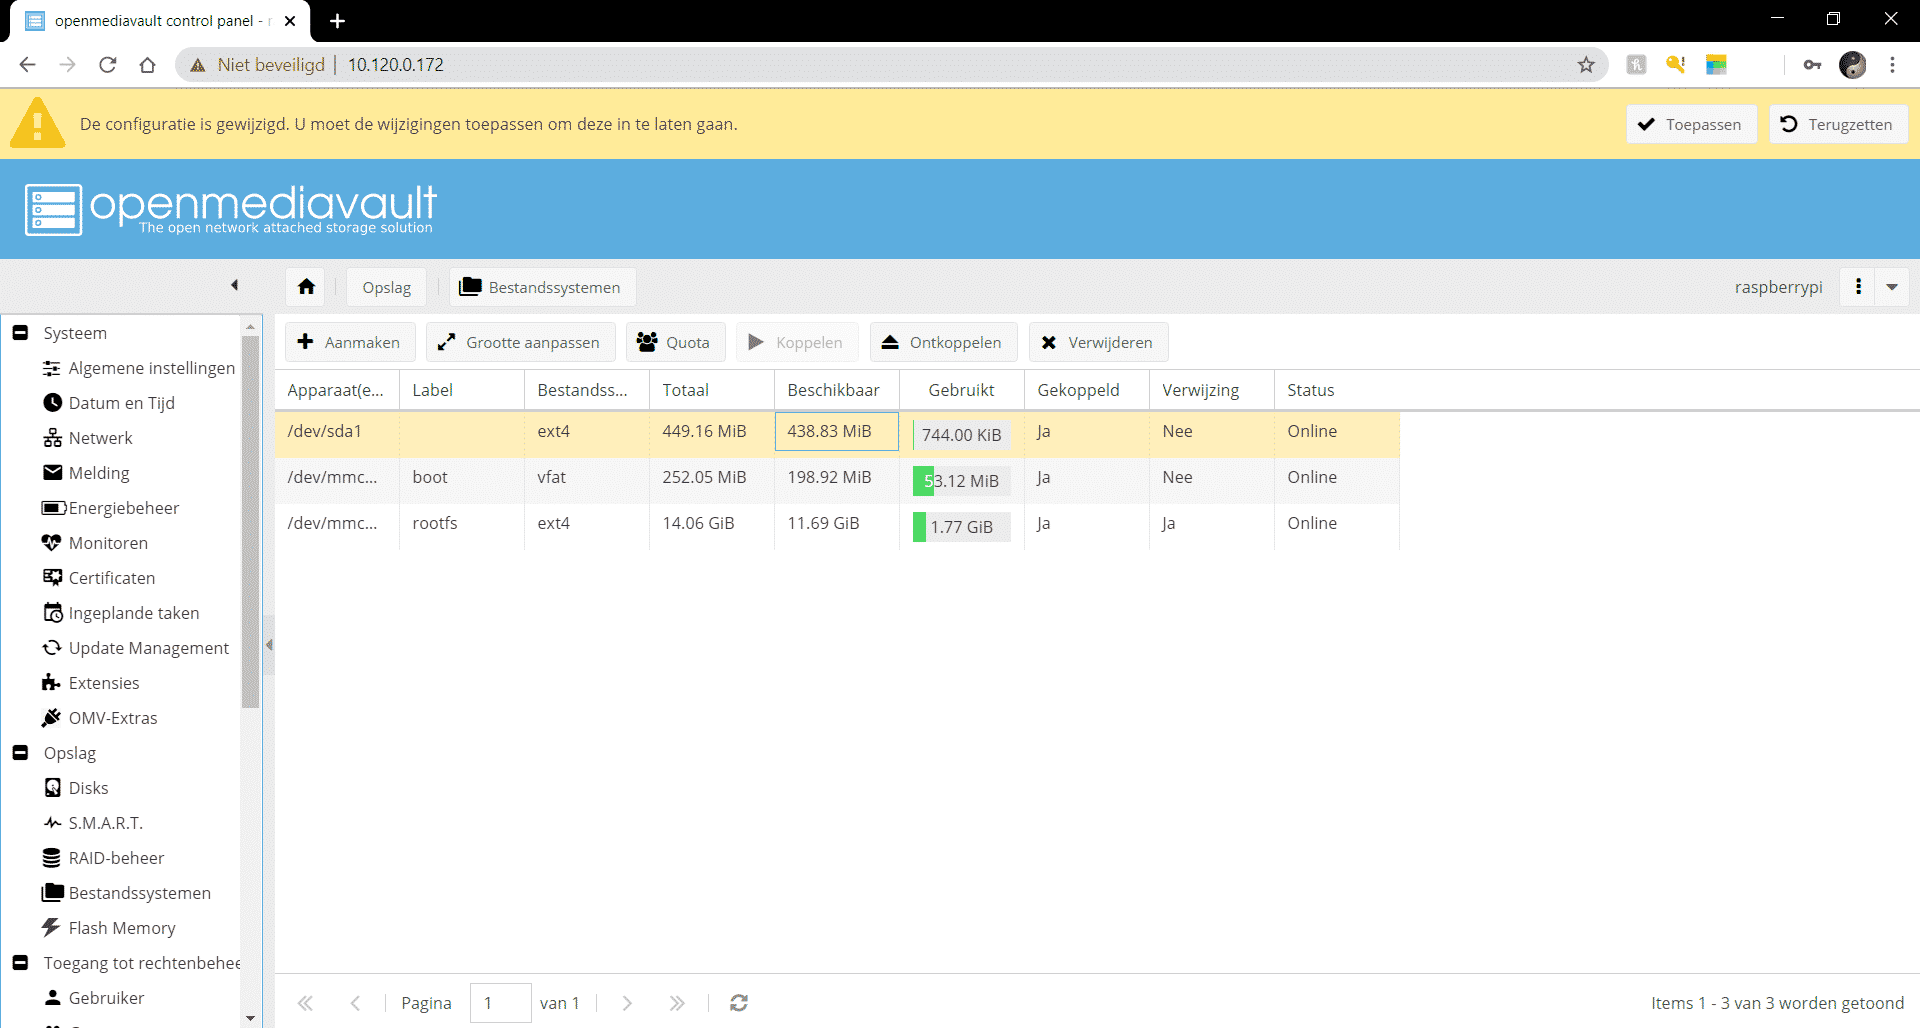
Now go under the heading 'Storage' to 'File systems'. Here your USB storage should now be visible. If not, go to create. Select one of your external storage drives, give them a name at 'label' and click OK.
Now we have adjusted a number of settings. At the top you see a yellow bar. Click on 'Apply' here and then click on OK. The system takes a moment to load, but the settings are applied.
Now go to the heading 'Services' and go to 'SMB / CIFS'. Here we are going to make your NAS accessible from a PC. Click on enable and save the changes via the yellow bar at the top.
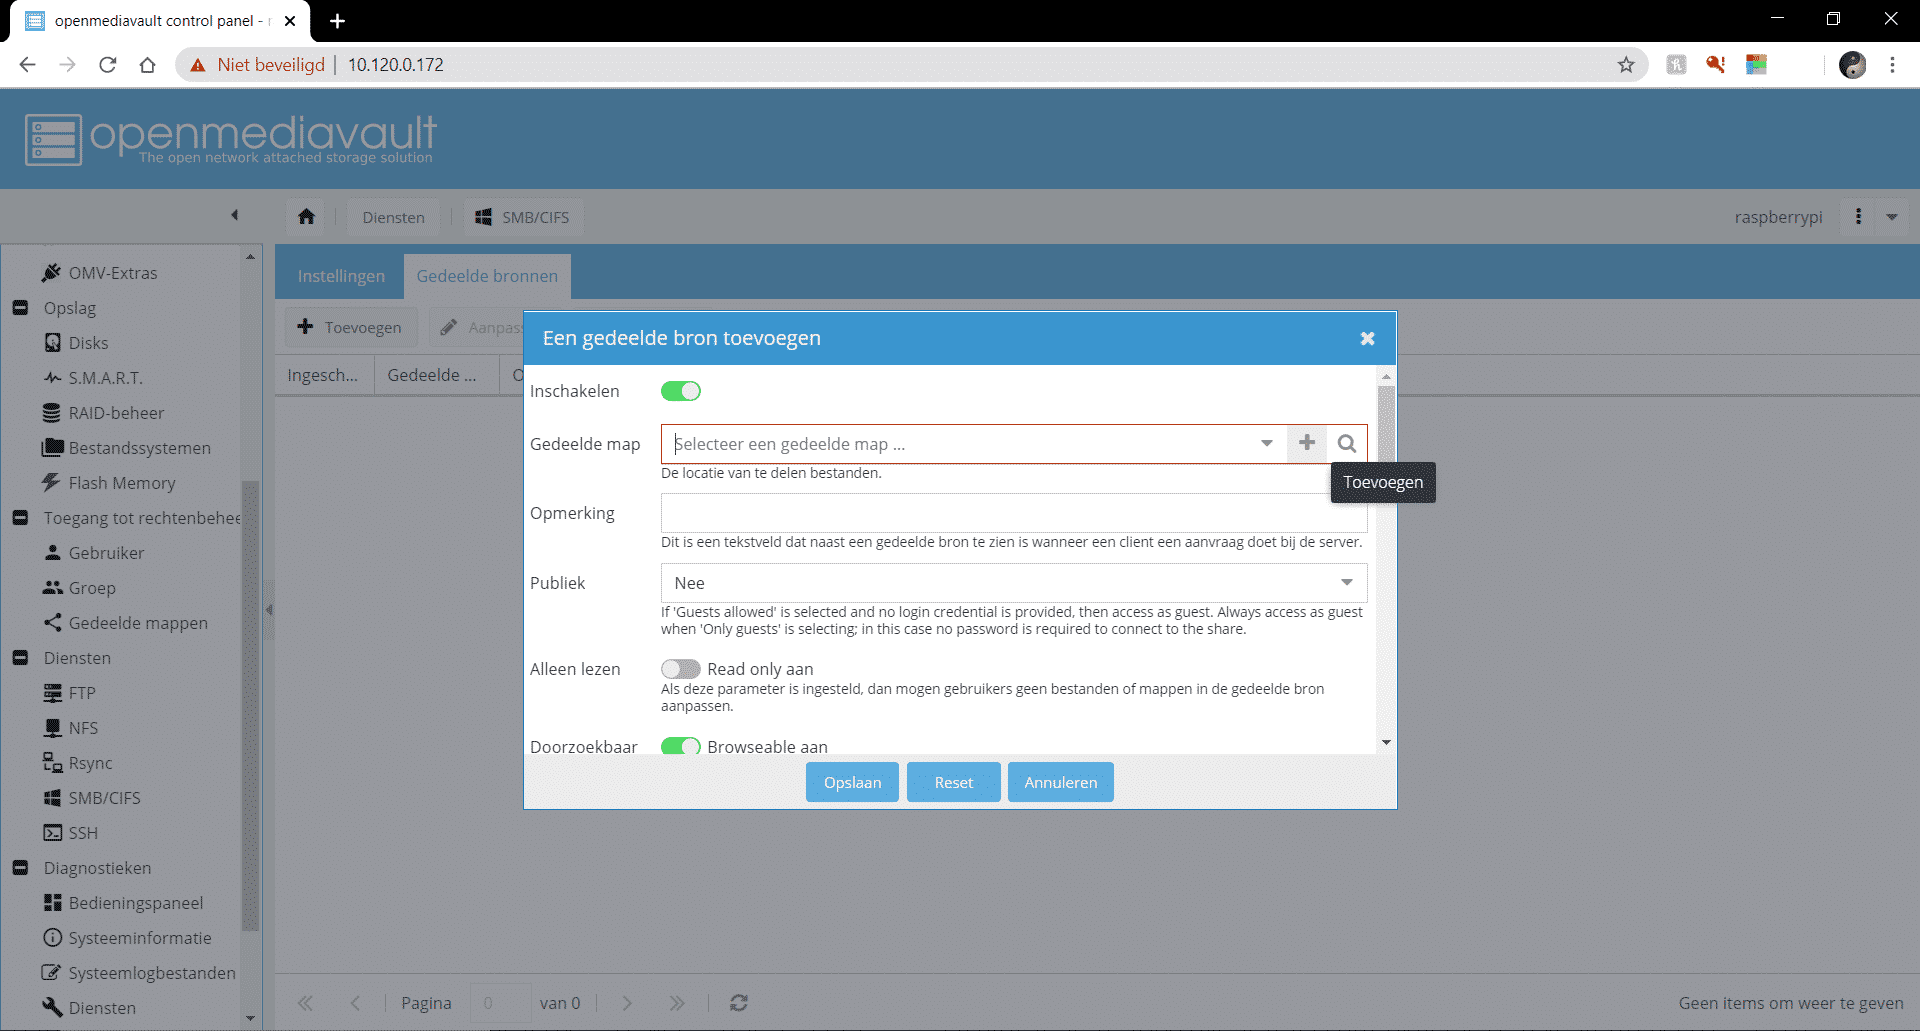
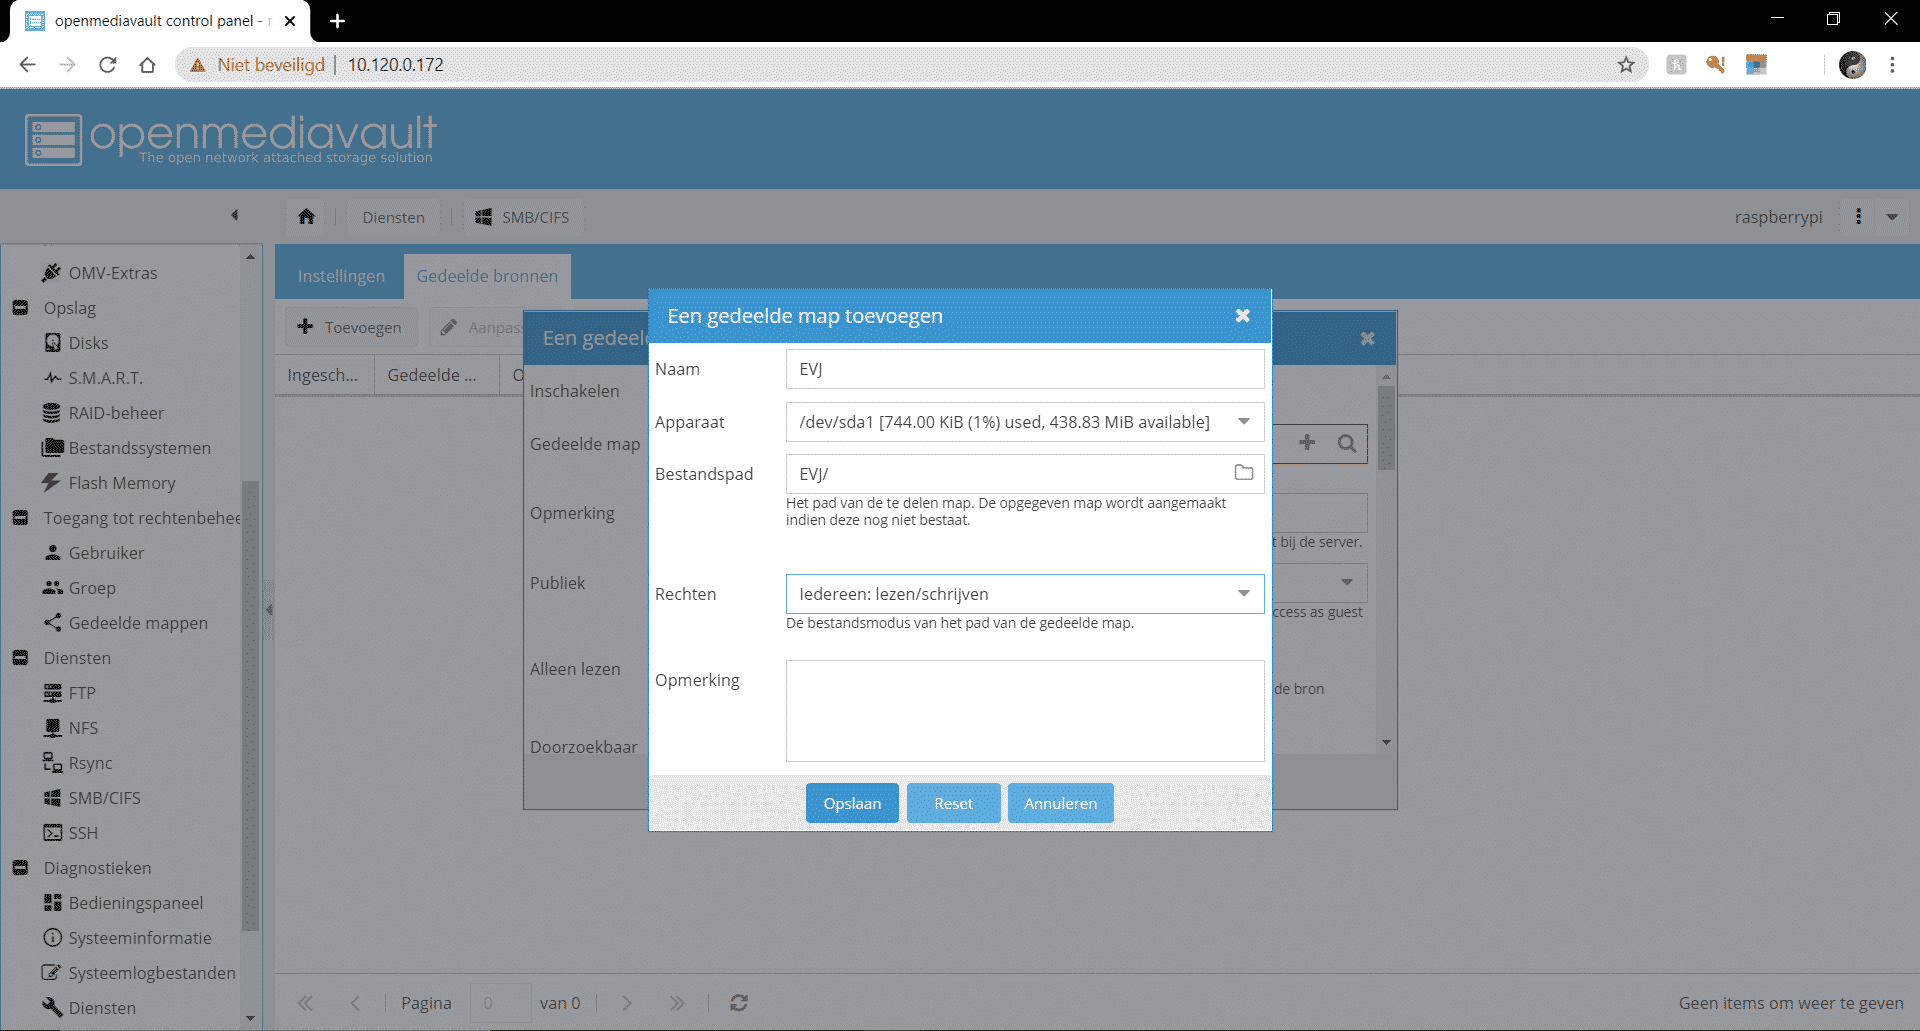
Now go to shared resources. Here we are going to create the public file. Click on add.
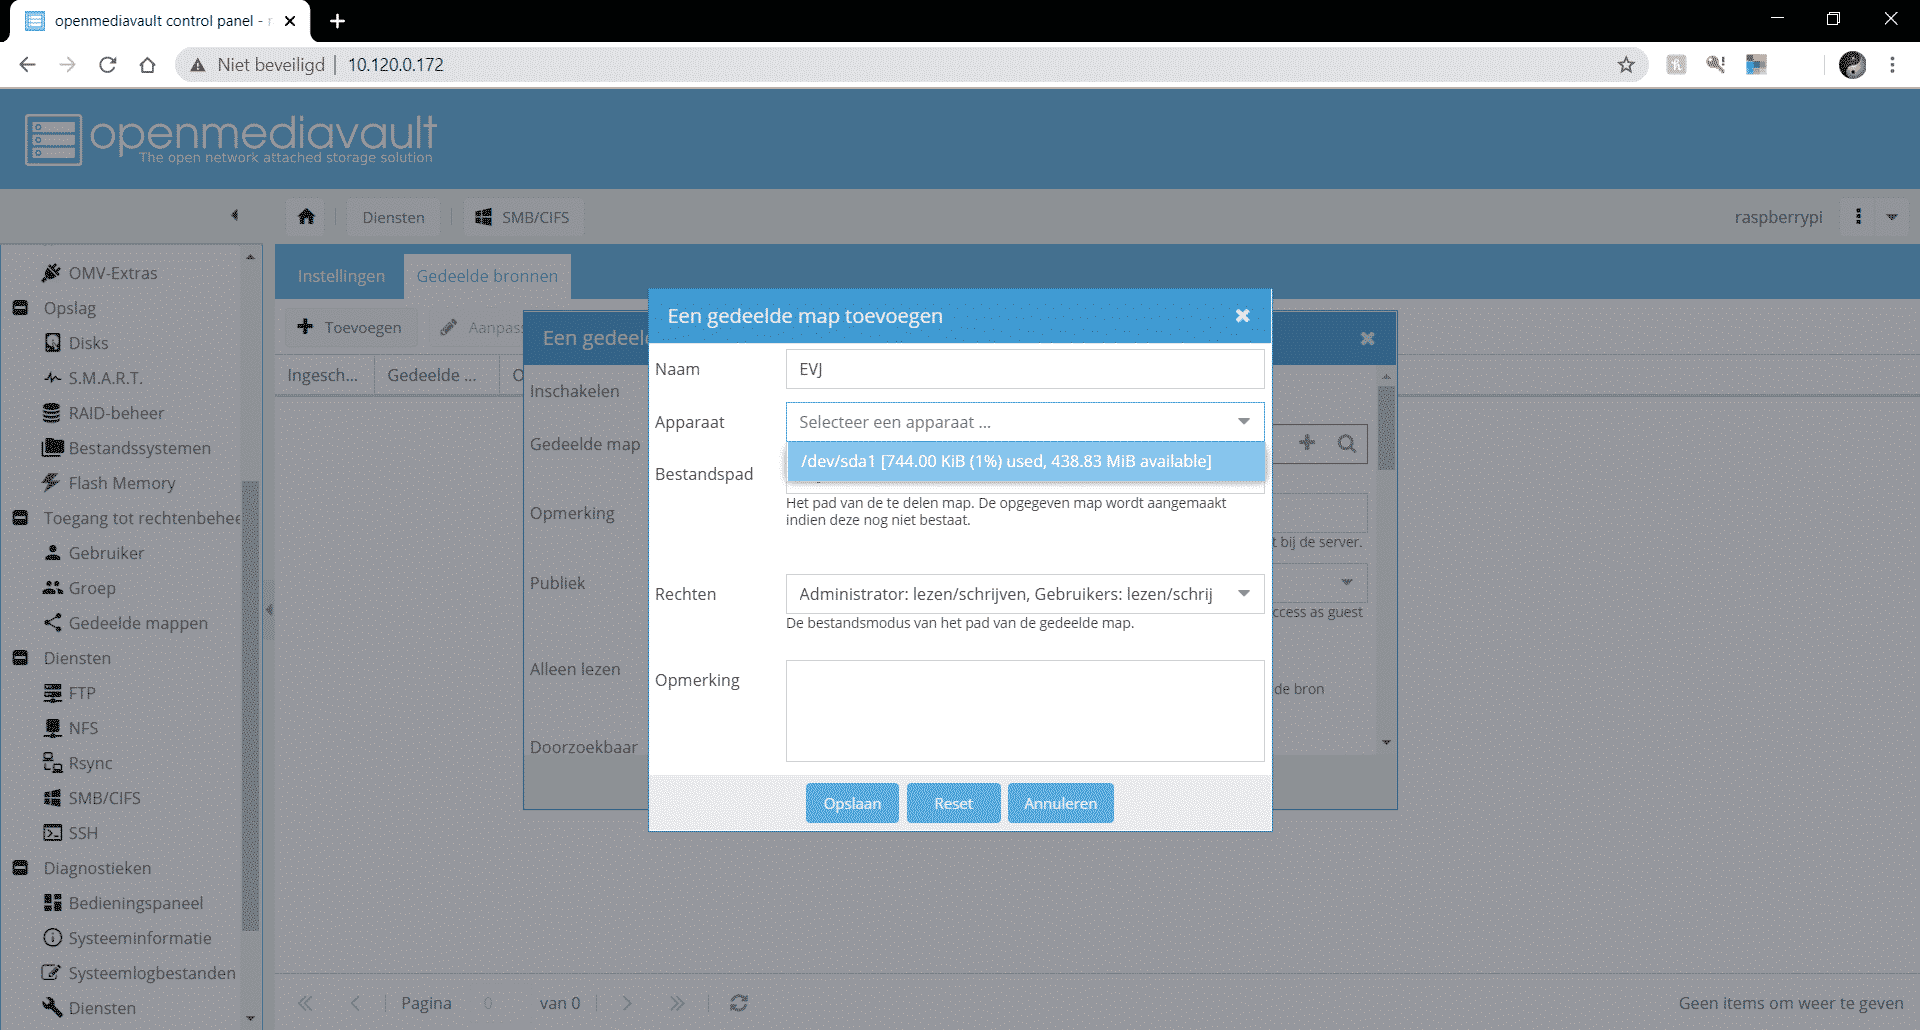
We are now going to add a shared folder. Come up with a name, in our case EVJ. Now select one of your USB storage devices and select 'everyone: read / write' under permissions.
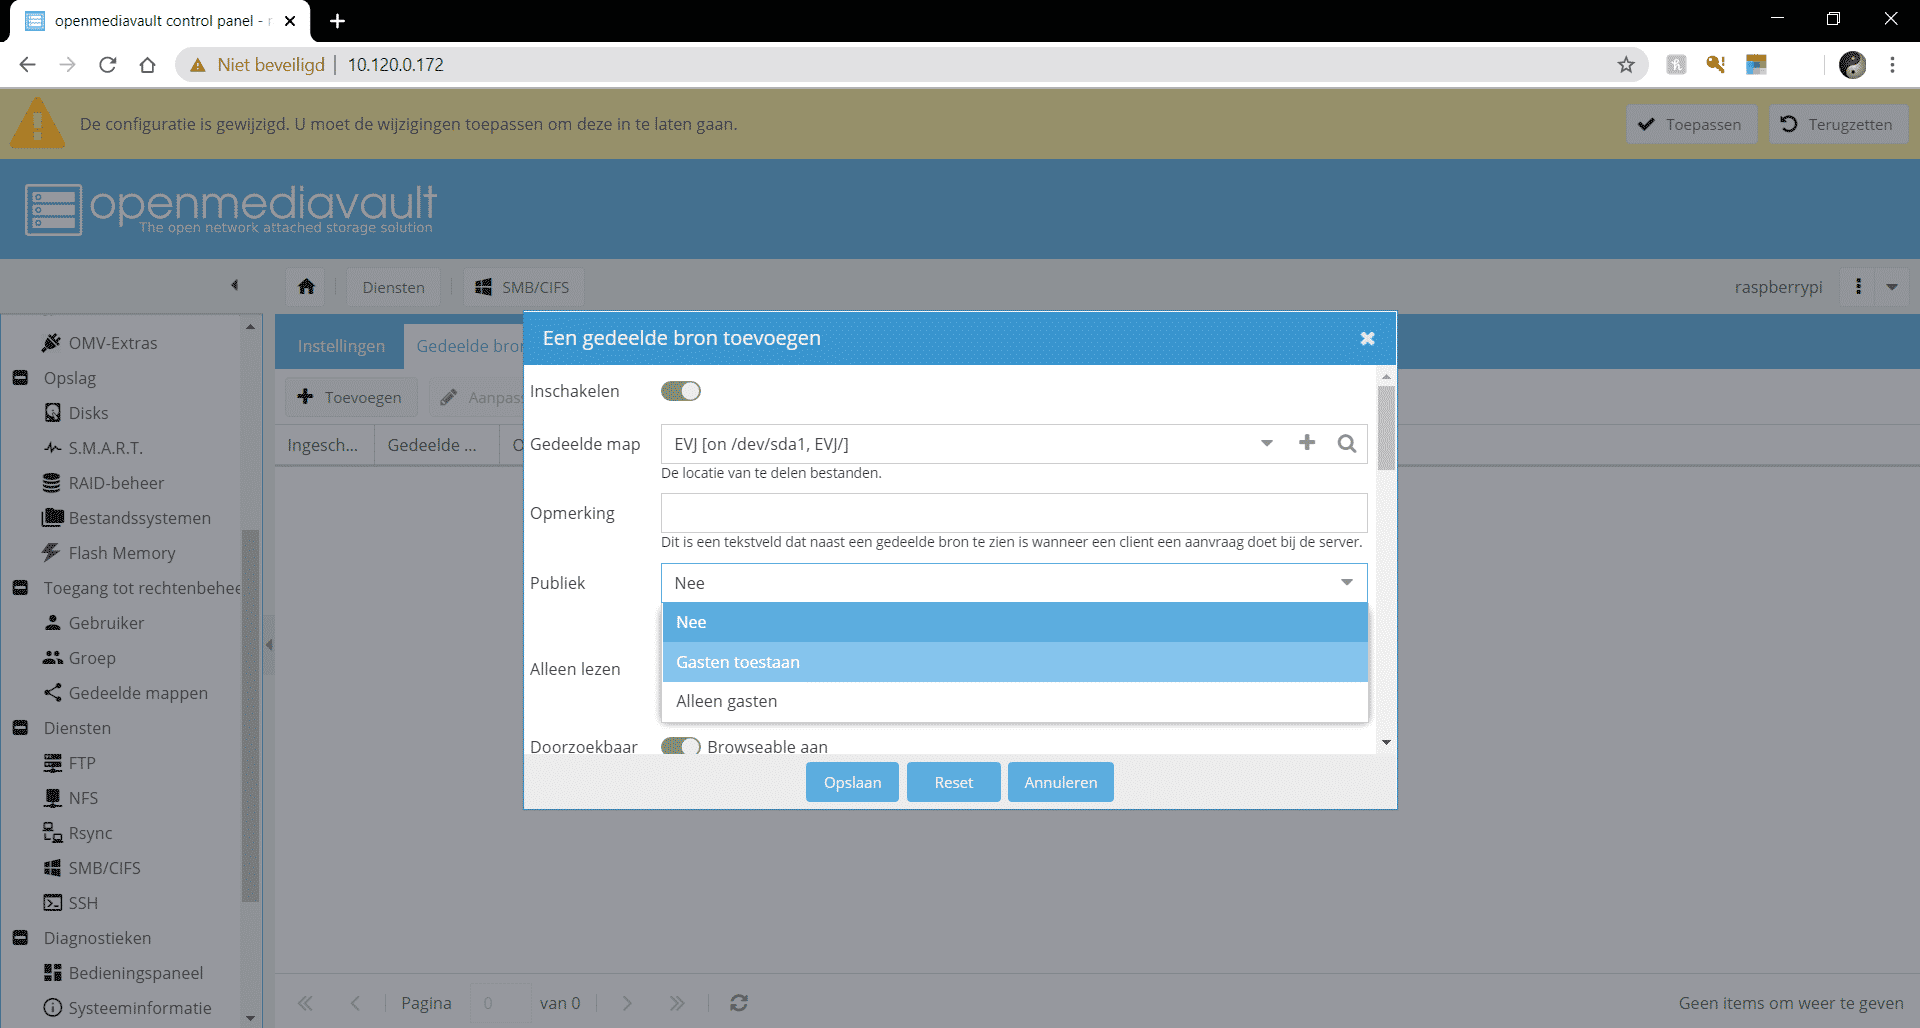
Now that you've added a shared folder, let's go back to the source. Under 'Public' select 'Allow guests'. Now click on save. And save the adjustments to the settings via the yellow bar.
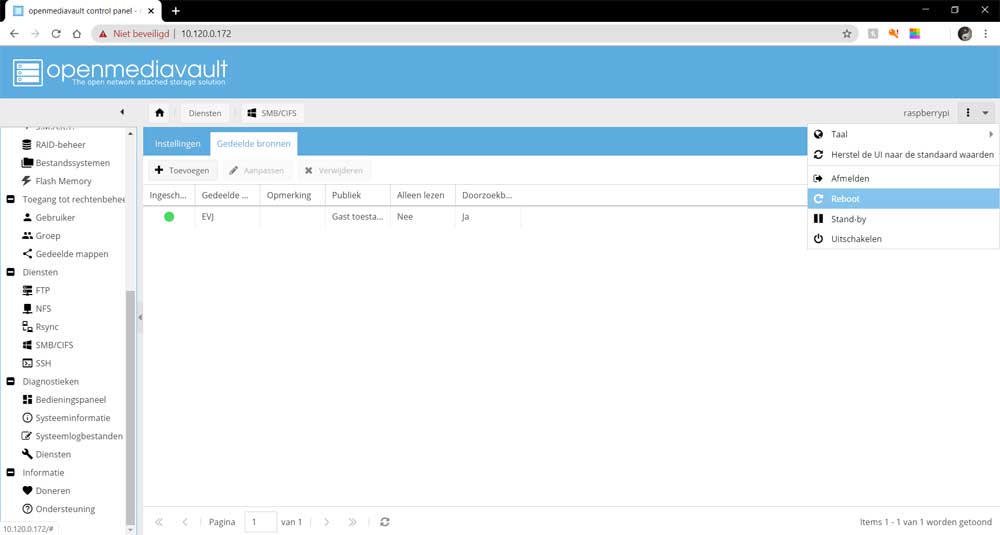
Now go to the top right at the three dots and the arrow down to the Reboot command. Only do this if your Raspberry Pi is connected via Ethernet.
Now go through all the settings that you have adjusted. It may be that something is not stored correctly. In this case, adjust the settings again and save them via the yellow bar.
Step 5: Access your NAS
We are now going to access your NAS via a windows machine. If you have a MacBook or Linux machine then you are now ready.
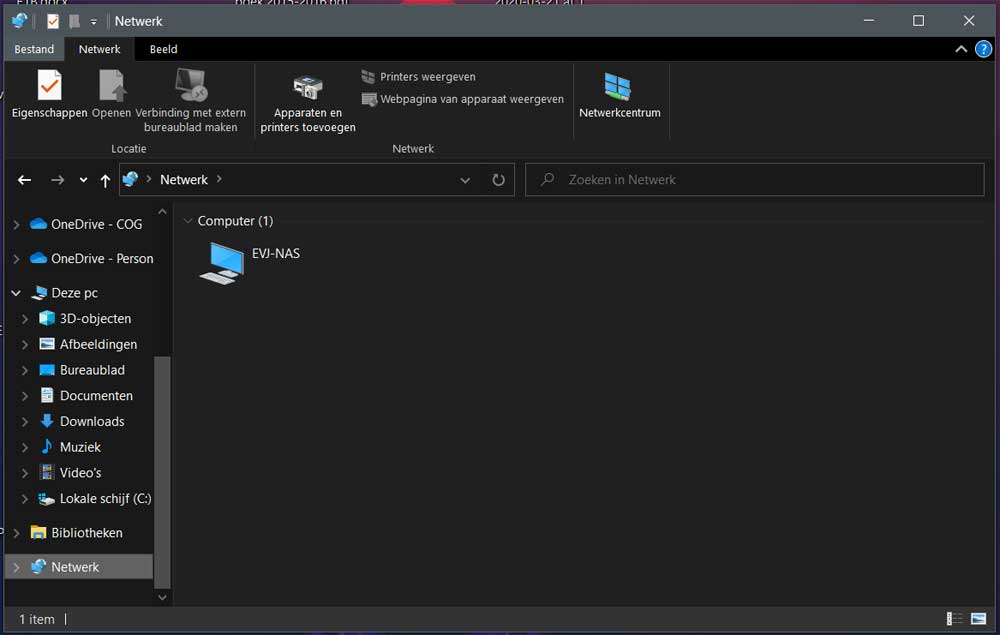
In the windows explorer, go to the heading 'Network'. Here you should now be able to see a computer with the name of your NAS. If it is not there, press the F5 button on your keyboard. A yellow bar may appear indicating that network discovery is turned off. Click the Enable network discovery button and press F5 again. Now that you see your NAS in the list, you can click on it. You may have to enter a username and password. Type in the name 'admin' and as password the password you created at the web interface. Now you will see one or more folders in which you can save your data.
So now you can Raspberry Pi use as a NAS.




![Do you want to continue [Y/n] Here the script stops proceeding to ask if you are sure. Type 'y' and click enter.](https://j6z7x9q7.rocketcdn.me/wp-content/uploads/2020/05/Afbeelding-4.png)
If you the raspberry pi imager used; CTRL-SHIFT-X to set your ssh, wifi and hostname and put them directly in the image. Saves a lot of hassle. 🙂
installed on a Pi 3b+, runs fine until I change the hostname. In addition, I get a long and unclear error message and there is no network connection via wlan or cable.
Not even after a reboot. After two reruns, I dismissed Open Media Vault as unstable/untrustworthy.
Dear Aart, did you put an external HDD on it? Or SSD? You may have to format it before you start using it for your NAS, but you must first undo all the steps you have made in open media vault and so go through it again so to speak. Just after you entered your password and username in step4. Go to the heading "storage" and then "disks" select your external disk (HDD or SSD) that is attached to your raspberry and click on the tab "wipe" this formats your disk so that it can be used normally for your nas. Of course I don't know what error message you got but I think this might work, then follow the steps from point 4 above again, and everything should work. Ow and one more thing, always try to connect the nas via a direct ethernet connection, wifi often does not work. I hope this helped you.
I have a media streamer that plays via USB connected hdd blu-ray, full disc only via USB not via network
Now I'm looking for a possibility to connect the hdd via usb to the media player, but at the same time it is also accessible via the network
to add files.
Will this work with a Pi and this project?
He must first enable ssh otherwise it will not work, and you have to do this in the pi itself by connecting to monitor and keyboard 😉
Can I also install music streaming software after completing this procedure? Like Plex or other software?