
In this simple project you will learn how to recreate Pong in Scratch.
What is Pong?
In Pong, you have a ball that falls down. The ball should not fall to the bottom of the screen. You keep the ball up by moving the platform with your mouse. When the ball touches it, it bounces back up. The goal is to keep the ball high as long as possible.
What is Scratch?
Scratch is a programming program for you Raspberry Pi. In this program you work with function blocks. This means that you do not write the programming text yourself. The blocks with the functions are already made for you. You put these blocks in a schedule yourself. If you have the Raspbian software on your Raspberry Pi Once downloaded, Scratch should be automatically installed on your Pi. If not, you need to download it.
I program in Scratch on the Raspberry Pi 4 with 4GB. You can also program on the Raspberry Pi 3B+. You can also use the 4 GB or 1 GB with the Pi 2.
Do you program in Scratch 2.0? Then you can still follow this tutorial. Keep in mind that certain functions may be in a different place. The pictures may also look different than on your screen. You can follow this tutorial because the code is the same.
Change language.
Your program is probably in English. To follow the steps properly, it is wise if you change the language in your program. You can change the language by clicking on the “globe” at the top left of your screen. This icon can be found next to the Scratch logo. Select Dutch.
- Level - beginner 33%
- Duration - 15 Min 20.%
- Cost - € 82.3. euros complete 50%
Step 1: Requirements
Step 2: Connect & Start Up
On the side of the Raspberry Pi 4B are two Micro HDMI ports. Plug the Micro HDMI cable into the left port, and the HDMI end into a monitor or display.
Connect a keyboard & mouse to the USB ports and finally insert the power cable into the USB-C port.
Your setup is now ready to start.
If the de Raspberry Pi Now you start up you will see a desktop on your monitor. When you start up for the first time, you have to set it up, but that is explained step by step.
Step 3: Programming
First we are going to pick the ball. Next to the text: New Sprite: you see a head. Click on it. Now you see all standard Sprites (characters). You should see the ball icon reasonably at the top, select it. You can also draw a ball yourself. Then click on the brush. When you have selected something, press OK (Figure 1). You can remove the standard character by clicking on the icon with your right mouse button. Then click on delete.
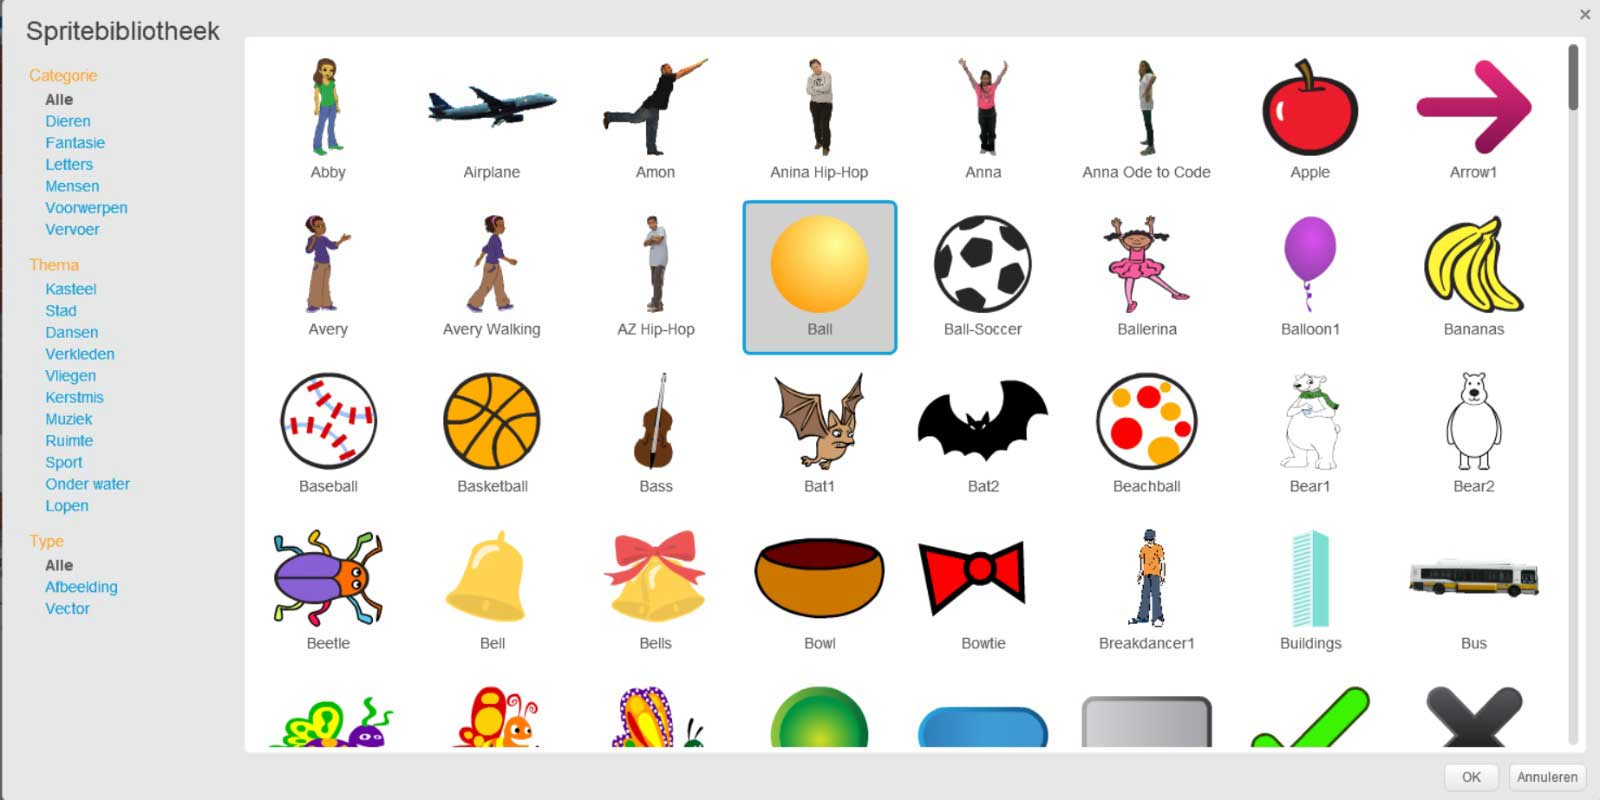
Figure 1
Now we are going to start with the code for the ball. The ball must fall into play and bounce against the edge.
- Go to Events and grab the “when (flag) is clicked” block. This block indicates that all blocks under this function can be started by pressing the green flag.
- Go to Movement and take the “go to X: - Y: -” place it under the start function. This function determines where the ball starts when play starts.
- To determine the X and Y position, move your mouse to where you want it to fall. (top of the screen)
- Then you will see the values of the X and Y axis at the bottom right of your small screen. Enter this in your X — Y function.
- Take the "aim to 90" degree function at Movement. Place this at the bottom of your code.
- Change the 90 degrees to 45. This determines the angle at which the ball falls down.
- Go to Control, take the “Repeat” block. Place this at the bottom of your code.
- Go to Motion and grab the “turn around the edge” and the “take 10 steps” blocks and put them in the repeat function.
- By changing the number of steps you change the speed of the ball. You can keep 10 for convenience.
- Click on the green flag and see if you are satisfied with the starting position and the ball speed. If you are not satisfied, you can still adjust it.
- Your code looks something like this (Figure 2).
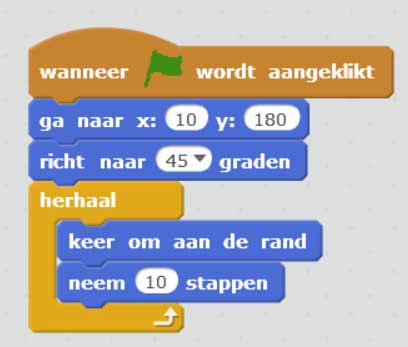
Figure 2
Now we are going to pick out the plateau, again money that you can make this yourself, but you can also sort it out. Find the plateau in the same way as the ball. The plateau is probably more downwards (Figure 3).
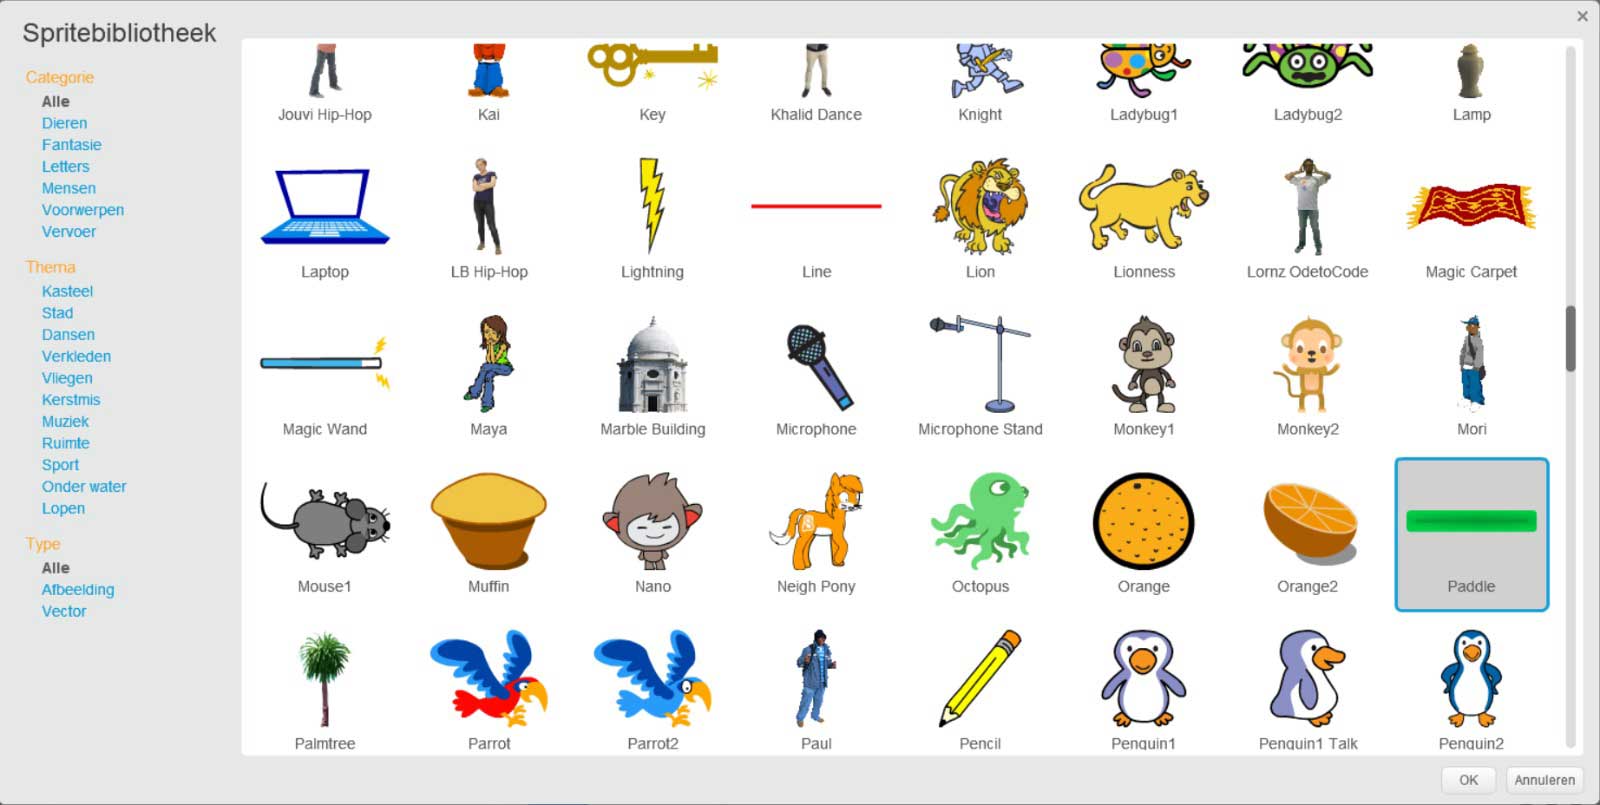
Figure 3
Now we are going to make the code for the plateau.
- Go to Events and grab the “When (flag) is clicked) block.
- Go to Control and grab a repeat function. Place this under the start function.
- Go to Moves and get the "make X 0". Put this in the repeat function.
- Go to observe and grab the “mouse X” function. Set it to 0.
- If you test the code you will see that the plateau follows your mouse.
- Your code now looks something like this (Figure 4).
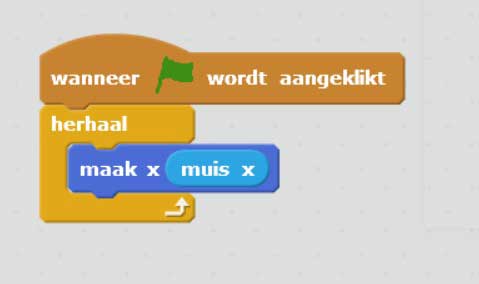
Figure 4
Now we continue with the code of the Ball.
- Go to Events and grab the “When (flag) is clicked) block.
- Go to Control and grab a repeat function. Place this under the start function.
- Then at Control take an “if then” function and place it in the repeat block.
- Go to Observe and get the "I touch ...." Press the down arrow and select your plateau. Put this function between the "if ... then".
- Go to Motion and take the “turn 15 degrees” (clockwise). Put this between the “if then” function.
- Go to functions and get the "random number between - and -" function. Set this to 15 degrees. Change the values to 160 and 200. These values determine which direction the ball bounces back.
- Go back to Movement and take the “take steps” change it to eg 15. This will make the ball run smoother.
- Your code now looks something like this (Figure 5).

Figure 5
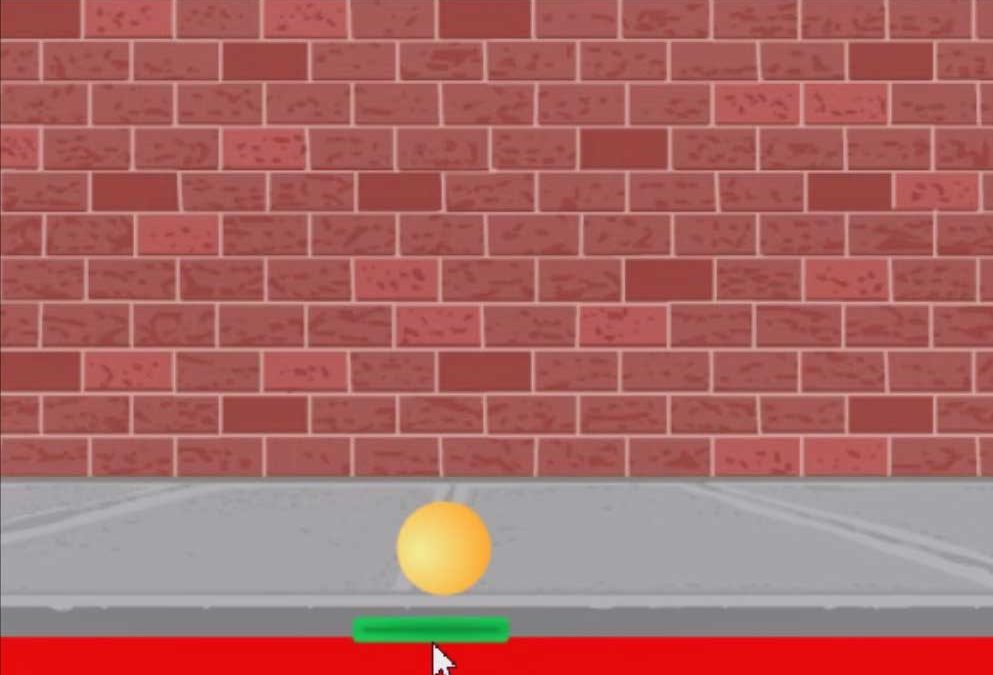
Now we are going to add a background.
- Selecting a background is a bit the same as your Sprite (character). Click on the picture, or on the brush if you want to edit it yourself.
- If you have selected a background, you will see at the top of the screen: Scrips, backgrounds and sound. If you click on backgrounds, you can edit them.
- Draw in your background at the bottom in a thick red line. This determines the point where you go when the ball lands on it.
- You can draw the line by pressing the square and moving around the screen. Then fill it up with the bucket.
- Your background now looks something like this (Figure 6).

Figure 6
Then we go back to the code of the ball.
- Go to Events and grab the “When (flag) is clicked” block.
- Go to Control and grab a repeat function. Place this under the start function.
- Then at Control take an “if then” function and place it in the repeat block.
- And when controlling you take the “stop” block and put it between the if then. Click on the arrow and search for “other scrips in sprite”.
- Then go to Observe and take the “touch color” function. Put this between the if then. Click on the color box and drag your mouse over the red bar and click on it. Now he takes on the color of the beam. You have now written a code that starts when the green flag is pressed. He constantly checks whether the red color is touched. When it is touched all codes stop. So you made a game over function.
- Go to Looks and get the “say” function. Place this in the if .. then block. Write behind say, for example: “Game over!”.
- Your code now looks something like this (Figure 7).
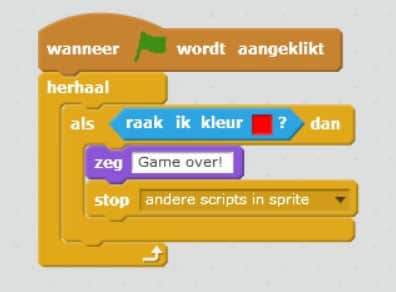
Figure 7
Now you have made your own pong game. Did you think this was a fun game to make? You can also expand it! Add sound every time the ball bounces. Let the ball change color. Or keep the score. You can completely customize this game to your own liking. Lots of fun!