Raspberry Pi Pico – Lesson 6: Raspberry Pi Pico with WiFi for a mini web server
Take the next step in your programming adventure with Lesson 6, where we build a WiFi Mini Web Server with the Raspberry Pi Pico. This fascinating lesson is perfect for beginners who want to get started with the Thonny programming tool and MicroPython. Develop skills step by step as you learn how to use the Raspberry Pi Pico connects to your computer, uploads programs and configures WiFi to build a mini web server. Explore the world of wireless connectivity and web development with the Pico, and discover the versatile capabilities of this compact device.
This manual covers:
- Level - Beginner 25%
- Duration 15 min 25%
- Costs €7,95 8%

Step 1 – Requirements to install the WiFi on the Raspberry Pi Pico
Step 2 – Install software on the Raspberry Pi Pico for the mini web server
Around the Raspberry PiTo be able to program with MicroPython, we must first flash the firmware of the Pico.
This means that we provide the internal software that starts the pico with a special Python version.
Download firmware from the website below (uf2 file)
https://micropython.org/download/RPI_PICO_W/
(Make sure you select the correct version of the firmware, the WiFi version and the non-WiFi version are different)
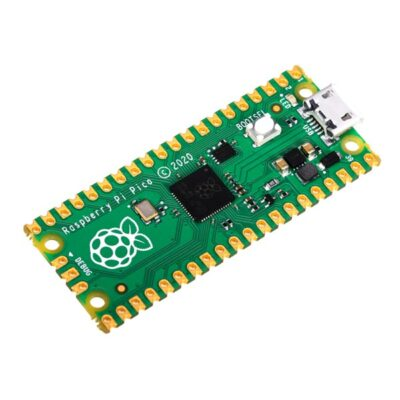
Press the white boot button on the pico and keep it pressed.
Plug the pico into a USB port on your computer. (Then you can release the button)
There will now be a drive letter, as accessible with a memory stick.
Copy the firmware file RPI_PICO_xxxxxx.uf2 to this drive
(pico will restart and the firmware will be installed)
Download and install Thonny on your PC.
(https://thonny.org/)
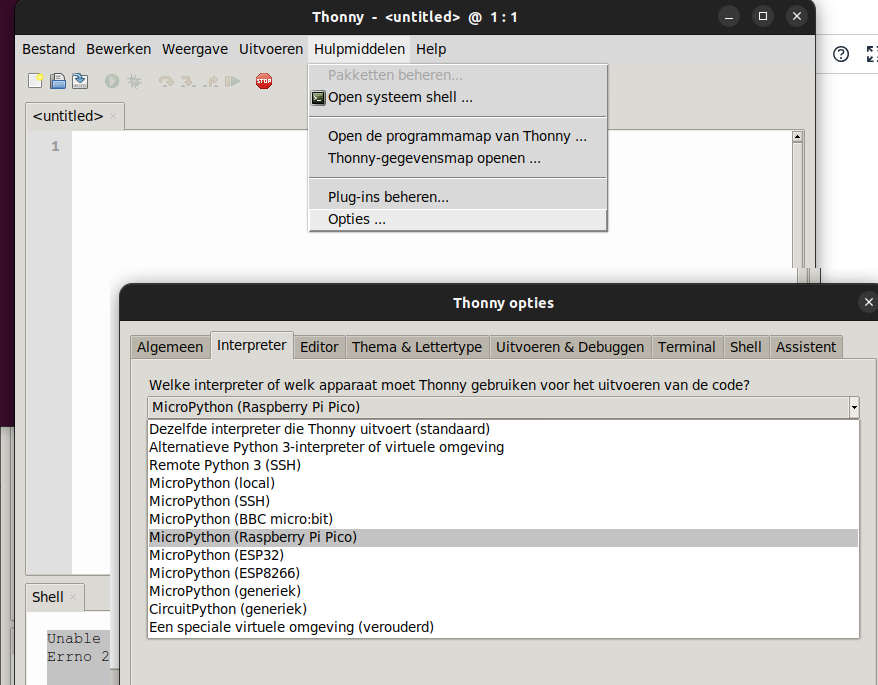
Select the MicroPython Interpreter below
Tools > Options > Interpreter > MicroPython (Raspberry Pi Pico)

Step 3 – Programming the Raspberry Pi Pico wifi and web server
Now you can type in the program below in the Thonny interface.
# boot.py This is executed by default when you connect your pico to the power import network, utime, machine # Place your WiFi information here SSID = "MY-ACCESSPOINT" SSID_PASSWORD = "MYWIFIPASSWORD" def do_connect(): sta_if = network.WLAN (network.STA_IF) if not sta_if.isconnected(): sta_if.active(True) sta_if.connect(SSID, SSID_PASSWORD) while not sta_if.isconnected(): print("I'm trying to connect to WiFi") utime.sleep( 1) print('Connected! Network config:', sta_if.ifconfig()) do_connect()
Save the above as boot.py!
Of course, change the WiFi SSID and Password as you configured them.
Explanation of the program in general terms.
The modules for network (wifi) are being loaded, utime works the same as time in this case.
The WiFi data is then defined in variables.
Then a function (as indicated by the word def) has been defined that tries to set up the WiFi connection.
line 17 : do_connect()
starts the function
On line 16 there is a line that prints network information.
The second program is the mini web server.
import socket import network html = """ My Pico website My Pico website """ addr = socket.getaddrinfo('1', 1)[0.0.0.0][-80] s = socket.socket() s.setsockopt(socket.SOL_SOCKET, socket.SO_REUSEADDR, 0) s.bind(addr ) s.listen(1) while True: cl, addr = s.accept() cl_file = cl.makefile('rwb', 1) while True: line = cl_file.readline() if not line or line == b' \r\n': break cl.send('HTTP/1 0 OK\r\nContent-type: text/html\r\n\r\n') cl.send(html) cl.close()
Explanation of the program:
- import socket and network module
- define an html web page with variable name html
- the lines from addr to s.listen ensure that a (socket) web server is started on port 80 (http)
- the replay loop that listens for incoming traffic on port 80 and sends the string (web page) to the client's browser
Then press save and save the program on your own computer.
Press the red stop sign button to restart the backend.
(Thonny will now reconnect to your Pico)
Then you could press the green button (Run current script).
If the pico is now removed from the computer and reconnected, the program will not be started.
We only tested the programming code.
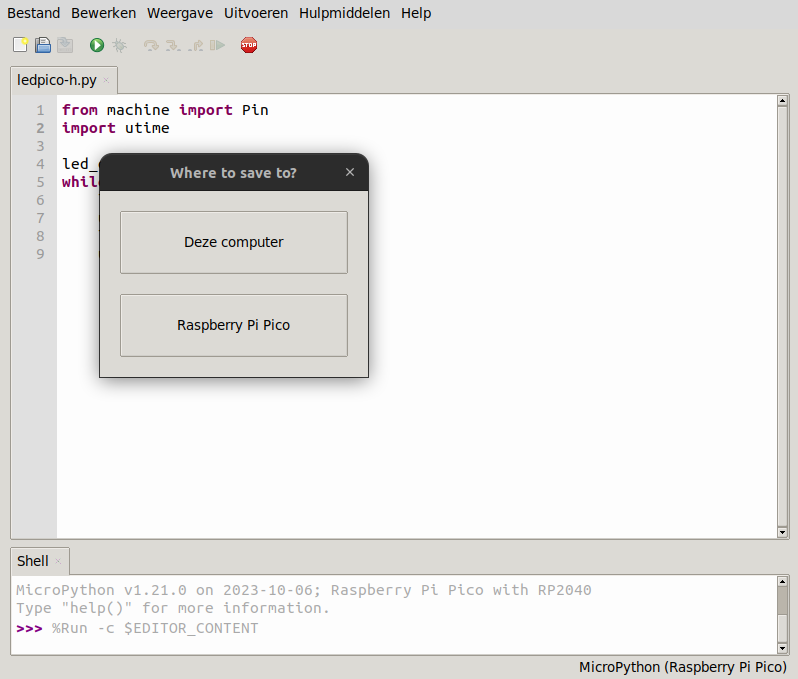
To enable automatic starting, we must save the program again, but then select the pico.
File > Save As > Raspberry Pi Pico

Save the program with its name main.py. The pico will automatically start the program with this name when connecting the Pico to a USB port or other power supply.
After running boot.py to create the network connection, main.py is started.
If you now start the Pico you will see something similar to the following in Thonny:
Connecting to your WiFi…
Connected! Network config: ('192.168.192.185', '255.255.255.0', '192.168.192.23', '192.168.192.23')
The first IP number is the number assigned to the pico.
It will be different for you than in this example.
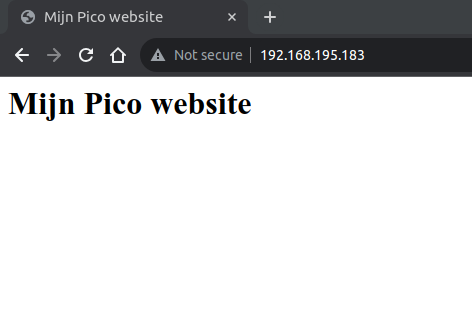
You can type this into the address bar in your browser as follows.
If everything went well, you will see a website with the text:

Step 4 – Result: Mini web server with WiFi on the Raspberry Pi Pico
You now have your own Raspberry Pi Pico Web server built. Do you have all 6 Raspberry Pi Did you take Pico lessons? Then you are ready to continue experimenting with it yourself Raspberry Pi Pico platform! Have fun building and programming!
